Skip to content
 A-line dresses look simple, but many buyers still pick the wrong style and miss the selling season. I see it when the fit is off, or the fabric does not match the silhouette. Then returns go up, and margins go down.
The most popular types of A-line dress include fit-and-flare, wrap A-line, shirt A-line, pinafore A-line, and maxi A-line. I choose the right one by matching the neckline, waist placement, hem length, and fabric weight to the customer’s body shape, climate, and occasion, then I test it with one approved sample.
I still remember one early order where I pushed a stiff fabric for a soft A-line look. The photos looked fine. The real garment did not move well. Since then, I always start from the silhouette first, then I pick fabric and trims.
What are the 20 most common types of A-line dress for wholesale collections?
When I build an A-line range for a buyer like Emily, I do not start with “one A-line.” I break it into clear style types. This is how I cover more occasions and reduce overlap in the assortment.
These 20 types of A-line dress cover most retail demand: classic A-line, fit-and-flare, empire-waist A-line, drop-waist A-line, wrap A-line, faux-wrap A-line, shirt A-line, smock A-line, pinafore A-line, slip A-line, skater A-line, babydoll A-line, halter A-line, off-shoulder A-line, one-shoulder A-line, strapless A-line, midi A-line, maxi A-line, mini A-line, and tiered A-line.
A quick wholesale assortment view
| Style Type | Best Season | Best Fabric Direction | Risk Level |
|---|---|---|---|
| Shirt A-line | Spring/Fall | Poplin, twill | Medium (buttons/fit) |
| Wrap/Faux-wrap | All seasons | Crepe, challis | Medium (bust gaping) |
| Smock/Tiered | Summer | Viscose, cotton | Low (easy fit) |
| Strapless/One-shoulder | Holiday | Satin, jacquard | High (support) |
| Slip A-line | Summer/Holiday | Satin, bias crepe | High (fabric + QC) |
How I keep the 20 styles from overlapping
- I separate them by neckline (strapless, halter, one-shoulder)
- I separate them by waist placement (empire, standard, drop waist)
- I separate them by occasion (workwear, casual, event)
- I keep only one hero fabric story per drop for each occasion group
How do neckline, waist placement, and hem length change the A-line effect?
Many people say “A-line is A-line.” I do not agree. Small pattern changes can turn a best-seller into a slow mover, even with the same fabric.
Necklines control how “open” the top looks, waist placement controls where the flare starts, and hem length controls the visual balance. If I want a clean, premium A-line, I keep the bodice stable, place the waist for the target body shape, and pick a hem that fits the customer’s daily life.
Neckline: where the buyer’s attention goes first
- V-neck: lengthens the neck and supports fuller bust better
- Square neck: looks structured and “modern,” needs clean topstitch
- Sweetheart: romantic, but needs stronger bust shaping
- High neck: modest and clean, but can feel warm in summer
Waist placement: where the silhouette begins
- Empire waist: helps comfort fit, but can shorten the torso visually
- Natural waist: safest for most customers
- Drop waist: fashion-forward, but less forgiving on proportions
Hem length: how wearable it is
- Mini: trend-driven, more size sensitivity in hip and thigh movement
- Midi: the most stable for repeat sales
- Maxi: strong vacation story, but can be “too much fabric” in heavy weaves
Pattern details I watch in sampling
- Bust dart position and dart length
- Armhole depth and gaping risk
- Waist seam stretch tolerance
- Hem sweep and walking ease
Which fabrics work best for different types of A-line dress?
I see many sampling delays because the buyer chooses fabric first. Then the factory tries to force the pattern to fit the fabric. I do it the other way.
Light, fluid fabrics (viscose, chiffon, satin) create soft A-lines and movement, while structured fabrics (poplin, twill, jacquard) create sharp A-lines and cleaner lines. I match fabric weight, drape, and recovery to the A-line type and the season, then I lock shrinkage and colorfastness before bulk.
Fabric behavior matters more than the fabric name
- Drape: decides if the skirt flows or stands out
- Weight: decides if the skirt looks premium or heavy
- Recovery: decides if the waist and neckline hold shape
- Sheerness: decides lining needs and cost
Best matches I use often
| A-line Type | Best Fabric Options | Notes |
|---|---|---|
| Shirt A-line | Cotton poplin, twill | Crisp look, stable placket |
| Wrap A-line | Crepe, viscose | Better movement, less bulk at tie |
| Slip A-line | Satin, bias crepe | Needs good face quality |
| Tiered/Smock | Viscose, cotton voile | Needs controlled shrinkage |
| Strapless A-line | Satin + lining, jacquard | Needs structure inside |
Common fabric mistakes I stop early
- Using stiff fabric for a “flowy” story
- Using thin fabric with no lining for light colors
- Ignoring shrinkage in rayon/viscose
- Using low-twist yarn fabric that pills fast on reorders
How do I choose the right types of A-line dress for my target customer and season?
Emily usually wants trend alignment and speed. She also needs reliable quality, because her brand name is on the label. I build the plan around her selling windows, not my factory calendar.
I choose A-line styles by season, occasion, and marketing angle first, then I pick 5–8 core A-line types and 2–4 trend A-line types. I also set one clear hero color story and two safe carryover colors, so the collection looks new but still sells fast.
A simple seasonal selection map I use
- Spring: shirt A-line, wrap A-line, midi A-line, smock A-line
- Summer: halter A-line, tiered A-line, mini A-line, slip A-line
- Fall: pinafore A-line, shirt A-line, midi A-line, drop-waist A-line
- Holiday: one-shoulder A-line, strapless A-line, fit-and-flare A-line
My practical checklist before I quote MOQ
- I confirm target price and margin needs
- I confirm size range and grading base
- I confirm lead time for fabric and trims
- I confirm if logo, label, and packaging are customized
- I confirm if the buyer needs compliance testing
A quick decision table for buyers
| Buyer Goal | Safer A-line Types | Trend A-line Types |
|---|---|---|
| Low returns | Shirt, midi, classic | Faux-wrap, tiered |
| Fast trend win | Skater, mini, fit-and-flare | One-shoulder, drop waist |
| Premium feel | Midi, classic in crepe | Slip in satin, strapless |
What are the common production and QC risks for A-line dresses, and how do I avoid them?
A-line dresses look easy. In production, they fail in the small places. This is why I put QC focus on fit stability, seam strength, and fabric behavior.
The most common risks are bust gaping, uneven hems, twisting seams, unstable waistlines, and inconsistent shrinkage. I avoid them by locking the pattern after the first approved sample, testing wash shrinkage for bulk fabric, using clear stitch specs, and running inline QC on critical points like neckline and hem.
The top problems I see in bulk
- Wrap dresses: gaping at bust, tie placement inconsistency
- Shirt dresses: button burst at bust, placket ripple
- Slip dresses: seam puckering, fabric shading
- Tiered dresses: tier mismatch, bulky seam joins
- Strapless dresses: slipping, top edge rolling
QC points I always write into the tech pack
- Measurement tolerance for bust, waist, and length
- Fabric shrinkage allowance
- Stitch type and SPI for stress seams
- Lining and fusing placement
- Hem width and hem stitch method
A practical QC checklist for buyers
- Fit test on 2 body types, not just one model
- Check skirt swing and walking steps
- Steam test for puckering and shine marks
- Light test for sheerness under flash
- Pack test to see if wrinkles recover
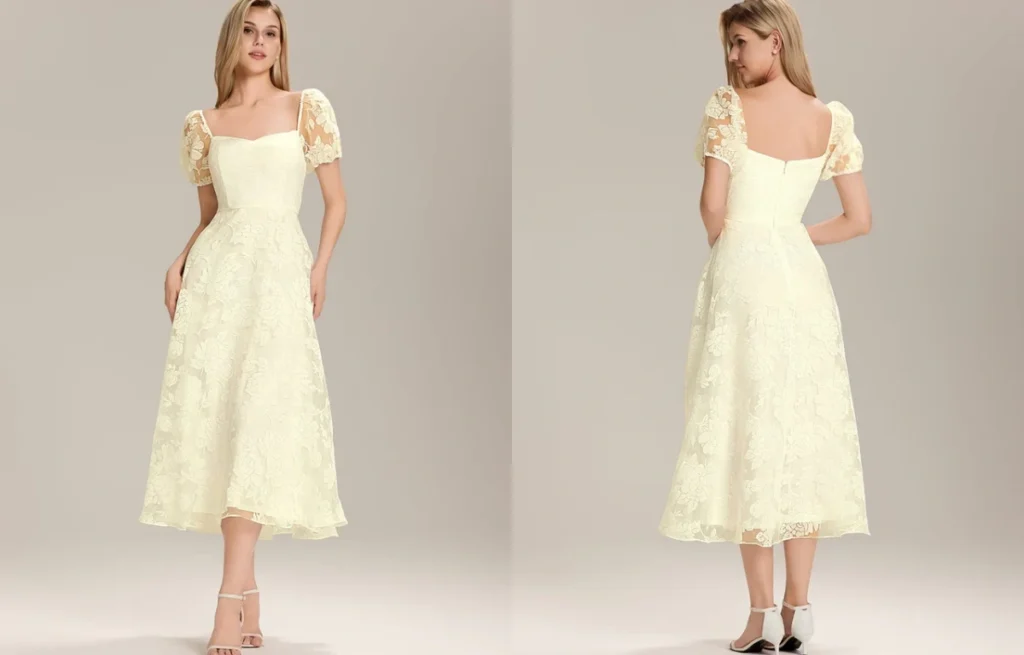
Sleeveless A-Line Dress
Many buyers want a sleeveless A-line dress because it looks easy to sell. But I often see the first sample fail on armholes, gaping, or thin fabric. Then the timeline slips, and the trend window closes.
A sleeveless A-line dress is a fitted-bodice, flared-skirt style without sleeves, and it sells well because it works across seasons and occasions. I make it “safe” by controlling armhole shape, neckline stability, and skirt drape, then I confirm coverage and comfort with one approved fit sample.
I learned this the hard way with an early client. The dress looked perfect on a hanger. On body, the armhole was too open and exposed the bra. After that, I started treating the armhole like a key design feature, not a small detail.
What are the main types of sleeveless A-line dress I should include in a wholesale range?
When a buyer says “sleeveless,” they usually mean different looks. Some want minimal and clean. Some want romantic. Some want workwear. I group the styles so the collection feels complete, not repetitive.
The main types of sleeveless A-line dress for wholesale are: tank A-line, halter A-line, high-neck A-line, square-neck A-line, V-neck A-line, wrap or faux-wrap sleeveless A-line, button-front shirtless A-line, pinafore A-line, strapless A-line, and slip-style sleeveless A-line.
A quick assortment guide for buyers like Emily
| Type | Best Season | Best Sales Angle | Fit Risk |
|---|---|---|---|
| Tank A-line | Spring/Summer | Everyday basics | Low |
| Square-neck A-line | All seasons | “Clean premium” | Medium |
| V-neck A-line | All seasons | Bust-friendly | Low-Med |
| Halter A-line | Summer | Vacation | Medium |
| Strapless A-line | Holiday | Party | High |
| Pinafore A-line | Fall | Layering | Low |
How I avoid style overlap in the same drop
- I keep one hero neckline (example: square-neck) and build colorways
- I add one trend neckline (example: halter or high-neck)
- I include one layered option (pinafore) for longer season use
- I cap the range at 6–8 SKUs so marketing stays focused
How do I get the armhole and neckline right on a sleeveless A-line dress?
Most sleeveless A-line problems come from two areas. The first is the armhole shape. The second is neckline stability. These are the spots where customers feel discomfort first.
I get the armhole and neckline right by balancing coverage and mobility, then locking the edge finish. I control the armhole depth, strap placement, and gaping allowance, and I choose the correct finish like binding, facing, or full lining based on fabric weight and stretch.
Why armholes fail in production
- Armhole is too deep, so bra shows and side chest is exposed
- Armhole curve is too straight, so it cuts into the front arm
- Armhole binding is too tight, so it pulls and wrinkles
- Armhole is too loose, so it “floats” and looks cheap
The pattern checks I do before I approve a sample
- I check front armhole against bust point level
- I check side seam angle so it does not swing to the front
- I check strap width for the target market (bra-friendly if needed)
- I check arm mobility with a simple raise-and-reach test
Edge finish options and when I use them
| Finish | Best For | Pros | Cons |
|---|---|---|---|
| Self-facing | Medium/heavy woven | Clean look, stable | Adds bulk at edge |
| Binding | Light woven | Light, neat | Easy to distort |
| Full lining | Light colors, premium | Best coverage | Higher cost |
| Partial lining | Budget styles | Cheaper | Risk of show-through |
Small construction choices that change comfort a lot
- I add a hidden snap for deep V-neck or wrap front
- I add stay tape at neckline if fabric is soft
- I use understitching to stop facing roll-out
- I control topstitch width so it looks consistent in photos
What fabrics work best for a sleeveless A-line dress, and what fabric mistakes cause returns?
Many buyers pick fabric from a swatch book without thinking about how sleeveless edges behave. Sleeveless edges show everything. A sleeve can hide small issues, but sleeveless cannot.
The best fabrics for a sleeveless A-line dress are stable wovens for structure (poplin, twill, jacquard) and soft wovens for movement (crepe, viscose, challis). Returns usually come from thin fabric in light colors, high shrinkage rayon, and fabrics that lose shape at the neckline and armhole.
Fabric behavior I test first
- Drape: decides if the skirt flows or sticks out
- Opacity: decides lining need and cost
- Recovery: decides if neckline stays flat
- Shrinkage: decides if the armhole changes after wash
My fabric-to-style matching map
| Sleeveless Type | Better Fabric Direction | Why it works |
|---|---|---|
| Square-neck tank A-line | Poplin, ponte, twill | Holds clean lines |
| V-neck A-line | Crepe, viscose | Softer fall, less sharp pull |
| Slip-style A-line | Satin, bias crepe | Premium shine and drape |
| Pinafore A-line | Twill, denim, cord | Layer-friendly structure |
| Halter A-line | Crepe, satin + lining | Needs stable neck edge |
Common fabric mistakes I stop early
- Using light viscose with no lining in white or pastel
- Ignoring shading in satin across dye lots
- Not pre-checking shrinkage for rayon blends
- Choosing fabric that pills on repeat orders
How do I size and fit a sleeveless A-line dress for fewer complaints across bust and armhole?
Sleeveless A-line dresses are forgiving at the skirt. They are not forgiving at the top. If the bodice fails, the customer complains even if the skirt looks good.
I reduce fit complaints by building the bodice around bust and armhole first, then letting the skirt do the forgiving work. I set clear grade rules for strap length, armhole depth, and neckline width, and I test fit on two body types before bulk.
Fit points that decide customer reviews
- Bust ease and dart placement
- Strap length and strap angle
- Armhole depth and side coverage
- Neckline width and gaping risk
My practical grading rules for sleeveless styles
- I do not let armhole depth jump too fast between sizes
- I increase bust width with controlled ease, not only side seam
- I adjust strap length slightly, but I avoid big changes that shift armhole
- I keep neckline shape stable to protect the photo look
A simple fit test routine I use with buyers
- Normal standing photos: front, side, back
- Arms raised to shoulder height: check gaping and pull
- Sit down test: check neckline and waist comfort
- Walk test: check skirt swing and strap stability
What are the key QC and production risks for sleeveless A-line dresses, and how do I prevent them?
Sleeveless A-line dresses look “basic,” so factories sometimes treat them as low risk. That is a mistake. Sleeveless styles expose sewing quality at the edges and show fit problems faster.
The key risks are neckline stretching, armhole gaping, binding distortion, uneven hems, and inconsistent shrinkage. I prevent them with stable edge construction, clear stitch specs, pre-checked shrinkage, and inline QC focused on neckline/armhole measurements and edge appearance.
The QC checkpoints I put in the tech pack
- Measurement tolerance for bust, neckline width, armhole depth, length
- Stitch type and SPI on neckline/armhole seams
- Understitch requirement for facing or lining
- Pressing rules to avoid shine marks on dark colors
- Hem width and hem stitch method for a clean swing
What I ask the factory to do during inline QC
- Check neckline and armhole on the first 10 pcs of each size
- Compare binding length to armhole curve to avoid “pulling”
- Confirm thread tension so edges do not wave
- Hang test for 24 hours for bias or soft fabrics
A fast pre-production risk table
| Risk | Why it happens | Prevention |
|---|---|---|
| Armhole gaping | curve + strap angle wrong | fix pattern, add snap if needed |
| Neckline waves | soft fabric stretches | stay tape, lining, understitch |
| Binding twist | wrong binding grain | cut on correct grain, control tension |
| Uneven hem | skirt panels shift | notches, careful spreading, hem QC |
| Shrink change | rayon/viscose | pre-test shrink, adjust pattern |
Spaghetti Strap A-Line Dress
Many buyers choose this style because it looks simple and fast. But in bulk, small spec gaps create big problems. Straps slip, neckline grows, and size becomes unstable. Then the reorder stops.
I spec a spaghetti strap A-line dress for B2B by locking fabric behavior, strap engineering, and grading rules before I confirm bulk. I write measurable standards for GSM, shrinkage, seam type, stitch density, lining, hardware, and tolerances, then I validate them with wear tests and inline QC.
I once lost time on a reorder because the fabric lot changed and the skirt drape became heavier. The style still looked “right” on hanger. But the customer said it felt different. Since then, I treat fabric lot control as part of the tech pack, not a supplier note.
What fabric specs should I set first for a spaghetti strap A-line dress?
Fabric is the base of everything. For this style, fabric decides drape, shine, and fit stability. If I do not lock fabric specs early, the pattern and size control become weak.
I set fabric specs in this order: composition, weave/knit type, weight (GSM), width, stretch, shrinkage, colorfastness, and handfeel. For spaghetti strap A-line dresses, I prefer stable drape fabrics like crepe, satin with controlled slippage, viscose challis with shrinkage control, or cotton poplin for a crisp look.
My default fabric spec options for wholesale
| Fabric Direction | Common Composition | Target GSM | Key Advantage | Main Risk |
|---|---|---|---|---|
| Soft drape | 100% viscose challis | 110–140 | fast trend, good movement | shrink + twist |
| Premium shine | poly satin / poly-spandex satin | 130–170 | camera-friendly | seam puckering |
| Clean matte | poly crepe / crepe de chine | 120–160 | stable drape | snag risk |
| Crisp casual | cotton poplin / cotton-poly | 110–150 | stable fit | wrinkles |
Fabric tests I require before bulk
- Shrinkage: wash + dry method aligned to care label
- target: within ±3% length/width for woven
- Seam slippage (for satin and loose weaves)
- target: no visible opening at stress seam
- Colorfastness: rubbing + washing
- target: no obvious staining on lining or hardware
- Pilling (if brushed or knit)
- target: acceptable grade for buyer standard
What I write into the tech pack
- Fabric supplier name + article number
- Fabric lot control rule (sample lot = bulk lot if possible)
- Approved color standard (lab dip or pantone target)
- Allowed GSM tolerance (example: ±5%)
What construction and sewing specs reduce strap and neckline failures?
This style fails at the top edge. If the strap angle, reinforcement, or stitch spec is weak, the dress will not stay on the body. B2B buyers hate this because it creates size complaints.
I reduce strap and neckline failures by specifying strap width, strap internal structure, anchor reinforcement, neckline stay tape, and stitch density. I also define which seams must be overlocked, which must be french seamed, and where I need bar tacks.
Strap engineering specs I use most
- Finished strap width: 5–8 mm (stable default)
- Strap layers: self-fabric folded + topstitch, or self + lining
- Adjuster: ring + slider (prevents fit complaints)
- Anchor reinforcement:
- inside: patch + bar tack
- outside: clean topstitch alignment
Strap placement rules that protect fit
- Front strap point should align near bust apex line, not too wide
- Back strap should avoid shoulder edge drop line
- Strap angle must match neckline shape to prevent twist
Neckline stabilization options
| Issue | Best Fix | Where I Apply |
|---|---|---|
| Neckline grows | stay tape | neckline seam, bias seams |
| Gaping at straight neck | light fusing + elastic | top edge facing/lining |
| Slippery satin shifts | stitch-in-the-ditch + press plan | neckline, waist seam |
Stitch and seam specs I lock
- SPI: 10–12 for main seams (buyer standard can vary)
- Overlock: 4-thread for inside edges
- Hem: baby hem for chiffon/satin, clean turned hem for poplin
- Bar tack: strap anchors, pocket corners (if any)
What lining, interlining, and support options should I specify for B2B?
Spaghetti strap styles often need hidden support. Without it, the buyer sees bust complaints, transparency issues, and neckline distortion. Support choices also affect cost and lead time.
I choose lining and support based on fabric sheerness, customer cup range, and retail positioning. The most reliable setup is a lined bodice with stable facing, optional bust cups, and a controlled waist seam. For premium programs, I add light boning or power mesh panels.
Lining standards I use
- Bodice lining: 100% poly tricot or lightweight woven lining
- Skirt lining: only when fabric is sheer or buyer requests premium feel
- Color rule: match shell for dark colors, nude range for light colors
- Level 1: lined bodice only (lowest cost)
- Level 2: lined bodice + elastic at top edge (lower returns)
- Level 3: lined bodice + cups + side boning (eventwear feel)
- Level 4: inner corset layer (highest cost, highest control)
Where support usually matters most
- Straight neck
- Cowl neck in soft satin
- Open back styles
- Larger cup targets
How do I set sizing, grading, and measurement tolerances for this style?
For B2B, sizing is not just measurements. It is a repeatable system. I care about grading logic, tolerance rules, and how the factory measures.
I set sizing by defining POMs (points of measure), grading increments, and tolerances for each POM. For spaghetti strap A-line dresses, the top POMs are bust, neckline width, strap length range, waist, and center front length. I also define how the dress is laid flat for measurement.
Core POM list for spaghetti strap A-line dress
- Bust circumference (at apex level)
- Waist circumference (natural waist seam)
- Hip (if fitted high hip)
- Center front length (from top edge to hem)
- Strap length (min/max with adjuster)
- Neckline width and depth
- Hem sweep (controls flare)
Typical grading logic I use (example only)
| POM | Grade Rule | Why it matters |
|---|---|---|
| Bust | +4 cm per size | reduces gaping and pull |
| Waist | +4 cm per size | keeps waist comfort stable |
| Hem sweep | +6–10 cm per size | keeps A-line balance |
| Strap length | +0.5–1 cm per size | prevents “short strap” complaints |
Tolerance standards I often propose
- Bust/Waist: ±1 cm
- Length: ±1 cm (or tighter for premium)
- Strap length: ±0.5 cm
- Hem sweep: ±1–2 cm
Measurement method rules I write
- Garment must be relaxed, not stretched
- Measure on flat table with consistent fold method
- Strap measured from seam point to seam point, plus adjuster range
What finishing and fabric process details should I control for bulk consistency?
Finishing makes the difference between “factory basic” and “brand-level.” It also affects how the garment behaves after packing and shipping.
I control bulk consistency by defining pre-shrinking, pressing temperature, seam pressing tools, and a final inspection standard for shine marks, puckering, and twisting. For satin programs, I also specify needle type, thread type, and press cloth rules.
Process controls by fabric type
- Satin: fine needle, lower tension, press cloth, avoid high heat
- Viscose: pre-wash or controlled shrink plan, hang test for hem
- Poplin: edge topstitch standards, button/hole reinforcement if needed
Hem finish selection
| Fabric | Best Hem | Reason |
|---|---|---|
| Satin / chiffon | baby hem | clean and light |
| Crepe | narrow double turn | stable and premium |
| Poplin | wider turned hem | crisp structure |
Packing standards I recommend to B2B buyers
- Tissue in bodice to protect shape
- Strap secured to avoid tangling
- Flat pack for satin to reduce crease lines
- Hang test sample after 48h transit simulation
What QC plan should I use for a spaghetti strap A-line dress order?
A B2B QC plan must match the real failure points. For this dress, the top edge and straps are the risk center. Then fabric lot and hem stability come next.
I use a QC plan with 3 layers: pre-production confirmation, inline checks focused on straps and neckline, and final random inspection with wear-move testing. I also lock fabric lot and hardware plating to reduce reorder inconsistency.
Pre-production checklist (before cutting)
- Approved bulk fabric lot and GSM
- Approved trims: ring/slider plating standard
- Approved sewing line sample and seam specs
- Confirm shrinkage allowance is applied in marker
Inline QC checkpoints (most important)
- Strap anchor bar tack presence and placement
- Neckline stay tape/fusing application
- Seam puckering check after pressing
- Strap adjuster function test
Final inspection points
- Strap slippage test on mannequin + movement simulation
- Neckline growth check (hang 24h)
- Hem evenness check (hang + flat)
- Shade variation check under standard light
AQL note I use with buyers
- I align AQL level to brand positioning
- I tighten checks for satin and open-back versions
Halter A-Line Dress
Many buyers like the halter look, but they still miss the real fit risks. Then the dress looks good in photos but feels wrong on the neck. When that happens, returns rise fast, and the style dies early.
A halter A-line dress is an A-line silhouette with a halter neckline that ties or fastens behind the neck, so the bodice stays supported while the skirt flares out from the waist. It sells well because it shows shoulders, feels light for warm weather, and gives a clean, “holiday” shape that works for many body types when the neck support is built correctly.
I still remember one boutique buyer who pushed for a thin strap halter with no inner support. The first sample looked cute on a hanger. On a real person, the neck pulled, and the bust shifted when she walked. Since then, I treat halter A-line as a “support + comfort” project, not only a neckline choice.
What are the most common types of halter A-line dress for wholesale?
Halter A-line is not one design. I split it into clear sub-types, because each one has different cost, fit tolerance, and target occasion.
The most common halter A-line dress types are tie-back halter, buckle/clip halter, button-back halter, high-neck halter, plunge halter, cross-front halter, scarf halter, and halter with built-in bra cup. I pick the type based on target customer comfort, bust support needs, and the brand’s “day to night” styling plan.
Quick wholesale view
| Halter Type | Best Use | Fit Risk | Production Notes |
|---|---|---|---|
| Tie-back | casual/resort | Medium | watch strap length tolerance |
| High-neck | daywear | Low | needs clean neckline finish |
| Cross-front | date night | Medium-High | bust shaping must be stable |
| Plunge | eventwear | High | needs cups/boning or strong lining |
| Built-in cup | premium | High | strict cup spec + grading |
How do I engineer neck comfort and bust support in a halter A-line dress?
This is the point that decides if the style becomes a reorder or a return problem. A halter neckline puts load on the neck. If the bodice is weak, the neck carries everything.
I engineer neck comfort by distributing weight into the bodice with inner structure, then I reduce strap pressure with wider straps, stable elastic, and correct strap angles. I engineer bust support with cups, underbust seams, and lining strength, so the neckline looks light but the inside works like a support system.
Why halter dresses fail on real customers
- The strap takes all the skirt + bodice weight
- The bust shifts because there is no underbust anchor
- The neckline gapes when the wearer bends forward
- The back neckline cuts in because strap angle is wrong
The “support path” I build inside the dress
- I anchor support at the underbust or waist seam
- I use power mesh or firm lining at the bodice
- I add elastic stay tape where stretch needs control
- I choose closure (tie, hook, zipper) based on stability needs
Strap engineering rules I use in sampling
- I increase strap width when fabric is heavy or skirt is long
- I avoid very thin straps for plus sizes or busty fits
- I keep strap attachment points aligned to reduce twisting
- I add a soft backing at the neck contact area for comfort
A practical strap width guide I use
| Dress Weight / Length | Recommended Strap Width | Why |
|---|---|---|
| Light mini | 10–15 mm | low load on neck |
| Light midi | 15–25 mm | better comfort and control |
| Satin midi | 20–30 mm | satin slides, needs stability |
| Maxi / heavy drape | 25–40 mm | high load, reduce pressure |
Fit details that change everything
- Underarm curve: too deep causes side spill, too shallow cuts in
- Bust dart or princess seam: controls shape without gaping
- Back panel: needs stability so straps do not pull forward
- Waist seam strength: holds skirt weight so neck does not suffer
Many buyers chase “flowy” fabrics for halter A-line. I do that too, but only when the inside construction can control the fabric. Soft fabric without structure becomes messy fast.
The best fabrics for a halter A-line dress are viscose challis, crepe, cotton poplin, linen blends, and satin with proper lining. I match fabric drape to the skirt volume, and I match fabric stability to the bodice support plan, because the halter neckline needs clean edges and predictable stretch.
How I match fabric to the halter neckline
- Soft drape (viscose): looks effortless, but needs stable bodice lining
- Crisp weave (poplin): holds shape, easier neckline finish
- Satin: looks expensive, but slips, so it needs inner grip and clean seams
- Linen blend: strong summer story, but wrinkles, so I plan finishing and packing
Fabric mistakes that create returns
- Using very slippery satin with no inner support
- Using thin light colors with no lining, then sheerness shows in photos
- Ignoring shrinkage in viscose, then strap length changes after wash
- Using scratchy trims at neck, then the wearer feels pain fast
My fabric-to-style pairing table
| Target Story | Fabric Pick | Best Halter Type | Notes |
|---|---|---|---|
| Resort casual | viscose challis | tie-back / scarf | control shrinkage first |
| Clean daytime | cotton poplin | high-neck | sharp edges look premium |
| Party premium | satin + lining | plunge / cross-front | needs inner grip + cups |
| Natural summer | linen blend | tie-back | plan wrinkle messaging |
How do I grade and size a halter A-line dress to reduce returns?
Halter A-line has two sensitive areas: bust volume and strap length. If I grade like a normal sleeveless dress, the neck and bust will not scale correctly.
I reduce returns by grading the strap length, strap angle, and bust depth separately from the skirt. I also set clear tolerance for neck opening and underarm curve, and I test on at least two body types, because halter tension changes a lot between sizes even when waist and hip look correct.
The grading points I always separate
- Strap length and back neck position
- Bust apex point and dart intake
- Underarm curve depth
- Neck opening width and depth
A simple grading risk map
| Size Range | Main Risk | Fix I Use |
|---|---|---|
| XS–S | gaping neckline | reduce neck width, add hidden snap |
| M–L | strap pull | adjust strap angle, strengthen bodice |
| XL+ | neck pressure | widen strap, add inner support path |
Sample test steps I run with buyers
- Walk test: see if bust shifts after 20 steps
- Sit test: see if neck cuts in
- Bend test: check gaping and coverage
- Heat test: check if the lining feels too hot for summer
What are the best use cases to sell halter A-line dresses by season and occasion?
I do not push halter A-line all year. I push it when the customer wants exposed shoulders and easy holiday styling. That is usually late spring to summer, plus a small holiday party window.
Halter A-line dresses sell best in late spring and summer for resort, vacation, brunch, and casual events. For holiday capsules, I use satin or structured crepe halter A-line with built-in support, so the silhouette looks clean under night lighting and photos.
Where I position halter A-line in a drop
- Summer core: high-neck halter + tie-back halter in easy fabrics
- Trend add-on: cross-front or scarf halter with a strong print
- Premium capsule: plunge halter in satin with inner structure
- Conservative add-on: high-neck halter midi for wider audience
Wholesale planning checklist I use
- I lock the target neckline look with reference photos
- I define if the buyer wants bra-friendly or not
- I confirm if the buyer accepts built-in cups
- I set comfort as a required fit standard, not a bonus
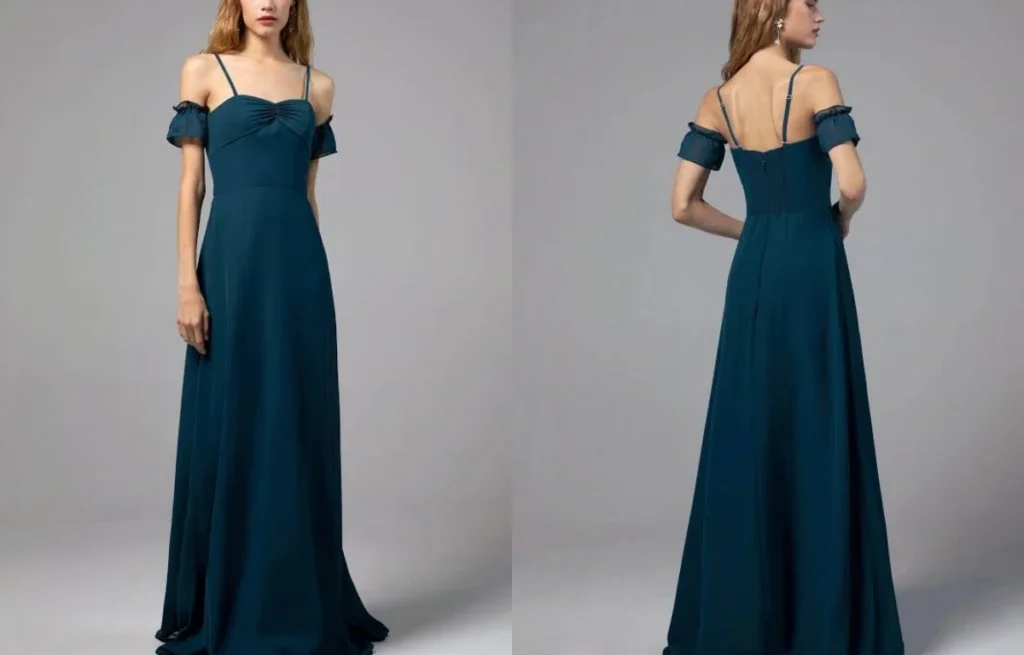
Off-the-Shoulder A-Line Dress
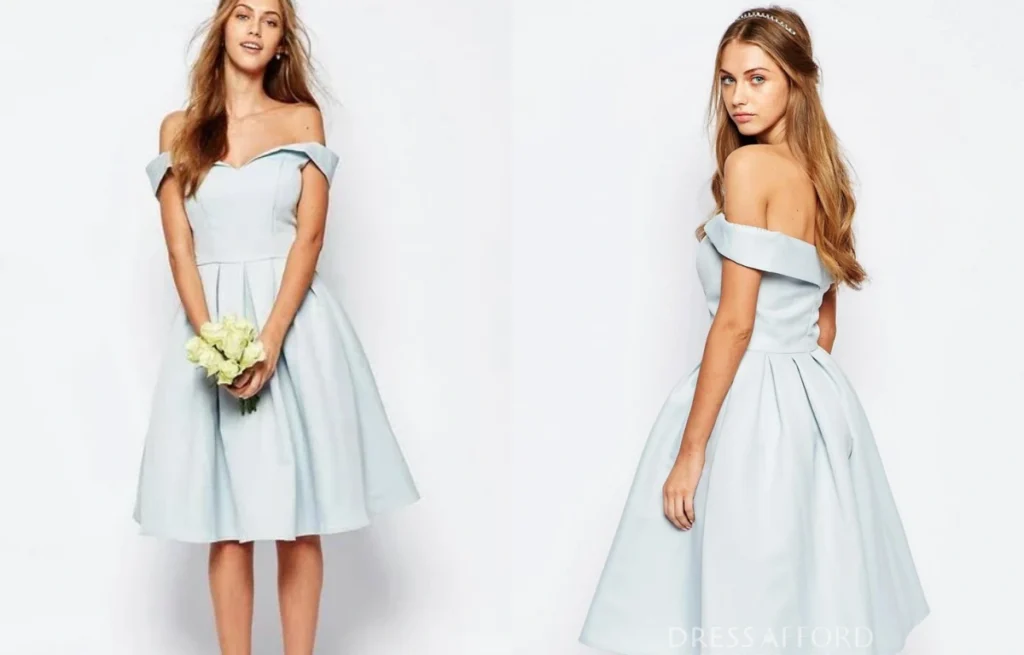
Many buyers like the off-the-shoulder look, but they still lose sales because the dress slips, feels tight on arms, or looks cheap in photos. I see it most when the neckline support is weak, or the fabric choice is wrong for the A-line flare.
An Off-the-Shoulder A-Line Dress is a shoulder-baring silhouette with a stable neckline band and a skirt that flares gradually from the waist or high hip. I make it sell by controlling neckline grip, sleeve comfort, and skirt drape, then I balance structure and softness through fabric, lining, and elastic specs.
I once had a boutique buyer rush this style for a summer launch. The sample looked perfect on the hanger. In wear test, the neckline rolled and slid down. Since then, I always treat this style like a “support garment” first, and a “pretty dress” second.
How do I design the neckline so an Off-the-Shoulder A-Line Dress stays up all day?
An off-the-shoulder dress can look amazing, but the neckline is the deal breaker. If it slips, the customer feels unsafe. Then the return happens, even if the fabric is good.
I keep the neckline up by combining the right elastic tension, a stable inner facing or lining, and optional grip tape. I also control the neckline curve and band height, because small pattern errors create rolling, gaping, or cutting into the arm.
The neckline has 3 jobs
- It must grip without pain
- It must hold shape after sitting and moving
- It must look smooth in photos under strong light
My practical construction options
| Option | How it works | Best for | Risk |
|---|---|---|---|
| Elastic in neckline casing | Elastic pulls edge in | Mass market, fast production | Rolling if casing is narrow |
| Elastic + inner facing | Facing stabilizes edge | Mid-tier quality story | Added labor cost |
| Elastic + lining + silicone tape | Grip + structure | Premium, low returns | Tape sourcing and wear comfort |
| Boning at side seams | Prevents collapse | Strapless-feel support | Can feel stiff in casual styles |
Specs I usually control in tech pack
- Elastic width: 6mm / 8mm / 10mm options based on fabric weight
- Elastic stretch ratio: set by wear test, not by guess
- Top edge seam: avoid thick ridge that prints in photos
- Stitch: secure elastic with zigzag or coverstitch based on fabric
Problems I solve early
- Neckline rolls outward: band height too short, fabric too soft, or elastic too strong
- Neckline cuts into upper arm: armhole curve too tight, band placed too low
- Neckline slips: elastic too weak, neckline too wide, or fabric too heavy
What sleeve and shoulder details make this style comfortable and size-friendly?
If the sleeve feels tight, customers blame sizing. If it feels loose, customers blame quality. This is why I treat sleeve choice as a fit strategy.
The best sleeve choices for an Off-the-Shoulder A-Line Dress are elasticized short sleeves, flutter sleeves, and soft draped sleeves. I pick them based on the target customer’s arm comfort, climate, and the fabric’s stretch, then I grade the sleeve opening carefully to reduce size complaints.
Sleeve styles that sell well
- Elasticized short sleeve: stable, easy fit, good for daily wear
- Flutter sleeve: hides upper arm, good movement, strong “feminine” photos
- Draped sleeve: premium look, but needs careful weight control
- Long sleeve off-shoulder: strong fall story, but higher fit risk
How I make sleeves more forgiving
- I add enough sleeve opening ease for movement
- I avoid sharp angle at the sleeve join
- I choose softer elastic for sleeve opening than neckline elastic
- I test raising arms, hugging, and sitting in wear test
- Sleeve opening increases should be consistent across sizes
- The off-shoulder drop must not increase too much in plus sizes, or it slips
- The bodice width must support the neckline, not fight it
This style is exposed at the neckline, so fabric quality shows fast. A low-quality fabric can look shiny, wrinkly, or thin in photos.
I choose fabric based on drape, recovery, and surface texture. Crepe, viscose challis, cotton poplin, and textured dobby can look premium. Satin can look premium too, but it needs better lining and cleaner sewing, or it will show puckering and shine.
Fabric selection rules I use
- Soft drape supports romance, but it needs neckline stabilization
- Crisp fabric supports structure, but it can feel stiff on arms
- Thin light fabric needs lining, especially for light colors
Best fabric matches by market position
| Market Position | Good fabric choices | Why it works |
|---|---|---|
| Value trendy | Viscose challis, poly crepe | Good drape, easy printing |
| Mid-tier boutique | Textured crepe, cotton poplin | Looks clean, holds shape |
| Premium event | Satin + lining, jacquard | Photo impact, rich surface |
Fabric mistakes that cause returns
- Too much shine on low-grade satin
- Fabric too thin at neckline, causing “collapse”
- Heavy fabric that pulls the neckline down
- High shrinkage in rayon without pre-test
How do I keep the A-line skirt balanced when the top is off-the-shoulder?
The off-shoulder top already pulls attention upward. If the skirt is too wide, the body looks short. If the skirt is too narrow, it looks like a tube and loses the A-line story.
I balance the A-line skirt by controlling waist seam stability, flare amount, and hem sweep. For most wholesale customers, I use a moderate flare with a clean waist seam, then I choose midi or mini lengths based on the selling channel and season.
How I decide flare level
- Soft casual: moderate flare, less volume, easier daily wear
- Resort boho: more flare, tiered options, more movement
- Eventwear: controlled flare, cleaner lines, better photos
Pattern points that change the whole look
- Waist seam placement: natural waist is safest
- Number of skirt panels: more panels = smoother flare, higher cost
- Hem sweep: too wide looks bulky, too narrow looks flat
- Lining length: short lining can make skirt cling or flip
A quick skirt construction table
| Skirt method | Look | Cost | Notes |
|---|---|---|---|
| 2-panel A-line | clean, simple | Low | risk of side seam twist |
| 4-panel A-line | smoother | Medium | better drape control |
| 6-panel A-line | premium flare | Higher | best for heavier fabrics |
| Tiered A-line | boho volume | Medium | seam bulk management needed |
What are the main production and QC risks, and how do I reduce returns?
This style fails when comfort and security fail. I can sell a dress with a simple print. I cannot sell a dress that slips. So I run QC around movement, friction, and seam stability.
The main risks are slipping necklines, rolling edges, elastic twisting, uneven hems, and inconsistent fit after washing. I reduce them by setting elastic specs, adding inner structure, running wear tests, controlling shrinkage, and checking neckline symmetry and seam stretch during inline QC.
My wear test moves are not optional
- Raise arms up and forward
- Sit and stand 10 times
- Walk fast and take stairs
- Do a gentle twist at the waist
- Check if neckline returns to position
Inline QC points I focus on
- Elastic insertion: no twist, even distribution
- Neckline topstitch: consistent SPI and tension
- Symmetry: left and right off-shoulder drop must match
- Seam strength: stress points at sleeve join and side seam
- Hem: measure hem length on body, not only on table
A simple “low return” spec plan
| Part | What I control | Target result |
|---|---|---|
| Neckline elastic | width + stretch ratio | stays up, no pain |
| Inner facing/lining | height + stitch method | no rolling, clean edge |
| Grip tape option | placement | anti-slip security |
| Skirt panels | 4 or 6 panels | balanced flare, premium look |
One-Shoulder A-Line Dress
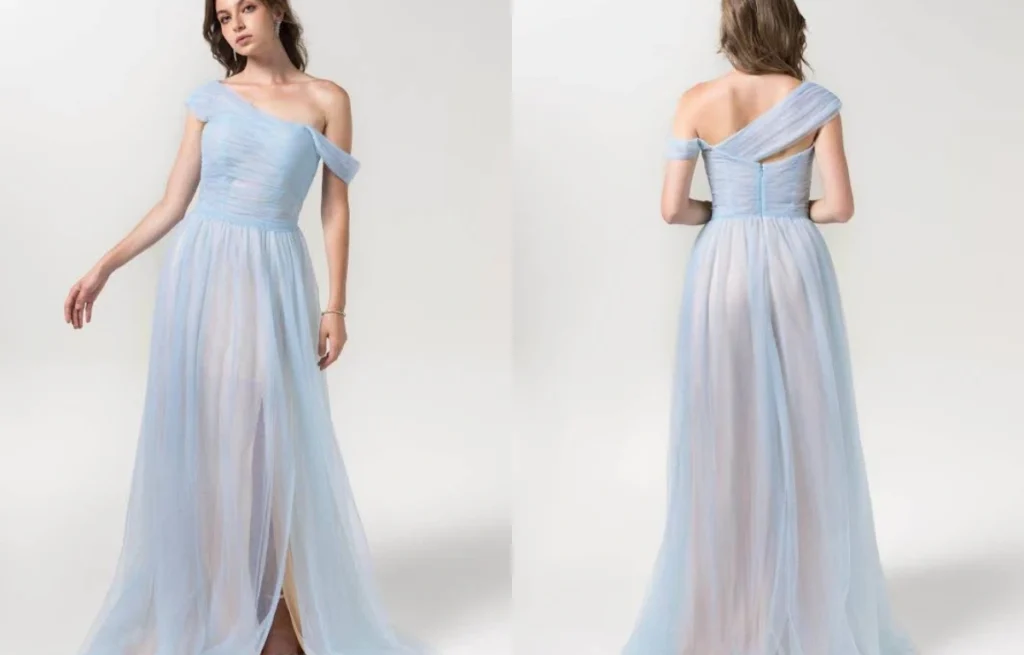
Many buyers love the one-shoulder look, but they fear returns from poor fit and slipping. I see this problem when the pattern is beautiful, but the support inside is weak. Then the customer feels unsafe, and the review score falls fast.
A one-shoulder A-line dress is worth adding when you need an event-ready hero style that looks premium in photos and sells at a higher retail price. I choose it when I can control three things: stable asymmetry at the neckline, strong internal support in the bodice, and a skirt drape that keeps the A-line clean without adding bulk.
I still remember a buyer who wanted a “simple” one-shoulder dress with no lining to save cost. The sample looked fine on a mannequin. On a real fit model, the neckline rolled and the side seam twisted. After that order, I treat one-shoulder A-line as a structured product, not a basic one.
What are the key design elements of a one-shoulder A-line dress that prevent fit issues?
Many people think the skirt shape is the hard part. I think the neckline and bodice are the real battleground. If the top is stable, the A-line skirt becomes easy.
The key design elements are a balanced neckline angle, a secure strap width, a stable armhole curve, and internal structure like lining, fusing, elastic, and sometimes boning. I also control the waist placement and skirt sweep so the dress stays centered and does not rotate on the body.
The neckline angle controls slip risk
- I avoid an extreme diagonal line if the fabric is heavy or slippery.
- I keep the neckline edge smooth with clean turn or facing.
- I add a hidden stay tape on the neckline seam for woven fabrics.
Strap width is not a styling detail, it is a support tool
- Narrow strap: looks sexy, but needs stronger internal support.
- Wide strap: looks modern and safer for most customers.
- Twist strap: looks trendy, but needs careful pressing and stitching.
Armhole and side seam decide if the dress rotates
- I keep the underarm curve tight enough to hold, but not cut.
- I balance the side seam so it does not pull forward.
- I control seam allowances so pressing stays consistent in bulk.
A quick spec table I use in sampling
| Part | What I control | Why it matters |
|---|---|---|
| Neckline edge | stay tape / elastic | stops rolling and stretching |
| Bodice | lining + fusing | holds shape and supports bust |
| Waist seam | stitch + tape | stops waist from growing |
| Side zipper | zipper quality + length | improves fit and dressing ease |
| Hem sweep | skirt width | keeps A-line clean and not bulky |
How do I choose the best fabrics for a one-shoulder A-line dress?
Fabric choice decides if the dress looks expensive or looks like a costume. I also see fabric choice decide if the neckline stays flat after one night of wear.
The best fabrics are medium-weight materials with controlled stretch or stable weave, like crepe, satin with lining, structured jersey, ponte, and some jacquards. I avoid ultra-slinky satin without support, and I avoid very stiff fabric that makes the A-line skirt stand out like a cone.
Fabric behavior rules I follow
- If the fabric is slippery, I require lining and strong neckline finishing.
- If the fabric is stretchy, I require recovery testing and stable elastic.
- If the fabric is textured, I check if it irritates underarm skin.
Fabric matching by market positioning
| Market Position | Fabric direction | Visual result |
|---|---|---|
| Premium eventwear | crepe, jacquard, satin + lining | clean lines, strong photos |
| Trend fast-fashion | stretch crepe, poly satin + lining | lower cost, still glossy |
| Comfortable party | ponte, stable jersey | body-hug top, easy wear |
Small fabric details that change returns
- Shine level under flash photography
- Color shading across lots in satin
- Snag risk in delicate weaves
- Static and cling in dry climates
What internal construction options improve support in a one-shoulder A-line dress?
This is the part that separates “pretty sample” from “real best-seller.” I do not like to guess here. I build the bodice like a support system.
Internal construction that improves support includes full lining, power mesh panels, fusing at key edges, elastic stay at neckline, silicone grip tape, bra-cup options, and light boning in some cases. I choose the mix based on fabric weight, bust range, and target retail price.
Lining is the base, not an extra
- Full lining in bodice: better comfort and less see-through.
- Partial lining: cheaper, but higher risk of rolling edges.
- Stretch lining: needed when the outer fabric has stretch.
- I place power mesh at the inside front and side bust.
- I anchor it into the zipper seam or side seam.
- I keep the mesh grain stable so it does not distort.
Fusing and stay tape stop deformation
- I fuse the neckline facing area in woven.
- I add stay tape to the diagonal neckline seam line.
- I avoid over-fusing because it can make shine marks.
Silicone tape helps, but it is not magic
- It works best with a clean, flat seam finish.
- It can irritate sensitive skin, so I keep it narrow.
- It can lose grip after many washes, so I test it.
Support options comparison table
| Support option | Cost impact | Support level | Best use case |
|---|---|---|---|
| Bodice lining | Low-Med | Medium | most styles |
| Power mesh panel | Med | High | wide size range |
| Elastic stay | Low | Medium | woven necklines |
| Grip tape | Low | Medium | slippery fabrics |
| Bra cups | Med | Medium | party dresses |
| Light boning | Med-High | High | strapless-like demand |
A simple support decision rule I use
- If the buyer sells sizes up to XL/2XL, I add power mesh or stronger lining.
- If the fabric is satin, I add stay tape and better pressing standards.
- If the neckline is narrow, I increase strap width or add inner elastic.
How should I pattern and grade a one-shoulder A-line dress for fewer returns?
Most returns come from sizing confusion and top slipping. I reduce both by building a pattern that stays centered and grading that respects asymmetry.
I pattern the one-shoulder bodice with balanced darts, controlled neckline stretch, and a stable anchor point on the strap side. For grading, I adjust bust volume and neckline length carefully by size, and I avoid scaling asymmetry too aggressively, because it changes the angle and causes gaping.
The bodice needs one “anchor side”
- The strap side must carry tension without stretching.
- I reinforce that side seam and shoulder seam.
- I use the zipper as a stabilizer when possible.
Darts and princess seams are not optional for many fabrics
- For woven crepe: bust darts or princess seams reduce gaping.
- For ponte: seams control shape without extra bulk.
- For satin: seams must be clean to avoid puckering.
Grading mistakes I see often
- Neckline grows too much in larger sizes.
- Armhole depth increases and loses hold.
- Waist seam shifts and skirt starts to rotate.
Fit testing routine I use with buyers
- I test on two fit models with different bust shapes.
- I do a movement test: raise arms, sit, dance steps.
- I do a “slip test”: quick shoulder movement and side twist.
- I do a wear test for 30 minutes to see if the neckline creeps.
How do I style and merchandise one-shoulder A-line dresses for better sell-through?
This style sells when the buyer tells a clear story. If the product looks “complicated,” customers skip it. I keep it simple and strong.
One-shoulder A-line dresses sell best as eventwear or vacation party pieces with clean photography and simple styling. I recommend showing the dress in motion, using accessories that do not fight the neckline, and offering 2–3 colors that match the season and the buyer’s brand identity.
Merchandising rules I suggest to brand buyers
- One hero angle: show the shoulder line clearly.
- One motion shot: skirt swing to show A-line shape.
- One close-up: neckline finishing and lining quality.
Color and print choices that work well
- Solid colors: black, red, cobalt, white with lining
- Subtle textures: jacquard, tonal satin
- Small prints: only if the neckline and seams stay clean
A quick wholesale color plan I use
| Season | Safer colors | Trend colors |
|---|---|---|
| Spring | ivory, navy | pastel blue, lilac |
| Summer | white (lined), coral | lime, hot pink |
| Fall | black, chocolate | wine, deep teal |
| Holiday | black, red | metallic, emerald |
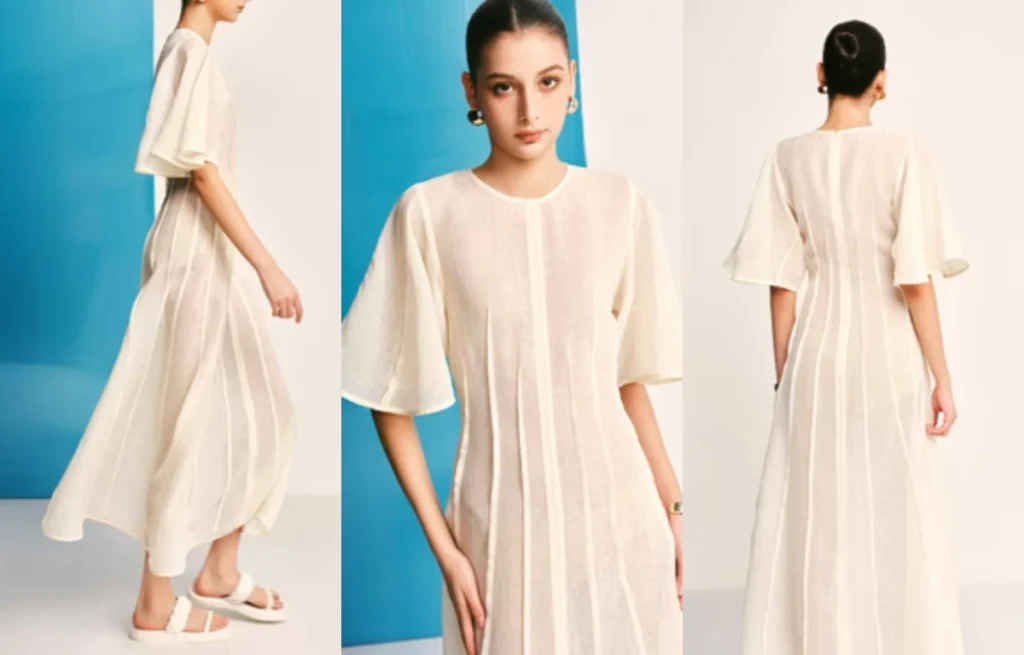
Short-Sleeve A-Line Dress
Many buyers want a dress that sells fast and fits many body types. But they also fear returns from tight sleeves, gaping bust, or cheap-looking drape. I see this problem most in spring and summer drops.
A short-sleeve A-line dress is an A-line silhouette with sleeves that cover part of the upper arm, usually ending between the shoulder and the elbow. It is a safe wholesale style because it balances comfort, coverage, and trend flexibility, and it works across casual, workwear, and resort edits with small pattern changes.
I still remember one buyer who only asked for “short sleeve, easy fit.” The first sample looked fine on a mannequin. Then it pulled on real arms and the bodice rode up. Since then, I always treat sleeve shape as a fit system, not just a sleeve length.
What sleeve types work best on a short-sleeve A-line dress?
Short sleeves are not all the same. The sleeve type decides comfort, movement, and how “premium” the dress looks in photos. This is where many collections lose consistency.
The best sleeve types for a short-sleeve A-line dress are set-in sleeves for clean structure, raglan sleeves for comfort, flutter sleeves for softness, puff sleeves for trend lift, and dolman sleeves for relaxed fit. I choose based on target customer, fabric weight, and how fitted the bodice is.
The sleeve options I use most in bulk
- Set-in short sleeve: clean shoulder line, best for workwear
- Raglan short sleeve: easier fit at armhole, good for casual
- Flutter sleeve: light and feminine, best in drapey woven
- Puff short sleeve: strong fashion signal, needs stable fabric
- Dolman short sleeve: relaxed, but can look bulky in heavy fabric
- Cap sleeve: looks sharp, but high return risk if armhole is tight
Quick matching guide
| Sleeve Type | Best Fabric Direction | Best Use Case | Main Risk |
|---|---|---|---|
| Set-in | Poplin, crepe, ponte | Office, clean casual | tight bicep if sleeve is narrow |
| Raglan | Jersey, soft woven | Everyday comfort | shape can look casual-only |
| Flutter | Viscose, chiffon | Resort, romantic | transparency, needs lining sometimes |
| Puff | Poplin, taffeta | Trend drops | elastic discomfort, balloon volume |
| Dolman | Jersey, challis | Relaxed fit | wide torso look in photos |
Small sleeve specs that change everything
- Sleeve opening: too tight causes lift and pulling
- Bicep ease: too small increases returns on size M and up
- Sleeve cap height: too high restricts movement
- Underarm point: too low makes the bodice look sloppy
How do I design a short-sleeve A-line dress that fits well across sizes?
Many A-line dresses fail because the skirt fits, but the top does not. In wholesale, the bodice and sleeve decide reorder rate. I plan fit from the shoulder down.
I build fit by locking shoulder width, armhole shape, and sleeve bicep ease first, then I control bust shaping with darts or princess seams, and I set the waist seam to match the target body length. This makes the A-line skirt hang correctly and keeps the dress comfortable in movement.
The fit system I follow
- Shoulder and neckline: stable base, prevents sliding
- Armhole: enough depth for movement, not too deep to avoid gaping
- Bust shaping: darts or seams that point to bust apex
- Waist placement: natural waist for safest fit, empire for comfort fit
- Skirt flare: balanced sweep so it drapes, not “tent” volume
Fit choices by target customer
| Customer Need | Bodice Construction | Sleeve Choice | Why it works |
|---|---|---|---|
| Low returns | bust dart + modest ease | set-in or raglan | stable shoulder + easy movement |
| Trend-driven | fitted bodice + waist seam | puff sleeve | strong shape, strong photos |
| Comfort-first | looser bodice + elastic waist | flutter sleeve | soft, forgiving fit |
Common fitting failures I prevent early
- Armhole too small, so the bodice lifts when arms move
- Sleeve too narrow, so the fabric wrinkles and pulls
- Bust apex mismatch, so the chest looks flat or pointy
- Waist seam too high, so the skirt starts flaring in the wrong place
A short-sleeve A-line dress can look “basic” fast if fabric looks thin or loses shape. Photos hide a lot. Customer hands do not. I choose fabric by drape and recovery, not by trend name.
To make a short-sleeve A-line dress look premium, I pick fabrics with stable color, smooth surface, and enough body to hold the A-line. For woven, I often use poplin, crepe, or rayon challis with controlled shrinkage. For knit, I use ponte or compact jersey when the bodice needs structure.
Fabric behavior rules I use
- Soft drape for flutter sleeves and relaxed skirts
- Medium body for set-in sleeves and clean waist seams
- Good recovery at neckline and waist, especially in knit
- Low pilling risk for repeat orders
Best fabric matches by style goal
| Style Goal | Recommended Fabrics | Notes |
|---|---|---|
| Crisp workwear | cotton poplin, cotton blend twill | holds collar and sleeve shape |
| Soft everyday | rayon challis, viscose crepe | checks shrinkage carefully |
| Premium minimal | heavy crepe, satin-back crepe | better drape, better photos |
| Stretch comfort | ponte, compact jersey | stable A-line without cling |
Hidden cost drivers buyers forget
- Lining for light colors or flutter sleeves
- Fusing for neckline and button plackets
- Better thread and needle choice to avoid puckering
- Pre-shrink or wash test for viscose blends
How do I use a short-sleeve A-line dress for different occasions without changing the base block?
This is where wholesale gets efficient. If I can keep one core block, I can shorten sampling time and help buyers move faster. I only change what changes the story.
I can cover casual, office, and resort with one short-sleeve A-line base by changing neckline, sleeve style, hem length, and trim details. I keep the shoulder and armhole stable, then I build new “drops” using fabric and styling changes.
One block, three stories
- Casual: crew neck, raglan sleeve, mini or midi, jersey or challis
- Office: shirt collar or square neck, set-in sleeve, midi, poplin or crepe
- Resort: V-neck, flutter sleeve, tier detail, maxi or midi, viscose
Trim and detail switches that sell
- Buttons: real shell-look vs basic plastic changes perceived value
- Belt: self belt vs contrast belt changes waist focus
- Pocket: hidden side pocket adds utility and reviews
- Hem: wide hem looks premium, narrow hem looks light and casual
A practical SKU plan I use with buyers
| Drop Type | SKU Count | Core Colors | Trend Colors |
|---|---|---|---|
| Core basics | 3–5 | black, navy, ivory | one seasonal color |
| Trend capsule | 2–3 | one neutral | print + one bright |
| Event/campaign | 1–2 | black | metallic or special fabric |
What are the most common QC risks for a short-sleeve A-line dress in bulk production?
Most defects are not “big problems.” They are small issues that break comfort or make the garment look cheap. I focus QC on sleeve, neckline, and hem first.
The main QC risks are sleeve tightness, armhole gaping, twisted side seams, uneven hems, and fabric shrinkage after wash. I reduce these risks by setting clear measurement tolerances, testing shrinkage before bulk, and doing inline checks on sleeve opening, underarm points, and hem sweep.
The QC points I always check first
- Sleeve opening measurement on sizes M and XL
- Armhole seam stretch and seam allowance consistency
- Neckline wave or rolling, especially in knit
- Side seam twist, often from grain issues
- Hem level after hanging 24 hours for drapey fabrics
Inline QC checklist I use on the line
- First 10 pcs: sleeve + armhole + neckline check
- Every hour: hem measurement on random sizes
- Every bundle: seam puckering check under strong light
- Before packing: stain, shade, and pressing check
Sampling tests that prevent returns
- Raise arms test: bodice should not ride up hard
- Sit test: skirt should not pull at waist seam
- Flash test: light colors should not go sheer
- Wash test: measure shrinkage and seam twist
Puff-Sleeve A-Line Dress
Many buyers love the puff-sleeve look, but the first sample often fails. The sleeve collapses, the armhole pulls, or the dress looks “costume.” Then the launch slips, and the trend window closes.
A puff-sleeve A-line dress works in wholesale when the sleeve volume is engineered with the right pattern shape, stable support details, and fabric that can hold air, while the A-line body stays clean and easy to grade. I focus on sleeve cap height, bicep ease, elastic channels, and lining so the style sells and returns stay low.
I once rushed a puff sleeve for a summer drop and used a fabric that was too soft. The sleeve looked flat in photos. The buyer lost confidence. Since then, I treat puff sleeves like a “mini structure project,” not just a cute detail.
What are the main types of A-line dress, and where does a puff-sleeve version fit?
A puff sleeve is not a full dress category by itself. It is a design layer that changes the top balance. I place it inside a clear A-line framework so the collection stays organized.
The main types of A-line dress include classic A-line, fit-and-flare, empire-waist A-line, drop-waist A-line, wrap A-line, shirt A-line, smock A-line, skater A-line, slip A-line, and tiered A-line. A puff sleeve can be added to most of these, but it performs best on classic, fit-and-flare, and empire-waist A-lines because the proportions stay stable.
Where puff sleeves sell the easiest
- Classic A-line + puff sleeve: clean and “Pinterest-friendly”
- Fit-and-flare + puff sleeve: strong waist emphasis, higher perceived value
- Empire-waist + puff sleeve: soft and romantic, easier fit across sizes
Where puff sleeves get risky
- Drop-waist + puff sleeve: top-heavy, can look unbalanced
- Shirt A-line + puff sleeve: placket + sleeve volume can fight each other
- Slip A-line + puff sleeve: conflict between minimal and volume
A puff sleeve is visual. But it is also technical. If I do not lock the sleeve engineering, bulk production will vary and the silhouette will die on the rack.
To make a puff-sleeve A-line dress hold shape, I control three things: volume distribution (where the puff sits), support method (elastic, gathers, tucks, or inner sleeve), and fabric stiffness (enough body, not scratchy). Then I balance it with a stable bodice and a predictable A-line skirt so grading stays clean.
The sleeve is a system, not one pattern piece
- Sleeve head volume: gathers or pleats at the cap
- Sleeve belly volume: the “balloon” area on upper arm
- Sleeve opening control: elastic or cuff that traps air
- Underarm mobility: enough ease so the wearer can lift arms
Puff sleeve options I use in production
| Puff sleeve method | Best look | Best fabrics | Main risk |
|---|---|---|---|
| Gathers at cap + elastic hem | Round and romantic | Poplin, taffeta, crisp viscose | Elastic twist, uneven gathers |
| Pleats at cap + cuff | Sharper, tailored puff | Poplin, twill, suiting blends | Bulky seam at armhole |
| Two-piece sleeve with seam shaping | Premium sculpted volume | Taffeta, duchess satin | Higher sewing cost |
| Inner “support sleeve” (organza/lining) | Big volume, stable | Softer outer fabrics | Extra heat, cost |
The most important pattern measurements I control
- Sleeve cap height: drives puff height and arm mobility
- Bicep circumference: prevents tightness and seam strain
- Armscye shape: prevents pulling lines on bodice
- Cuff/elastic length: controls how much “air” stays inside
- Shoulder slope match: prevents sleeve from leaning forward
A practical fit test I run on sampling
- Model raises arms to shoulder height and above head
- Model sits and reaches forward
- I check if bodice lifts or bust pulls
- I check underarm rubbing and seam bite
- I photograph front/side/back in motion, not just standing
Common “cheap look” triggers and how I avoid them
- Too much gather with thin fabric → I add structure or reduce fullness
- Puffy sleeve + wrinkly fabric → I change weave or add finishing
- Narrow shoulder seam with big sleeve → I widen shoulder and stabilize
- No lining in light color → I add lining or use better fabric opacity
How do fabric choices change the performance of a puff-sleeve A-line dress?
Buyers often ask me for “soft and flowy” and “big puff” at the same time. Those two goals fight each other. I pick the priority and engineer the rest.
Crisp fabrics like cotton poplin, taffeta, and some jacquards hold puff volume naturally, while soft fabrics like rayon challis and lightweight crepe need internal support to keep the sleeve from collapsing. I choose fabric by testing sleeve bounce, crease recovery, and skin comfort, not just by the fabric name.
Fabric behavior tests I use
- Scrunch test: does it recover fast or stay wrinkled?
- Hang test: does it drape or keep shape?
- Sleeve bounce test: does the puff return after pressing?
- Light test: is it sheer under flash photography?
Fabric selection map for puff sleeves
| Fabric direction | Puff volume | Comfort | Best season | Notes |
|---|---|---|---|---|
| Poplin | High | Medium | Spring/Summer | Clean, stable, easy QC |
| Taffeta | Very high | Medium-Low | Holiday/Event | Loud rustle, premium shine |
| Viscose twill | Medium | High | All seasons | Softer puff, better wear |
| Chiffon (with lining) | Medium | High | Summer | Needs inner support for puff |
| Jacquard | High | Medium | Fall/Holiday | Higher price, higher value |
What I avoid for first-time puff-sleeve orders
- Very soft rayon challis with no support
- Heavy stiff fabric that scratches the arm
- Fabric with high shrinkage that changes sleeve length after wash
- Uneven dye lots that show on gathered areas
How do I balance puff sleeves with the A-line body so the dress flatters more customers?
Puff sleeves add width on top. The A-line skirt adds width at the bottom. If I do both too much, the customer looks swallowed. So I balance proportions on purpose.
I balance a puff-sleeve A-line dress by controlling the shoulder width, neckline openness, waist placement, and skirt sweep. If the sleeve is big, I keep the skirt flare moderate, and I use a neckline that opens the chest area so the garment looks intentional, not heavy.
Proportion rules I use for broad market fit
- Big sleeves + open neckline: square, sweetheart, or V-neck
- Big sleeves + high neck: only if skirt is slimmer and waist is clear
- Short puff sleeves: safer for warm climates and daily wear
- Long puff sleeves: better for fall drops, but need lighter fabrics
Waist placement that works with puff sleeves
- Natural waist: most stable for most sizes
- Empire waist: soft romantic look, good for comfort fit
- Drop waist: only for strong fashion story and taller customer base
A-line skirt sweep targets I often use
- Commercial puff sleeve: moderate sweep, easier walking and shipping
- Statement puff sleeve: keep sweep controlled or add slit for movement
What are the key production and QC risks for puff-sleeve A-line dresses?
This style looks easy on Instagram. In bulk, it can go wrong fast. Puff sleeves amplify small mistakes like uneven gathers or weak elastic.
The key risks are uneven sleeve volume, elastic failure, armhole distortion, and inconsistent sleeve length after wash. I reduce them with clear stitch specs, gather ratio control, pre-shrink testing, and inline checks on sleeve symmetry, arm mobility, and seam strength.
The highest-risk sewing points
- Sleeve cap gather line: needs consistent ratio
- Armhole join seam: stress point when wearer lifts arms
- Elastic channel: twisting and uneven stretch are common
- Cuff seam: can look wavy if tension is wrong
Specs I always lock before bulk
- Gather ratio (cap and hem) written in numbers
- Elastic width, stretch %, and vendor standard
- Stitch type and SPI for armhole seam
- Pressing method and temperature limits
- Sleeve length tolerance and left/right symmetry tolerance
Inline QC checklist I use on the line
- Compare left and right sleeve puff height on mannequin
- Check elastic twist by rotating sleeve opening
- Do a quick arm-lift test on sample every size set
- Measure sleeve length after pressing, not before
- Random check for thread breaks at armhole seam
Cost drivers buyers should know early
- Extra fabric usage from sleeve fullness
- Higher sewing time from gathers and elastic channels
- Higher risk of rework from symmetry issues
- Possible need for lining or inner support layer
Long-Sleeve A-Line Dress
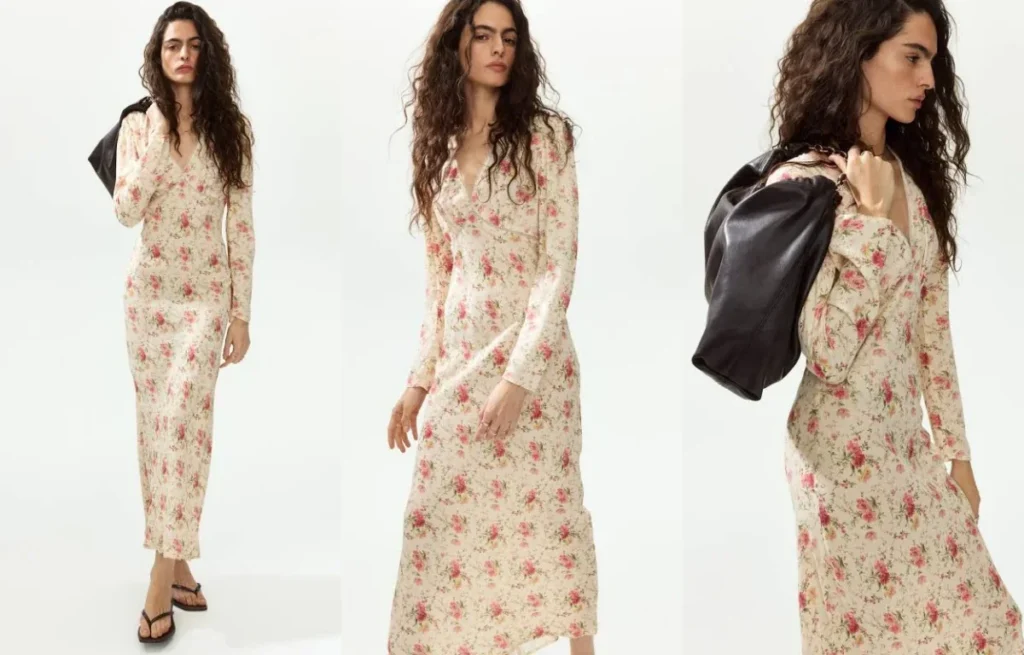
Many buyers add sleeves late, then the fit gets tight, the armholes pull, and the dress looks cheap on camera. I have seen this ruin a good A-line pattern. Then sampling repeats, and the season window gets smaller.
The best long-sleeve A-line dress styles are shirt A-line, wrap A-line, fit-and-flare, empire-waist, smock, rib-knit A-line, sweater A-line, and midi A-line. I choose the right one by matching sleeve type, cuff design, and fabric stretch to the target season, then I confirm movement with a wear test before bulk.
I once worked on a fall capsule where the buyer insisted on narrow sleeves because the photos looked “clean.” The real garment felt restrictive. After that, I always treat sleeves as a functional part, not a decoration.
What are the most popular types of long-sleeve A-line dress for wholesale collections?
When I build a long-sleeve A-line range, I do not only change sleeve length. I design around warmth, movement, and the customer’s daily life. This is where long-sleeve A-line dresses win, because they can sell across work, weekend, and event.
The most in-demand long-sleeve A-line dress types include shirt A-line, wrap, faux-wrap, fit-and-flare, empire-waist, smock, sweater-knit A-line, rib-knit A-line, denim A-line, corduroy A-line, midi A-line, maxi A-line, mini A-line, tiered A-line, and square-neck long-sleeve A-line. For wholesale, I usually pick 6–10 of these based on season and brand positioning.
Where each type usually works best
| Type | Best for | Why it sells | Risk level |
|---|---|---|---|
| Shirt A-line | Work + casual | easy styling, “polished” | Medium (placket fit) |
| Wrap/Faux-wrap | Broad size range | adjustable waist | Medium (bust gaping) |
| Fit-and-flare | Occasion | strong silhouette | Medium (bust shaping) |
| Smock/Tiered | Casual | comfort and easy fit | Low (shape control) |
| Sweater/Rib knit | Cold season | warmth + stretch | Medium (pilling/fit) |
| Denim/Corduroy | Fall/Winter | texture trend | Medium (bulk at seams) |
How I avoid overlapping products in one drop
- I keep one hero work style (often shirt A-line)
- I keep one comfort style (smock or rib-knit)
- I keep one event style (fit-and-flare or square-neck)
- I keep one trend texture (denim or corduroy)
- I keep one length anchor (usually midi)
How do sleeve types change fit, comfort, and size range in a long-sleeve A-line dress?
Many brands judge sleeves by the look only. I judge sleeves by movement first. Long sleeves change how the bodice sits. They also change how returns happen, because customers feel restriction fast.
Sleeve type controls mobility and fit tolerance. Raglan and dolman sleeves give more movement and reduce armhole pulling. Set-in sleeves look sharper but need better armhole shaping. Bishop sleeves and puff sleeves allow easier bicep fit, but they can add bulk that changes the A-line balance.
Sleeve construction changes the whole garment
- Set-in sleeve
- Pros: clean shoulder line, premium look
- Cons: tight bicep complaints if armhole is shallow
- Raglan sleeve
- Pros: easy movement, better for casual brands
- Cons: less “tailored” look
- Dolman/Batwing sleeve
- Pros: very relaxed, good for knits
- Cons: extra fabric can look wide in photos
- Bishop sleeve
- Pros: flexible bicep, feminine shape
- Cons: cuff must be comfortable and stable
- Puff sleeve (long)
- Pros: trend-driven, strong design point
- Cons: can overpower A-line if skirt is also wide
The fit points I always test on long sleeves
- shoulder width does not pull when arms lift
- bicep circumference works for the size range
- sleeve cap height matches the armhole
- cuff opening matches customer preferences
- sleeve length stays correct after wash
A quick sleeve choice table for buyers
| Brand vibe | Best sleeve type | Why it works |
|---|---|---|
| Tailored + office | Set-in with cuff | clean and structured |
| Casual + comfort | Raglan | more movement |
| Trend + social media | Puff or bishop | stronger visual point |
| Knit-focused | Dolman or raglan | better drape and stretch |
Which fabrics work best for a long-sleeve A-line dress, and what should I avoid?
Long sleeves often mean cooler weather. So fabric choice is not only about drape. It is also about warmth, static, and how the sleeve slides on the arm. If fabric sticks, customers feel it all day.
For long-sleeve A-line dresses, I use poplin, twill, crepe, ponte, rib knit, sweater knit, denim, and corduroy depending on the target season. I avoid fabrics that cling, pill fast, or shrink heavily, because sleeves magnify these problems and increase returns.
Fabric behavior I check before sampling
- stretch and recovery at elbow
- friction against skin and base layer tops
- shrinkage after wash and steam
- pilling risk for knits
- colorfastness in dark fall colors
Best fabric + style matches I use often
| Style type | Best fabrics | Notes |
|---|---|---|
| Shirt A-line | poplin, twill | stable placket and collar |
| Wrap/Faux-wrap | crepe, viscose | better movement, less bulk |
| Fit-and-flare | ponte, crepe | holds shape and waist seam |
| Smock/Tiered | viscose, cotton | control shrinkage early |
| Knit A-line | rib, ponte | stable stretch and comfort |
| Denim/Corduroy | denim, corduroy | manage seam bulk and topstitch |
Common mistakes I stop early
- using loose sweater knit with no stabilizer at neckline
- using heavy denim with a very wide skirt sweep
- skipping lining in light colors with flash photography
- ignoring shrinkage on viscose when sleeves must stay long
How do neckline, waist placement, and skirt sweep change the look of a long-sleeve A-line dress?
When sleeves get longer, the top half becomes visually heavier. This can make the dress look “top-heavy” if the neckline is closed and the skirt is not balanced. I solve this with proportion rules.
Long sleeves make neckline and waist placement more important. Open necklines like V-neck and square neck reduce heaviness. A natural waist is the safest for most body shapes. A controlled skirt sweep keeps the A-line clean without making the dress look bulky with long sleeves.
Proportion rules I follow
- high neck + long sleeve needs a cleaner skirt sweep
- square neck + long sleeve looks modern, but needs stable neckline
- empire waist + long sleeve works for comfort, but needs clean bust fit
- drop waist + long sleeve is fashion, but it is not for every customer
- neckline stay tape or facing quality
- shoulder seam stability
- armhole curve accuracy
- skirt panel grain direction
- hem width and hem stitch consistency
What are the main production and QC risks for long-sleeve A-line dresses?
Long-sleeve A-line dresses fail in predictable places. If I control these points early, I can protect bulk quality and reduce rework. This matters for wholesale because a delay can kill a season.
The biggest risks are tight sleeves, armhole pulling, twisted sleeves, cuff discomfort, uneven hems, and inconsistent shrinkage. I reduce these risks by locking sleeve specs, controlling fabric shrinkage, reinforcing stress seams, and doing movement checks in fitting before bulk production.
The highest-risk zones in production
- sleeve cap: puckering and twisting
- underarm seam: tearing risk if too tight
- cuff: tight opening and rough seam
- neckline: stretching in knits and loose weaves
- hem: waviness on knit or bias panels
What I put into the tech pack for long sleeves
- bicep, elbow, and cuff measurements with tolerance
- sleeve length spec after wash
- stitch type and SPI for armhole and underarm
- interfacing/fusing map for collar and placket
- pressing standards to avoid shine marks
A QC checklist that works in real factories
- raise arms test: no pulling and no chest lift
- bend elbow test: no tightness and no seam stress
- wash test: sleeve length stays within tolerance
- twist test: sleeve seam stays on correct line
- photo test: fabric does not cling or show through
Bell-Sleeve A-Line Dress
Many buyers like the idea of statement sleeves, but they fear fit issues and high returns. I also see this problem when the sleeve looks great on a model, but it feels tight in real wear. Then the customer posts bad reviews, and the style dies fast.
A bell-sleeve A-line dress is an A-line silhouette with a fitted or semi-fitted upper sleeve that flares wider from the elbow or mid-forearm to the cuff. It sells because it upgrades a simple A-line shape with visible movement, better photo impact, and an “elevated boho” feel, without needing heavy trims or complex panels.
I remember one boutique client who wanted “a viral sleeve” but kept the body basic for easy grading. We tested three sleeve flare widths in sampling. The mid-flare version won because it looked dramatic in photos and still let people eat, drive, and type.
How is a bell sleeve different from a flared sleeve, bishop sleeve, and trumpet sleeve?
Many people mix these sleeve names together. I do not. When I quote bulk, the sleeve type changes the pattern, seam stress, and fabric waste.
A bell sleeve flares in a smooth cone shape and stays open at the cuff. A trumpet sleeve usually flares later and can look more fitted above the flare. A bishop sleeve is full and gathered into a cuff. A general flared sleeve is a loose term that can mean several flare shapes.
The fast visual differences I use in tech discussions
- Bell sleeve: flare starts earlier, cuff stays open
- Trumpet sleeve: flare starts later, looks sharper and more fitted
- Bishop sleeve: volume is pushed into gathers, cuff is closed and structured
- Flared sleeve: could be bell or trumpet, so I always ask for a reference
What changes in the pattern room
- Bell: needs accurate flare angle, cuff edge must hang clean
- Trumpet: needs controlled ease above the flare to avoid pulling
- Bishop: needs extra sleeve width and gathering ratio, plus cuff interfacing
- “Flared”: needs a clear spec, or bulk can drift
A simple sleeve comparison table
| Sleeve Type | Volume Control | Cuff Finish | Main Risk | Best Use |
|---|---|---|---|---|
| Bell sleeve | Shape-based | Open hem | hem waviness | boho, resort |
| Trumpet sleeve | Shape-based | Open hem | tight elbow | modern event |
| Bishop sleeve | Gather-based | Closed cuff | bulky cuff | romantic, winter |
| Flared sleeve | varies | varies | unclear spec | only with reference |
Where should the bell sleeve flare start, and how wide should the cuff be?
This is the core decision. If the flare starts too high, it catches on everything. If it starts too low, it looks like a normal sleeve and loses the point.
Most commercial bell sleeves flare from mid-forearm to elbow level, and the cuff opening usually needs enough width to move freely without brushing the hand. I set flare start and cuff width based on fabric drape, target customer lifestyle, and the dress occasion, then I confirm it by movement testing during sampling.
My practical rules for flare placement
- Everyday casual: flare starts closer to mid-forearm for comfort
- Eventwear: flare can start closer to elbow for more drama
- Work-friendly: flare starts lower and the cuff opening stays moderate
How I decide cuff opening size without guessing
- I check if the hand can pass through easily in pull-on styles
- I test “daily actions” in fitting
- typing on a laptop
- eating with utensils
- picking up a phone
- opening a car door
- I watch if the cuff brushes the knuckles too often
A cuff width guide I use as a starting point
| Target Look | Cuff Opening Feel | Photo Impact | Return Risk |
|---|---|---|---|
| Soft bell | moderate | medium | low |
| Statement bell | wide | high | medium |
| Dramatic bell | very wide | very high | high |
Small detail that changes everything
- If the cuff edge is too light, it collapses and looks cheap
- If the cuff edge is too heavy, it swings stiff and feels “costume”
I see bell sleeves fail when the fabric does not support the sleeve shape. Buyers then blame the design, but it is often a fabric choice problem.
For a premium bell-sleeve A-line dress, I prefer fabrics with controlled drape and stable surface quality, like crepe, viscose challis with good weight, cotton poplin for crisp versions, and satin for night looks with lining support. I avoid fabrics that collapse, shine unevenly, or ripple at the hem.
Fabric behavior that matters more than the fabric name
- Drape: decides if the sleeve hangs in a clean cone
- Weight: decides if the flare has shape or just droops
- Recovery: decides if elbow area bags out after wear
- Surface: decides if it photographs “expensive”
Fabric picks by season and story
- Spring: viscose challis, crepe, light poplin
- Summer: rayon blends, cotton voile with lining strategy
- Fall: heavier crepe, brushed woven blends
- Holiday: satin, jacquard, structured crepe
Fabric risk list I call out early
- thin jersey: sleeve edge rolls and looks messy
- cheap satin: shines in patches and shows needle marks
- loose weave: sleeve hem waves and twists after wash
- heavy twill: sleeve swings stiff and feels bulky
How do I pattern and construct a bell sleeve to prevent twisting, waviness, and seam stress?
This is where professionalism shows. Bell sleeves look easy in photos, but bulk production punishes weak construction choices. I focus on stability first.
I prevent common bell sleeve failures by controlling grain, adding the right hem finish, balancing sleeve cap and bicep ease, and reinforcing stress points at the underarm. I also match sleeve flare to fabric, because an aggressive flare in a soft fabric almost always creates hem waves.
Grain and cut direction
- I keep the sleeve on-grain when possible for consistent hang
- I avoid mixing grain directions across left and right sleeves
- For bias-heavy looks, I plan extra stabilization at hem
Sleeve cap and armhole balance
- Too much bicep tightness causes drag lines that pull the sleeve flare
- Too little control causes the sleeve to rotate around the arm
- I adjust not only width, but also the sleeve pitch
Hem finishing options and what they really do
- Narrow double turn hem: clean and stable in poplin and crepe
- Baby overlock + turn: fast but can wave in soft viscose
- Rolled hem: pretty and light, but looks cheap if tension is wrong
- Faced hem: best for dramatic flare, adds weight and shape
- Binding: good for contrast looks, adds cost and stitch time
A construction decision table I use
| Fabric Type | Recommended Hem | Why | Main QC Check |
|---|---|---|---|
| Poplin/twill | narrow double turn | crisp edge | cuff symmetry |
| Viscose/challis | faced or binding | controls wave | hem ripple |
| Satin | faced + lining plan | hides marks | needle pulls |
| Sheer chiffon | rolled hem | light edge | tension balance |
Stress points that need reinforcement
- Underarm seam join
- sleeve hem seam overlap
- any slit or opening at cuff
Common bulk defects and my fixes
- Wavy cuff hem: reduce hem tension, use facing, control steam
- Twisting sleeve: correct sleeve pitch, check grain, balance cap
- Puckered seam: adjust needle size, thread tension, stitch length
- Elbow tightness: add ease above flare, not only at cuff
How do I style bell-sleeve A-line dresses for wholesale drops, and what details increase conversion?
A buyer needs more than one SKU. They need a story that sells. Bell sleeves already give strong visuals, so I keep the rest simple and sharp.
I build bell-sleeve A-line drops by pairing one sleeve statement with clean bodice details, then I vary necklines and lengths for different occasions. Conversion usually improves when I add waist definition, consistent sleeve symmetry, and photo-friendly cuffs that do not collapse.
The best neckline pairings I use
- Square neck: modern and structured
- V-neck: elongates and fits more bust types
- Off-shoulder: romantic, but needs elastic control
- High neck: premium look, but watch heat and comfort
The best lengths for different markets
- Mini: trend fast, good for Gen Z stories
- Midi: widest customer base, best reorder stability
- Maxi: resort and modest angle, strong photo motion
Details that increase perceived value
- clean facing at neckline and sleeve hem
- consistent topstitch thread color
- lining in light colors
- hidden snap at deep V to avoid gaping
- waist tie that is anchored, not floating
A mini assortment plan I use for boutique buyers
| Slot | Style | Color Strategy | Purpose |
|---|---|---|---|
| Core 1 | midi bell-sleeve A-line | black/cream | stable seller |
| Core 2 | mini bell-sleeve A-line | seasonal print | trend driver |
| Trend 1 | square neck bell-sleeve | bright solid | social content |
| Trend 2 | maxi bell-sleeve | resort floral | vacation drop |
Bishop-Sleeve A-Line Dress
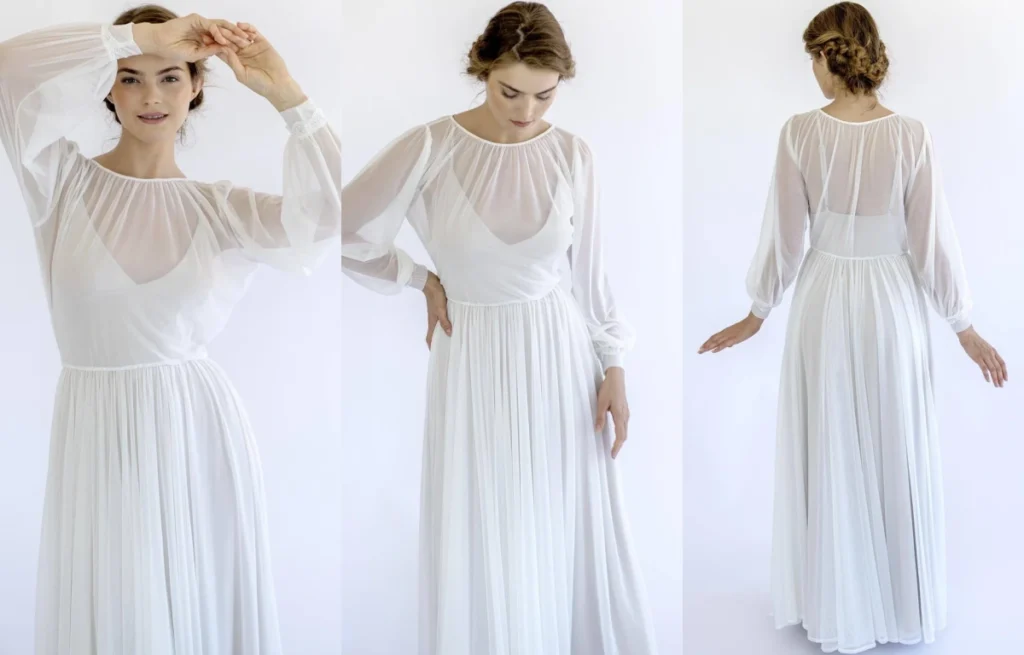
Many buyers like bishop sleeves, but they still miss sales because the sleeve feels heavy or the armhole pulls. I often see this when the pattern is copied from photos, not built from real wear tests. Then the silhouette looks good on a hanger, but it fails on the body.
A bishop-sleeve A-line dress is an A-line silhouette with a full sleeve that blouses along the arm and gathers into a cuff. It sells well because it gives drama without needing body-tight fit, so it suits more customers, hides fit issues at the upper arm, and supports higher perceived value with simple pattern upgrades.
I remember one boutique buyer who wanted “big sleeves” for a fall drop. The first sample looked trendy, but the cuff was too tight and the sleeve cap was too high. The client’s model could not lift her arms for photos. After that, I always treat the sleeve as the key product feature, not a decoration.
A bishop sleeve can make an A-line dress feel expensive in one second. But if the sleeve balance is wrong, customers will complain about tightness, sweating, and restricted movement.
I design a premium bishop-sleeve A-line dress by controlling sleeve volume, cap height, and cuff width, then matching them to the bodice ease and fabric drape. I also stabilize the shoulder and armhole with the right seam and lining choices, so the sleeve looks full but the dress still moves well.
Sleeve volume: the “wow” part, but it must be controlled
- If the sleeve is too wide, it looks costume-like and adds bulk in photos.
- If the sleeve is too narrow, it loses the bishop effect and looks like a basic long sleeve.
- I aim for volume that creates a clear balloon shape only from elbow to cuff, not at the shoulder.
- High cap = sharper shoulder line, but less arm lift.
- Low cap = more arm movement, but a softer shoulder look.
- For most wholesale customers, I prefer a moderate-to-low cap because it reduces returns.
Cuff width: where comfort complaints start
- Tight cuff makes customers feel “trapped.”
- Loose cuff drops and looks messy, especially in slippery fabric.
- I usually build cuffs with functional ease + closure choice.
Closure choices I often recommend
- 1-button cuff: clean, easy production, medium adjustability
- 2-button cuff: better fit range, slightly higher cost
- Elastic cuff: easiest wear, but can look less premium
- Tie cuff: trendy, but slower sewing and more QC points
A fast fit guide I use in sampling
| Customer Need | Sleeve Direction | Cuff Direction | Risk Level |
|---|---|---|---|
| Low returns | Medium volume | 2-button or elastic + clean finish | Low |
| Trend impact | Higher volume | 1-button or tie cuff | Medium |
| Premium look | Medium volume + better drape | 2-button with interfacing | Medium |
| Hot climate | Light volume | Wider cuff, breathable fabric | Medium |
Which fabrics work best for a bishop-sleeve A-line dress?
Fabric decides if the sleeve looks airy or heavy. Many buyers only check color and hand-feel. I always check how the fabric holds gathers and how it behaves at the cuff seam.
The best fabrics for a bishop-sleeve A-line dress are medium-light woven materials with good drape and stable yarn structure, like viscose challis, crepe, chiffon with lining, and lightweight cotton poplin. I avoid overly stiff or overly slippery fabrics unless the pattern is adjusted for them.
What I test before bulk
- Drape: does the sleeve blouse naturally, or does it stick out?
- Gather response: does it gather cleanly, or does it bunch and look thick?
- Recovery: will the cuff edge keep shape after wear and steam?
- Sheerness: does the sleeve need lining, and will it change the “balloon” look?
Fabric-by-effect matching
- Soft romantic sleeve: viscose challis, georgette, soft crepe
- Crisp fashion sleeve: cotton poplin, structured blends
- Eventwear sleeve: satin-backed crepe, chiffon with lining
- Resort sleeve: cotton voile with careful shrink control
Common fabric mistakes I stop early
- Heavy crepe in a full sleeve: it pulls the shoulder seam down
- Thin light color with no lining: the gathers look messy under flash
- Slippery satin with tight cuff: seam puckering shows easily
How does pattern structure change for a bishop-sleeve A-line dress?
A bishop sleeve is not only “add width.” The pattern needs balance. If the bodice and armhole do not support the sleeve, the dress twists and the sleeve collapses.
I adjust the pattern by balancing the armhole, sleeve cap, and cuff opening, then I control the gather distribution so volume sits at the mid sleeve. I also strengthen the shoulder and neckline, because the sleeve weight can distort the top part of the dress during wear.
The sleeve has three critical zones
1) Sleeve head (cap and bicep area)
- I keep the bicep ease generous, but not unlimited.
- I avoid too much gather right at the sleeve head, because it creates “puff shoulder,” not bishop sleeve.
- I manage the sleeve head with small easing or limited gathers based on the target look.
2) Mid sleeve (the balloon body)
- This is where the bishop shape should be strongest.
- I place volume so it blouses when the elbow bends.
- I check the sleeve length carefully, because short sleeves cannot blouse well.
3) Cuff zone (gather + cuff)
- I distribute gathers evenly, but I reduce bulk at the underarm seam.
- I often use a cuff interfacing that supports shape without making it stiff.
- I choose seam allowance and stitch type to prevent puckering.
I always watch these technical risks
- Armhole too small: pulling lines at bust and back
- Sleeve too heavy: shoulder seam drops, neckline opens
- Gather too dense: cuff seam becomes thick and uncomfortable
- Underarm seam twist: sleeve hangs forward
A-line skirt support matters too
- If the top is dramatic, I often keep the skirt flare clean and not too wide.
- If the sleeve is moderate, I can add more skirt movement with panels or pleats.
- I match the “volume story” so the dress looks intentional.
How do I position bishop-sleeve A-line dresses in a wholesale collection?
This style sells as a hero piece. But it also needs a clear plan, because it can overlap with other sleeve stories like puff sleeves or lantern sleeves.
I position a bishop-sleeve A-line dress as a “statement casual” or “soft event” item, then I support it with simpler A-lines in the same color story. I usually offer one core version for reorders and one trend version with stronger sleeve volume or special cuffs.
My core + trend structure
- Core: midi length, medium sleeve volume, solid color, stable fabric
- Trend: mini length or tiered skirt, printed fabric, tie cuff or contrast cuff
Easy selling angles for buyers like Emily
- “Flattering arm coverage” without tight fit
- “Premium detail” with simple pattern cost
- “Photogenic movement” for reels and short videos
Simple spec options that change the feel fast
- Neckline: square neck for modern, V-neck for bust-friendly
- Waist: empire for comfort, natural waist for clean shape
- Cuff: 2-button for premium, elastic for easy wear
- Lining: only bodice lining for cost control, full lining for eventwear
What QC points reduce returns for bishop-sleeve A-line dresses?
This style fails when movement is limited or when the sleeve looks uneven between left and right. Most issues come from measurement tolerance and poor gather control.
To reduce returns, I focus QC on armhole comfort, sleeve symmetry, gather density, cuff fit, and seam puckering. I also test steam and wash behavior, because bishop sleeves show distortion faster than plain sleeves.
My must-check QC list
- Sleeve length left vs right within tight tolerance
- Gather count or gather length consistency at both cuffs
- Cuff circumference and closure strength
- Armhole stretch and seam strength
- Underarm seam alignment and twist
- Puckering at cuff seam on light fabrics
Wear test I always do before bulk
- Arms up, arms forward, and “phone typing” posture
- Sitting test for sleeve bunching at elbow
- After-steam check for sleeve shape recovery
Mini A-Line Dress

Mini A-line dresses look easy, but many buyers lose money because the skirt flips up, the waist rides, or the fabric looks cheap in photos. I see this problem most when the pattern is rushed and the fabric is picked only by price.
A mini A-line dress is a short-length A-line silhouette that fits closer at the top and flares out from the waist or high hip, usually ending above the knee. I make it sell by controlling the hem sweep, balancing the bodice-to-skirt ratio, choosing fabric with the right drape and recovery, and building a fit spec that protects movement and comfort.
I still remember a mini A-line sample that looked perfect on the hanger. Then the model walked, and the skirt swung too wide and exposed too much. Since that day, I always test mini A-lines with a “real movement” fit check before I approve bulk.
What are the most popular types of mini A-line dress for Gen Z and young Millennials?
Mini A-line is not one style. For Emily’s customer, I treat it like a platform silhouette. Then I build different “tops” and different “stories” on the same base. This is how I cover trend demand without confusing production.
The most popular mini A-line dress types are skater mini A-line, wrap mini A-line, shirt mini A-line, corset-bodice mini A-line, slip mini A-line, babydoll mini A-line, long-sleeve mini A-line, puff-sleeve mini A-line, strapless mini A-line, and halter mini A-line. I choose 4–6 per season so the collection stays tight and easy to market.
- Skater mini A-line: bouncy, youth, high sell-through in basics
- Wrap / faux-wrap mini A-line: adjustable waist, strong try-on appeal
- Shirt mini A-line: preppy, more structured, good for work-casual edits
- Corset-bodice mini A-line: “snatched” look, higher perceived value
- Slip mini A-line: minimal, needs strong fabric quality
- Babydoll mini A-line: comfort fit, good for summer drops
- Long-sleeve mini A-line: transitional season hero
- Puff-sleeve mini A-line: photo-friendly, romantic trend
- Strapless mini A-line: party capsule, higher return risk if support is weak
- Halter mini A-line: vacation trend, needs strong neck construction
How I reduce overlap in a mini A-line assortment
- I limit to two necklines per drop for focus
- I keep one “statement sleeve” at a time
- I separate by fabric story (crisp vs soft vs shiny)
- I keep one hero “going out” mini and two daily minis
How should the pattern and proportions be set for a mini A-line dress?
Most mini A-line problems are pattern problems, not sewing problems. A mini hem makes every small mistake look bigger, because the eye is close to the details.
The key pattern settings are waist placement, flare angle, hem sweep, and bodice length. I aim for a mini that looks leg-lengthening in photos but stays safe in motion by controlling skirt volume and adding hidden stability at the waist and neckline.
The mini A-line balance I target
- Bodice length: long enough to anchor the waist, short enough to look young
- Skirt length: short, but not so short that it needs constant adjustment
- Flare angle: enough swing for “A-line,” not so wide that it flips
The biggest pattern risks in mini A-line
- Too much hem sweep: skirt flips up, photos look “costume”
- Too little hem sweep: looks like a straight mini, not an A-line
- Waist too high: makes hips look wider and shortens torso
- Waist too low: makes legs look shorter and causes riding up
Fit test moves I always require in sampling
- Sit down and stand up 3 times
- Walk fast 10 steps
- Climb 3 steps
- Raise arms and twist torso
- Do a small jump test for party minis
Mini A-line measurement focus
| Area | What I control | Why it matters |
|---|---|---|
| Waist | stability + tolerance | stops riding and rolling |
| Hip | enough ease at high hip | prevents drag lines |
| Hem sweep | controlled flare | prevents flipping |
| Front length | slightly longer than back when needed | improves coverage in motion |
| Armhole | clean curve + no gape | avoids bra exposure and returns |
What fabrics work best for a mini A-line dress, and which ones create problems?
When the keyword is “Mini A-Line Dress,” the photos sell first. So fabric face quality matters more than most buyers expect. If the fabric looks dull, thin, or shiny in a cheap way, the whole dress loses value.
The best fabrics for a mini A-line dress are mid-weight wovens with stable hand-feel, or knits with strong recovery. I often use cotton poplin, twill, ponte, structured crepe, and satin with proper lining. I avoid overly soft viscose when the skirt needs shape, unless I add structure.
Fabric decision rules I use
- Crisp A-line: poplin, twill, structured crepe
- Soft A-line: challis, light crepe, but only with controlled flare
- Party A-line: satin or jacquard, usually with lining and inner support
- Knit mini A-line: ponte or double knit for clean flare and comfort
Fabric problems that hit mini A-line the hardest
- Thin fabric: shows underwear lines and looks cheap under flash
- High-shrink viscose: changes skirt length after wash
- Low recovery knit: waist grows and hem twists
- Too stiff fabric: skirt stands out and looks “boxy” in photos
Fabric + construction pairing table
| Fabric | Best Mini A-line Type | Construction notes |
|---|---|---|
| Cotton poplin | Shirt mini A-line | stable placket, crisp hem |
| Ponte knit | Daily skater mini | clean waist, less wrinkling |
| Structured crepe | Corset-bodice mini | supports shaping seams |
| Satin + lining | Strapless/party mini | needs grip + inner layer |
| Twill | Utility mini A-line | topstitching adds value |
Mini A-line has a short body, so small details carry the whole value story. This is where I help buyers win, because details are cheap compared to discounts.
The premium look comes from clean neckline finishing, stable waist construction, a smooth hem, and balanced hardware. I add value by using lined bodices, hidden shorts options, strong zippers, and consistent topstitching, so the dress looks expensive in close-up photos.
Detail upgrades I recommend for wholesale
- Lined bodice for light colors
- Invisible zipper with clean top stop
- Waist stay tape for woven minis
- Clean hem finish with consistent width
- Covered buttons instead of cheap plastic for shirt minis
Hidden shorts: when it helps and when it hurts
- Helps: ultra-mini lengths, dance/party positioning, festival edits
- Hurts: hot weather complaints, higher cost, harder fitting
- My rule: I only add shorts when the marketing needs it, not “just in case”
Size grading notes I highlight to buyers
- Mini lengths need careful grade by size, not a simple linear add
- Bust and waist grade must match the target fit (snug vs relaxed)
- Hem sweep grade changes the whole look, so I set limits
What are the main production and QC risks for mini A-line dress orders?
Mini A-line sells fast when it fits right. But it also returns fast when it fails in movement, lining, or finish. This is why my QC plan for minis is stricter than for midi A-lines.
The main risks are skirt flipping, uneven hems, waist rolling, zipper waving, fabric shading, and inconsistent length between sizes. I prevent them with movement testing, controlled cutting, strict tolerance rules, and inline QC on waist and hem before final finishing.
The highest-risk points in production
- Hem: waviness, uneven turn-up, twisting
- Waist seam: stretching during sewing, then rolling
- Zipper area: ripples on light fabrics
- Lining: peeking out at hem or neckline
- Sleeve cap: puckering on puff sleeves
Inline QC checkpoints I use
- Cutting check: grainline and panel pairing
- Sewing check: waist seam strength and stitch density
- Mid-press check: shine marks and seam impression
- Hem check: full round measurement and evenness
- Final check: try-on inspection for movement and coverage
A practical risk table for buyers
| Risk | Why it happens | How I fix it |
|---|---|---|
| Flipping hem | too much flare or stiff fabric | reduce sweep or soften structure |
| Riding waist | weak waist seam or low recovery | add stay tape, adjust pattern |
| Uneven length | cutting + shrink differences | pre-shrink test, strict cutting |
| High returns | exposure in motion | movement test + shorts option |
Midi A-Line Dress
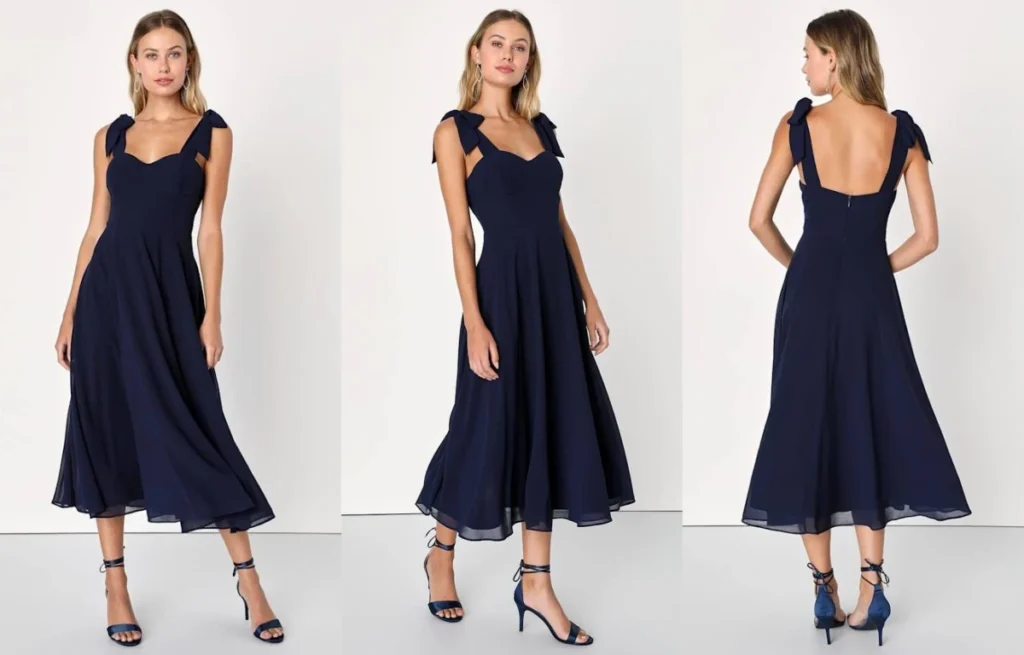
Many buyers want a dress that sells fast and does not create fit drama. But a lot of “pretty” dresses fail after launch because the length feels awkward, or the skirt shape looks cheap in photos. Then stock sits, and discounting starts.
A midi A-line dress is an A-line silhouette with a hem that usually hits mid-calf. I treat it as a low-risk wholesale style because the length fits more occasions, the flare balances many body shapes, and it works in both casual and elevated fabrics when the pattern and hem sweep are controlled.
I still remember one buyer who only wanted minis for a summer drop. The traffic was good, but returns were high because customers felt exposed. After we added one clean midi A-line option, the reorder came first, and it stayed in the core line.
What hem length counts as “midi” for a midi A-line dress?
Many people use “midi” loosely. I do not. If I do not define it, sampling becomes messy, and buyers compare the wrong competitor products.
For a midi A-line dress, I usually define midi as a finished length that lands between the knee and the ankle, most often mid-calf. In tech packs, I lock it using HPS length and a body height reference, so the factory and buyer talk about the same midi every time.
How I define midi in production terms
- I use HPS (High Point Shoulder) to hem as the main length spec
- I add a body height reference like 165cm or 170cm
- I state if the hem should hit below knee, mid-calf, or high calf
A practical length guideline I use
| Midi target | Visual hem position | Common use |
|---|---|---|
| Low midi | Just below knee | Workwear, daily |
| True midi | Mid-calf | Most stable seller |
| Long midi | High calf (near ankle) | Modest, resort |
Where “midi” goes wrong in samples
- The skirt is too wide, so the hem looks longer than it is
- The waist seam drops, so the body looks shorter
- The fabric is heavy, so the hem pulls down and changes the hit point
How does the A-line shape behave at midi length compared with mini or maxi?
Midi length changes everything. The same A-line flare can look playful in a mini and heavy in a maxi. So I treat midi as its own silhouette problem, not just “add length.”
At midi length, the A-line needs controlled flare and clean drape, or it can look bulky and shorten the body. Compared with mini, midi needs a smoother waist-to-hip line. Compared with maxi, midi needs a lighter visual finish, so the hem and panel shape must stay sharp.
The core geometry I think about
- Mini A-line: flare can be wider because the hem is short
- Midi A-line: flare must be balanced because the hem sits at the leg’s widest visual zone
- Maxi A-line: flare can be larger, but weight and drape must be managed
What I adjust in pattern making for midi A-line
- Hem sweep: I reduce extra sweep if the fabric is thick
- Skirt panels: I use fewer panels for cleaner lines, more panels for flow
- Darting: I keep darts clean to avoid “triangle” shaping at the waist
- Waist placement: I often keep it natural waist to avoid stumpiness
A quick silhouette risk table
| Length | Main visual risk | Fix I use |
|---|---|---|
| Mini | flips up / too wide swing | reduce sweep, add hem weight |
| Midi | looks bulky / shortens leg | refine flare, choose lighter fabric |
| Maxi | drags / feels heavy | reduce weight, improve drape, add slit |
Which body shapes and customer profiles suit a midi A-line dress best?
Most buyers want one style that fits “everyone.” That is not real. But midi A-line comes close if the neckline and waist are chosen with intent.
A midi A-line dress suits many body shapes because the flare skims hips and thighs, and the hem creates a balanced line. It works best when I match neckline and waist placement to the customer’s proportions, then I tune the skirt flare so it moves but does not add bulk.
What the midi A-line does well
- It hides hip fit problems better than pencil shapes
- It supports modest styling without looking “matronly”
- It photographs well when the fabric drapes cleanly
How I match it to proportions
- Shorter height customers: I prefer a slightly higher waist and a slimmer sweep
- Fuller bust customers: I prefer V-neck, wrap, or square neck with good darts
- Curvier hips: I keep the skirt flare smooth from upper hip, no sudden widen
Easy add-on styling options buyers like
- Belt loops + self belt for adjustable waist shaping
- Side slit for walking ease and leg line
- Functional pockets for casual price tiers
This is where many “midi A-line dress” programs fail. Midi length amplifies fabric flaws. If the fabric creases badly or hangs dead, the dress looks cheap even if the pattern is fine.
For a premium midi A-line dress, I pick fabrics with controlled drape and stable recovery, like crepe, viscose blends with structure, cotton poplin for crisp looks, and satin with proper lining for dressy drops. I avoid overly stiff or overly clingy fabrics that exaggerate bulk or show every line.
Fabric selection rules I follow
- If the fabric is stiff, I reduce hem sweep and add shaping seams
- If the fabric is soft, I add structure in the bodice with lining or fusing
- If the fabric is thin and light, I plan lining early to protect quality
Fabric-to-style pairing that works
| Midi A-line direction | Fabric options | Notes |
|---|---|---|
| Clean workwear | Cotton poplin, stretch poplin | crisp silhouette, easy pressing |
| Soft casual | Viscose, challis, crepe | good movement, good photos |
| Event / elevated | Satin + lining, jacquard | needs strong bodice support |
| Transitional | Ponte knit, heavier crepe | stable shape, fewer wrinkles |
Fabric mistakes I stop before sampling
- Heavy twill with a wide sweep skirt
- Thin rayon with no lining in light colors
- Satin with poor face quality that snags in packing
- Knit with weak recovery that grows at the waist
What design details make a midi A-line dress sell better online?
Online selling is visual first. If the dress does not show movement, waist shape, and fabric quality in two seconds, the customer scrolls away.
The best-selling midi A-line dresses online have a clear waist, a clean neckline, and a skirt that moves in video without ballooning. I add details like slit, belt, or panels only when they support the silhouette, and I keep trims simple so the product reads premium in photos.
Details that lift conversion
- Defined waist seam or subtle waist shaping
- Side slit for walking video and better leg line
- Slightly wider straps or supportive sleeves for comfort claims
- Pockets for casual tiers, but not for sleek eventwear
Details that hurt conversion
- Too much gathering at waist in thick fabric
- Over-decorated ruffles that hide the A-line
- Poor button spacing in shirt midi styles
- Wide hems that crease and look wavy
My “photo test” checklist for sampling
- Front: waist looks clear, skirt falls clean
- Side: no belly pull lines, no hip drag
- Back: zipper lies flat, no seat strain
- Movement: skirt swings, hem stays even
What are the key pattern, grading, and QC points for a midi A-line dress in bulk production?
Midi A-line looks easy, but the long hem and flare make small errors obvious. If grading is sloppy, the sweep becomes uneven across sizes. Then fit complaints arrive fast.
Key bulk risks for a midi A-line dress are uneven hem, twisting seams, inconsistent skirt sweep across sizes, and unstable waist seams. I control them with clear tolerance specs, shrinkage testing, hem measurement checks after wash, and inline QC focused on seam balance and drape.
The pattern points I lock early
- Waist seam stability and stretch control
- Skirt panel symmetry and grain direction
- Hem sweep target by size, not just one size
How I grade midi A-line without destroying the shape
- I increase sweep gradually, not by a flat number for every size
- I check side seam length balance after grading
- I keep waist-to-hip shaping consistent so the skirt starts flaring at the same point
QC checkpoints that prevent most returns
- Hem evenness check on a hanger and on a dress form
- Seam twist check after steaming
- Shrinkage test for viscose and blends before bulk cutting
- Color shading check for satin lots
A simple QC table I use with factories
| Checkpoint | When | Why it matters |
|---|---|---|
| Shrinkage + wash test | Before bulk | stops length drift |
| First-article measurement | Start of line | locks grading reality |
| Inline hem check | Mid production | prevents wavy hem batches |
| Final press + hang test | Pre-pack | confirms drape and balance |
Maxi A-Line Dress
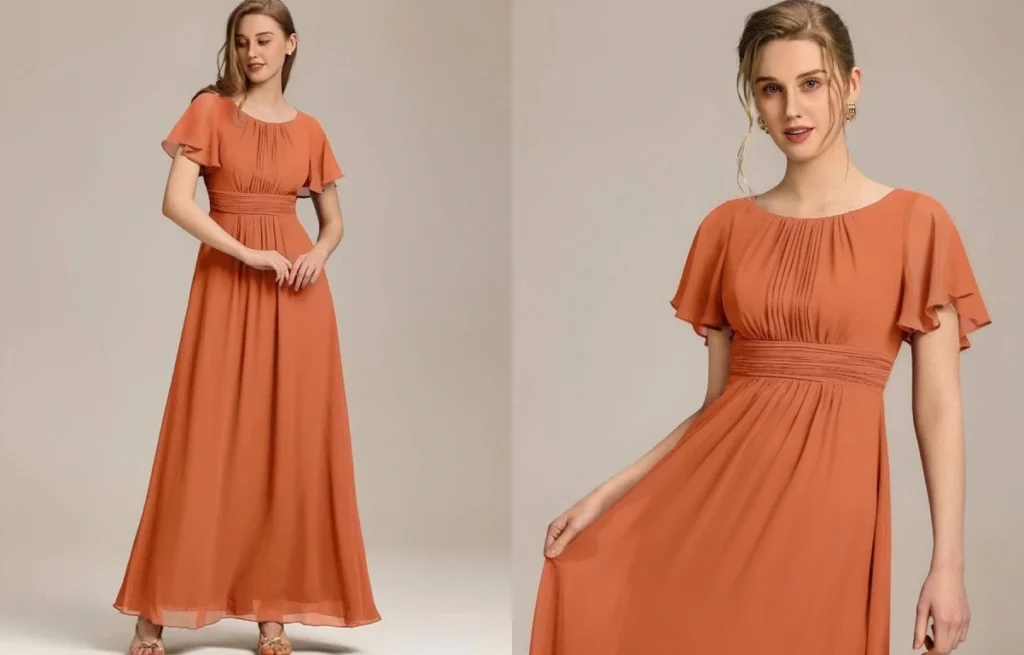
Maxi A-line dresses look “easy,” but they often fail in real selling. The skirt can feel heavy, the hem can drag, and the fit can turn sloppy fast. When that happens, returns rise and the whole drop loses momentum.
A maxi A-line dress is a full-length dress that stays fitted through the bodice and flares gradually to the hem. I make it sell by controlling skirt volume, fabric drape, and hem sweep, then I lock the waist placement and lining plan so the dress moves well, photographs clean, and stays consistent on reorders.
I once rushed a maxi sample for a buyer’s resort launch. The photos were pretty, but the skirt twisted after steaming and the hem looked uneven in video. Since then, I treat maxi A-line dresses like a technical product, not a “basic.”
How do I choose the right fabric for a maxi A-line dress without making it look heavy?
A maxi length adds a lot of fabric. So a small fabric mistake becomes a big visual problem. I always start from drape and weight, then I check how it behaves after wash and steam.
I choose fabric for a maxi A-line dress by matching drape to the amount of skirt volume. I use lighter, fluid fabrics for fuller skirts and medium-weight fabrics for cleaner, narrower A-lines. I also test shrinkage, skew, and color consistency before I approve bulk fabric.
I start with these fabric questions
- Does the fabric fall or does it stand?
- Does it show shine under flash?
- Does it cling on legs when walking?
- Does it crease after packing?
Fabric direction by silhouette goal
| Maxi A-line goal | Best fabric options | What it looks like | Main risk |
|---|---|---|---|
| Soft flowy resort | Viscose challis, rayon, chiffon (lined) | Movement and swing | Shrinkage + wrinkling |
| Clean modern premium | Crepe, crepe satin, textured poly | Smooth and neat lines | Static + seam puckering |
| Structured “statement” | Jacquard, poplin, taffeta | Shape and volume | Heavy feel + loud rustle |
| Cold weather maxi | Knit ponte, sweater knit | Warm and stable | Stretch growth |
Maxi skirts carry weight at the bottom. So I calculate the “drag risk” with three simple checks.
- I hold the skirt panel on grain and see if it drops straight
- I hang the sample for 24 hours and recheck length
- I steam it and see if the hem waves or twists
The tests I run before bulk
- Wash test for shrinkage and spirality
- Rub test for pilling and color transfer
- Shade band check across rolls
- Lining compatibility test for static
How do skirt volume and pattern choices change the fit and sell-through of a maxi A-line dress?
Maxi A-line is not just “long A-line.” The pattern controls walking comfort, silhouette, and photos. I choose pattern structure based on how the buyer markets the dress.
Skirt volume and panel structure decide if the maxi A-line dress looks premium or bulky. I use fewer panels for a cleaner look, more panels for better swing, and I control hem sweep so it moves well without feeling like a curtain. I also balance waist fit with hip ease to avoid pulling lines.
The 3 main maxi A-line pattern routes I use
| Pattern route | Construction | Best for | Risk |
|---|---|---|---|
| 2-panel (front/back) | simplest | minimal clean styles | limited swing, shows wrinkles |
| 4–6 panel A-line | shaped panels | premium everyday maxi | more seams, more QC points |
| Gored / multi-panel | many narrow panels | dramatic swing | seam twisting if grain is off |
Hem sweep is the real “volume number”
I do not guess hem sweep. I set it based on target customer and channel.
- For boutique daily wear: moderate sweep for movement, lower return risk
- For resort content: bigger sweep for dramatic video and photos
- For formal: controlled sweep so it looks expensive, not messy
Walking comfort is a sales feature
Maxi dresses fail when customers cannot walk fast or climb stairs.
- I add a side slit or back slit when the sweep is narrow
- I avoid high slits if the buyer sells to conservative markets
- I test steps: normal walk, quick walk, stairs, sitting
Grainline errors destroy maxi skirts
A long skirt shows grain issues more than any mini dress.
- Off-grain panels cause twisting after steam
- Mixed grain direction causes uneven drape
- Poor marker planning causes shade differences across panels
Where should the waist sit on a maxi A-line dress for different body types and markets?
A maxi length can make the body look longer or shorter. Waist placement decides which one happens. I always choose waist placement with the buyer’s customer profile in mind.
Natural waist placement is the safest for a maxi A-line dress because it balances proportions and supports most bust and hip shapes. Empire waist works well for comfort and maternity-friendly fit, while drop waist is trend-focused and needs strong styling and model choice to avoid a “low and heavy” look.
Waist placement options and what they do
| Waist placement | Visual effect | Best customer need | Main risk |
|---|---|---|---|
| Empire | lengthens legs, softer fit | comfort, bump-friendly | bust fit errors show fast |
| Natural waist | balanced, classic | widest audience | needs precise waist grading |
| High waist | “snatched” look | fashion-forward | can feel tight when sitting |
| Drop waist | long torso vibe | trend capsules | can look heavy on petite |
I decide waist placement with 4 checks
- Customer height range (petite vs tall)
- Bust fullness (cup support needed or not)
- Occasion (work, resort, event)
- Styling plan (belted, layered, minimal)
Bust fit is tied to waist placement
If I move the waist up, I must rework the bust shaping.
- I adjust dart point and dart intake
- I often add lining or light fusing for stability
- I add hidden snaps for wrap styles
What details make a maxi A-line dress look expensive in photos and reduce returns?
Most wholesale buyers sell with photos and short videos. Maxi dresses can look cheap fast if the hem, lining, or closures are wrong. I build “photo-proof” details into the spec.
A maxi A-line dress looks expensive when the hem is even, the skirt hangs straight, and the bodice stays stable. I reduce returns by using the right lining plan, adding structure where needed, controlling zipper and seam quality, and setting clear tolerances for length and sweep.
- Lining plan that matches fabric weight
- Invisible zipper that lies flat, no ripples
- Clean neckline finish, no rolling edge
- Stable waist seam with correct stay tape if needed
- Hem finish that matches fabric (blind hem, baby hem, wide hem)
Lining strategy that actually works
| Outer fabric | Lining approach | Why it helps |
|---|---|---|
| Chiffon / sheer | full lining or skirt lining | avoids see-through + better drape |
| Satin | anti-static lining | improves movement and comfort |
| Viscose | lightweight lining or partial | reduces cling, controls transparency |
| Jacquard | selective lining | keeps shape without overheating |
Tolerances I recommend for bulk control
- Dress length tolerance: tight enough to avoid “uneven hem” complaints
- Hem sweep tolerance: controlled so reorders match content
- Waist measurement tolerance: strict to protect fit
Common return triggers I remove early
- Hem touching the floor in standard height sizes
- Bodice sliding down in strapless or low-back styles
- Static cling in satin and poly blends
- Rough seams at side slit
How do I plan MOQ and production for maxi A-line dress orders without missing the trend window?
Maxi A-line dresses use more fabric and more time for hemming and pressing. If the plan is not tight, lead time slips. I plan sampling and bulk like a calendar project.
I protect the trend window by locking fabric early, standardizing core blocks, and using a repeatable measurement spec for maxi length. I also plan the order in color groups to reduce shade issues, and I schedule extra time for hanging, hemming, and final pressing.
My production plan for maxi A-line
- I reuse a proven bodice block when possible
- I freeze skirt panel count and hem sweep after approval
- I book fabric and lining together to avoid mismatch
- I add time for hang test before final hem
Cost drivers buyers forget
- Fabric consumption jumps fast with larger sweep
- Lining adds both material and sewing time
- Hem finishing and pressing take real labor
- Zippers and structure add QC time
A simple bulk risk table
| Risk | What causes it | How I control it |
|---|---|---|
| Uneven hem | hang + steam changes | hang test, hem after rest |
| Twisting seams | grainline errors | strict cutting checks |
| Shade variation | long panels show tone | color grouping, roll control |
| Fit inconsistency | waist + length grading | locked block, tight spec |
Wrap A-Line Dress
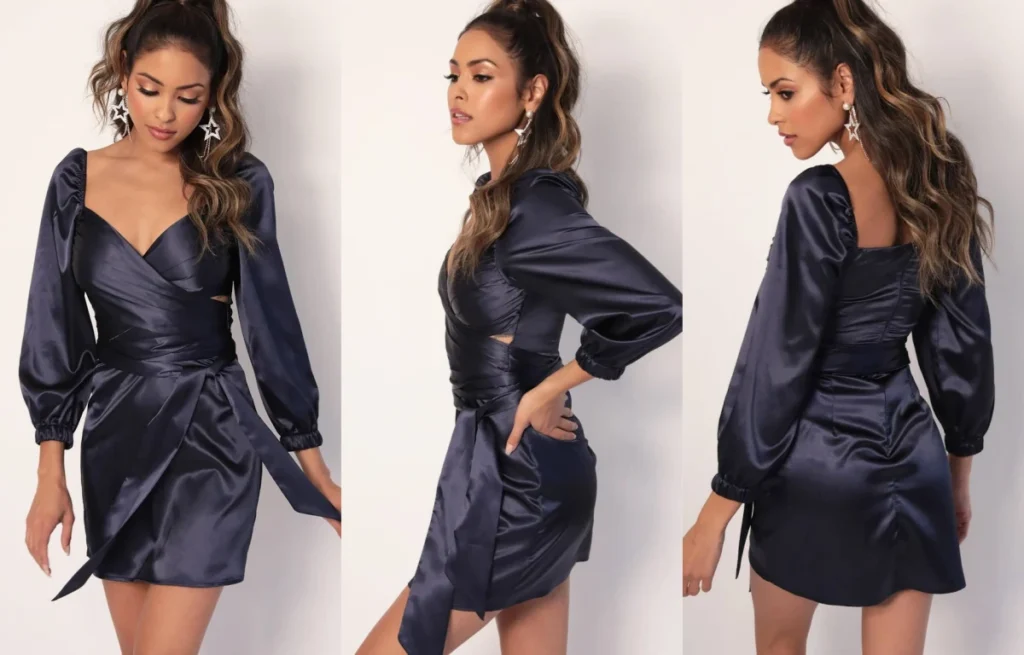
Many buyers treat wrap A-line dresses as a “basic” item, so they rush it. Then the fit gaps at the bust, the skirt twists, and returns go up. I see this most when the pattern is not built for real bodies, or the fabric choice is wrong.
A wrap A-line dress is an A-line silhouette with a true wrap front that crosses over the bust and ties at the waist to create an adjustable fit. It sells well because it flatters many body shapes, supports easy sizing, and works across casual to eventwear when the pattern balance, neckline coverage, and fabric drape are right.
I learned this the hard way on an early wrap order. The sample looked great on one fit model. In bulk, the wrap opening behaved differently on different bust sizes. Since then, I treat the wrap front as a “functional closure,” not just a design detail.
What is the difference between a true wrap A-line dress and a faux-wrap A-line dress?
A lot of buyers ask for “wrap” when they really want the look, not the adjustment. I always clarify this first because it changes pattern, cost, and QC risk.
A true wrap A-line dress opens and closes with a wrap overlap and tie, so the wearer can adjust the waist and neckline. A faux-wrap A-line dress looks like a wrap but is fixed with stitching, a hidden zipper, or an elastic waist, so it is easier to control in production but offers less fit flexibility.
Where the differences show up in real sales
- True wrap: better for wider size ranges and repeat customers who want adjustability
- Faux-wrap: better for cleaner photos, fewer “wardrobe malfunction” complaints, and faster production
Quick sourcing decision table
| Point | True Wrap A-Line | Faux-Wrap A-Line |
|---|---|---|
| Fit flexibility | High | Medium |
| Bust gaping risk | Higher | Lower |
| Production control | Medium | High |
| Returns risk | Medium-High | Low-Medium |
| Best use | Everyday + maternity-friendly | Office + eventwear capsules |
What I ask a buyer before sampling
- Does your customer value adjustability or clean structure?
- Do you sell more to fuller bust or smaller bust?
- Do you want a side tie, internal button, or internal snap?
How do I stop bust gaping on a wrap A-line dress without ruining the look?
This is the number one problem for wrap A-line. If I solve this well, the style becomes a stable reorder item. If I ignore it, it becomes a return factory.
I reduce bust gaping by increasing wrap overlap, adding a hidden snap or internal button at the bust point, using a more stable neckline edge finish, and adjusting dart or princess seam shaping so the wrap sits on the body instead of floating.
Why bust gaping happens
- The wrap overlap is too small for the size range
- The neckline angle is too open for fuller bust
- The fabric has low recovery, so it relaxes after wearing
- The tie point is placed too high or too low, pulling the front off balance
Pattern fixes I use most often
1) Overlap control
- I increase overlap width at the bust level
- I keep overlap consistent across grading, not only at size S
2) Neckline stabilization
- I add stay tape or clear elastic inside the neckline seam
- I use a facing or narrow binding that does not stretch out
3) Shaping for real bodies
- I add bust darts, or I use princess seams for better contour
- I check the bust apex position for the target market
4) Functional closures
- I add hidden snaps at the wrap edge
- I add internal button + buttonhole for heavier fabrics
A practical “anti-gap” checklist for sampling
- I test the dress on 2 bust sizes, not one
- I ask the model to sit, reach, and walk fast
- I check if the wrap edge flips during movement
- I check neckline after 30 minutes of wear
Which fabrics work best for a wrap A-line dress, and which fabrics create problems?
Fabric decides how the wrap behaves over time. Some fabrics look perfect on day one and fail after two wears. I focus on drape, friction, and recovery, not just the fabric name.
The best fabrics for wrap A-line dresses are medium-drape woven fabrics with stable recovery, like crepe, textured polyester, viscose challis (with controlled shrinkage), and some satin crepes with lining. Fabrics that create problems include very slippery satins, overly stiff poplins, and stretch knits with weak recovery, because they cause shifting, gaping, or twisting.
Fabric behavior that matters for wrap
- Drape: controls how the skirt falls and how the front lays
- Friction: controls whether the wrap slides open
- Recovery: controls whether neckline stretches out
- Weight: controls whether the tie and waist seam sag
Fabric match table I use in development
| Fabric Direction | Best Use Case | Main Risk | My Fix |
|---|---|---|---|
| Crepe (poly/viscose) | Daily wear, office | Edge stretching | Stay tape + facing |
| Viscose challis | Summer casual | Shrinkage, seam slippage | Pre-shrink test + stitch spec |
| Satin / satin crepe | Holiday, event | Slippery wrap opening | Lining + hidden snap |
| Poplin / twill | Shirt-wrap hybrid | Stiff overlap bulk | Reduce overlap thickness |
| Rib knit / jersey | Comfort wrap | Neckline growth | Elastic stabilization |
Common fabric mistakes I stop early
- Choosing satin without lining for light colors
- Choosing rayon without shrinkage control plan
- Using too light fabric with heavy tie ends
- Ignoring seam slippage on loose weaves
Where should the tie placement be on a wrap A-line dress for the best fit?
Tie placement looks minor, but it controls balance. It decides whether the skirt hangs straight or twists. It also decides if the wearer feels “pulled” on one side.
The best tie placement is usually at the natural waist, slightly to the side seam, with an internal anchor point that holds the underlap in place. I adjust tie height based on torso length and bust size, then I test if the waistline stays level during walking and sitting.
The three tie systems I use
1) Side tie with internal hole
- Clean look outside
- Better control for bulk production
2) Double tie with inner + outer ties
- Most stable for larger bust
- Slightly more sewing time
3) Wrap belt through loops
- Styling flexibility
- More movement risk if loops are weak
Tie placement testing steps
- I check skirt side seams for twisting
- I check if the waist seam stays horizontal
- I check if the tie drags the neckline open
- I check if the tie knot sits in a flattering place in photos
How do I choose the right wrap A-line dress details for different occasions?
Wrap A-line can be casual, workwear, or eventwear. The same base can sell across markets if I control neckline depth, sleeve choice, and skirt volume.
I choose wrap A-line details by setting one clear occasion first, then I match neckline coverage, sleeve type, and hem length to that use. For casual, I keep it easy and breathable. For workwear, I add coverage and stability. For eventwear, I use premium fabric and internal support.
Occasion mapping I use for buyers like Emily
| Occasion | Neckline | Sleeve | Hem | Fabric |
|---|---|---|---|---|
| Casual summer | Moderate V | Short/ruffle | Mini/Midi | Viscose challis |
| Office | Higher V or modest | 3/4 | Midi | Crepe |
| Resort | Open V | Sleeveless | Maxi | Lightweight crepe |
| Holiday | Deep V with control | Long | Midi/Maxi | Satin crepe + lining |
Detail choices that lift perceived value
- Clean topstitch around neckline and waist
- Stable waist seam with good pressing
- Lining in bodice for better shape
- Covered buttons or metal trims only when they match brand tone
What are the main production and QC risks for wrap A-line dresses in bulk?
Wrap A-line is not hard, but it is sensitive. Small errors show fast, especially in grading. This is why I always write tighter QC points for wrap styles.
The main risks are inconsistent wrap overlap, neckline stretching, tie placement mismatch, seam slippage in soft fabrics, and size grading that increases gaping in larger sizes. I manage them with locked overlap specs, neckline stabilization, standard tie templates, shrinkage control, and inline QC focused on wrap edges and waist balance.
Critical QC points I include in tech packs
- Wrap overlap measurement at bust and waist
- Underlap anchor position and reinforcement
- Neckline edge stretch tolerance
- Tie length and position tolerance
- Stitch type and SPI at stress seams
Inline QC checks that catch most issues early
- One quick wear test per size set on the line sample
- Flat measurement of overlap on finished garment
- Visual check for skirt twisting on hanger
- Pull test on tie attachment and belt loops
A simple wrap A-line risk matrix
| Risk | Why it happens | Impact | Control |
|---|---|---|---|
| Bust gaping | Low overlap, wrong shaping | High returns | Snap + shaping |
| Twisting skirt | Tie off-balance | Medium returns | Tie template |
| Neckline growth | Weak stabilization | High complaints | Stay tape |
| Seam slippage | Loose weave | Quality failure | Stitch spec |
| Shrinkage | Uncontrolled viscose | Fit shift | Pre-shrink test |
Button-Front A-Line Dress
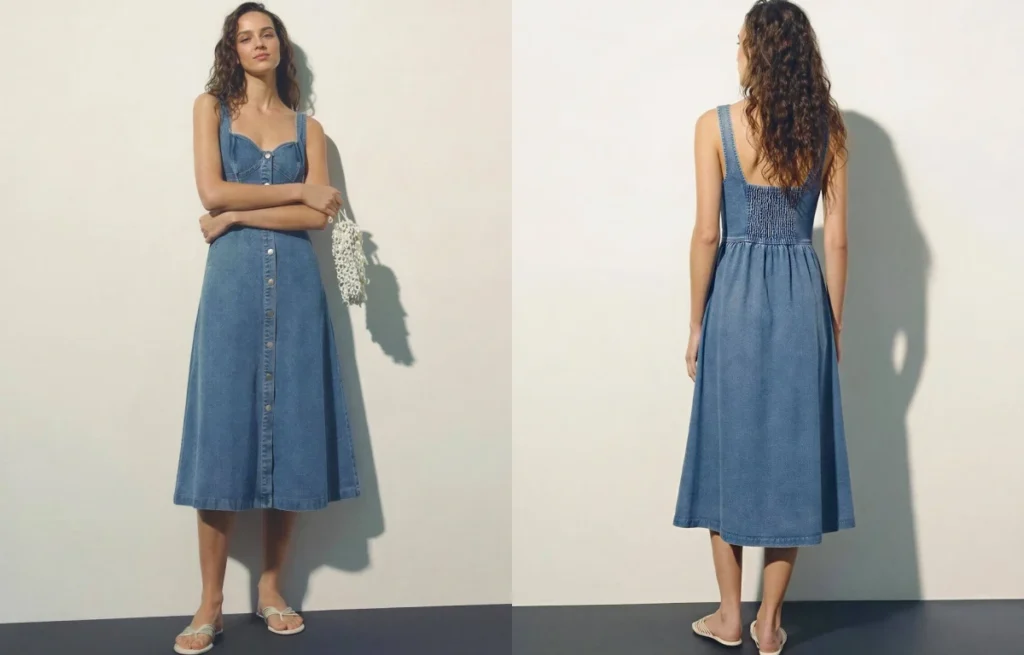
Many buyers pick a button-front A-line because it looks “easy.” Then the sample arrives, and the placket waves, the bust gaps, or the buttons pull. The style still looks cute, but it does not feel premium, so returns go up.
A button-front A-line dress sells well when the placket stays flat, the bust does not gap, and the skirt keeps a clean A-line swing. I develop it by controlling button spacing, adding hidden structure in the placket, balancing the bodice ease, and matching fabric weight to the skirt flare so the front opening never distorts.
I learned this the hard way on an early bulk order. The design was fine. The buttons were fine. The placket construction was not. After that, I treat the placket like a “support system,” not just a decoration.
What is a Button-Front A-Line Dress, and why is it different from a normal A-line?
A lot of people think “button-front” is only a detail. I do not see it that way. A full front opening changes the whole tension map of the dress.
A button-front A-line dress is an A-line silhouette with a functional button placket on the front bodice, skirt, or both. It is different because the placket becomes a structural seam that must resist pull at the bust and waist while still laying flat, so pattern, fabric, and construction all matter more than a closed-front A-line.
- Shirt-style A-line with collar + full placket
- Sweetheart or square neck A-line with center-front buttons
- Pinafore button-front (often thicker fabric, layered styling)
- Midi button-front with slit opening at the bottom
Where it usually fails
- Bust area: buttons pull and create “smiles”
- Waist area: placket ripples because the skirt flare pulls forward
- Hem area: placket twists and the center front hangs uneven
This is the first decision I lock. If the placket choice is wrong, I will chase problems all through sampling.
The best placket type depends on fabric weight and the target price point. For most mid-range wholesale button-front A-line dresses, a fused grown-on placket or a separate placket with clean edge topstitch gives the flattest look and the best production stability.
Common placket constructions
- Grown-on (self) placket: placket is folded from the front panel
- Separate placket: a separate strip is attached to the front edge
- Facing + button extension: cleaner inside, more steps and cost
- Hidden placket: premium look, but higher risk and higher cost
How I pick quickly
- Light fabric (viscose, challis): separate placket + light fusing
- Medium fabric (poplin, crepe): grown-on placket + stable fusing
- Heavy fabric (twill, denim): separate placket, reduce bulk, adjust SPI
My cost vs stability table
| Placket Type | Visual Look | Production Stability | Cost Level | Best Use |
|---|---|---|---|---|
| Grown-on | Clean, simple | High | Low | Poplin, crepe |
| Separate | Sharp, controlled | High | Medium | Light or heavy fabrics |
| Facing + extension | Premium inside | Medium | High | Higher-tier styles |
| Hidden | Minimal front | Low-Med | High | Premium only, careful QC |
This is the biggest reason buyers reject samples. A button-front A-line can look perfect on a hanger and still fail on a real body.
I prevent bust gaping by controlling bust ease, adding the right shaping (darts or princess seams), using correct button spacing, and adding one hidden security point at the highest tension area. I also test the dress on at least two bust sizes before I approve it.
- Not enough bust shaping, so the body pushes the placket open
- Button spacing is too wide in the bust zone
- Placket fusing is too weak, so the edge collapses
- Wrong button size for the fabric thickness
My practical pattern fixes
- I add or adjust bust darts, not just add width
- I shift the bust point to match the target customer
- I reduce center-front edge stretch by correcting grain placement
- I avoid too much waist suppression if the customer is curvy
- I treat bust level as a “high tension zone”
- I reduce spacing in that zone
- I add one hidden snap or hidden button between two visible buttons
Quick tech-pack notes that save time
- “No gaping allowed at bust. Add hidden snap at bust point.”
- “Button spacing at bust zone: tighter than the rest.”
- “Placket must stay flat after steam and after 10 wear pulls.”
How do fabric choice and skirt flare affect the front opening?
This is where many teams miss the engineering part. A-line flare adds forward pull, and the buttons become the weak point.
Fabric and flare decide how much the skirt pulls on the center front. Fluid fabrics reduce distortion but can ripple, while crisp fabrics hold shape but can create placket waves if fusing is wrong. I match flare degree with fabric weight, then I stabilize the center front so the opening stays straight.
What I look at first
- Fabric weight (GSM) and drape
- Stretch direction (even “no stretch” fabrics have bias give)
- Recovery after hang and after steam
- Shrinkage behavior, especially for viscose blends
| Fabric Direction | Result on Button Front | Best Flare Level | Notes |
|---|---|---|---|
| Viscose/challis | Soft, feminine | Moderate | Needs fusing to stop ripple |
| Cotton poplin | Crisp, clean | Moderate to strong | Great seller, stable photos |
| Linen blend | Natural texture | Moderate | Shrink + wrinkling must be controlled |
| Denim/twill | Strong shape | Low to moderate | Bulk at placket needs trimming |
Construction moves that reduce distortion
- Use fusing that matches fabric weight, not “one fusing for all”
- Add stay tape on center-front edge if fabric is soft
- Align topstitch direction and keep SPI consistent
- Control seam allowances at waist join to avoid bulges
Buttons are small, but they signal quality fast. If they look cheap, the whole dress looks cheap.
I spec buttons by thickness, finish, and wash durability, then I match buttonhole style and topstitch thread to the brand look. I also choose the button size based on fabric thickness, because wrong size makes the placket buckle or look out of scale.
- Button material: resin for most fashion, corozo for premium vibe, metal for denim
- Button size: smaller for light fabrics, larger for denim and heavy twill
- Buttonhole type: keyhole for thicker buttons, straight for light/medium
- Thread: match tone for clean look, contrast for denim story
My minimum durability checks
- Button pull test on random pieces
- Buttonhole fray check after wash
- Colorfastness for dyed buttons
- Heat/steam resistance if buyer steams for content shoots
Stitch details that change the visual grade
- Topstitch: 1 row for clean, 2 rows for workwear
- Edge distance: keep it consistent or it looks cheap
- Thread thickness: heavier thread can look premium but shows mistakes
What are the most common production and QC risks for Button-Front A-Line Dresses?
This style looks simple on paper, but production errors show right on the center front. I treat it as a “high-visibility” garment.
The most common risks are placket waving, uneven button spacing, skipped buttonholes, twisting center front, and inconsistent length after wash. I avoid them with clear placket construction specs, button placement templates, inline checks on buttonholes, and final hang tests before packing.
My high-risk points checklist
- Center front line must be perfectly straight on table and on hanger
- Waist join at center front must not create a step
- Button spacing must match spec within tolerance
- Buttonholes must be clean with no loose threads
- Hem must be level with buttons closed and also with buttons open
The QC flow I like for bulk
- First articles: check placket flatness + button template
- Inline: check buttonholes every size run
- Midline: check bust gaping on fitting form
- Final: hang test 12 hours, then re-check center front
A simple tolerance table I use with buyers
| Point | What I Check | Typical Tolerance |
|---|---|---|
| Button spacing | Center-to-center | Tight control |
| Placket width | Left vs right | Very tight |
| CF straightness | Twist/wave | No visible wave |
| Hem level | Left vs right | Small tolerance |
Shirt A-Line Dress
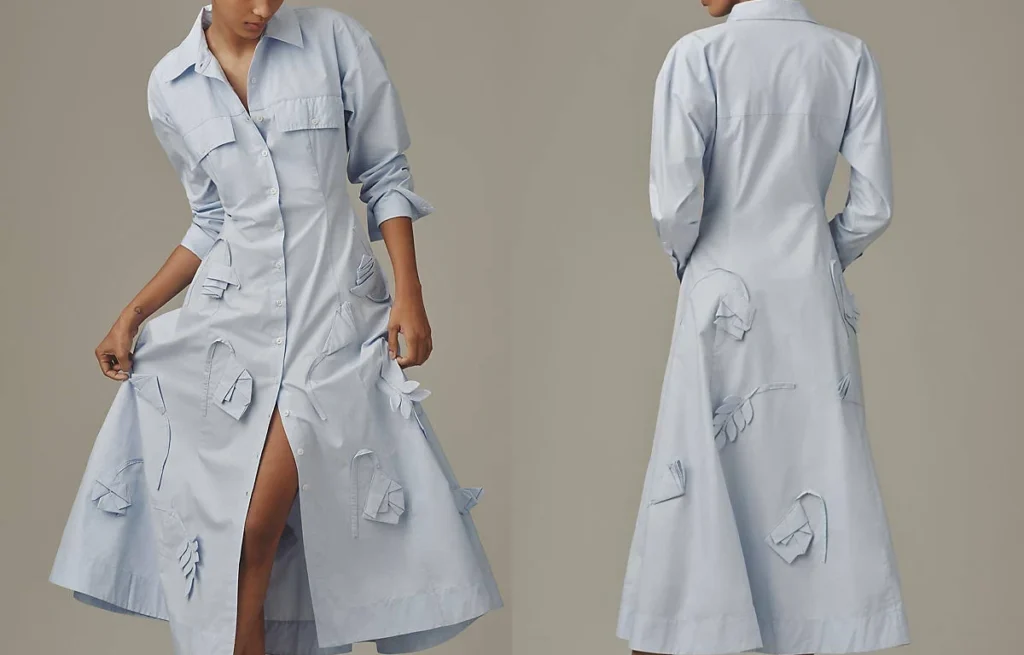
Many buyers pick a “shirt dress” that looks good on a hanger, then it fails on the body. The bust pulls, the placket waves, and the waist looks flat. Then the reviews drop, even if the fabric is fine.
A shirt A-line dress is a collared, button-front dress with a structured shirt-style bodice and an A-line skirt that flares from the waist or high hip. It sells well because it feels polished but easy, and it fits many customers when the placket, bust ease, and skirt sweep are balanced.
I learned this the hard way when I shipped a first run with button spacing that was too wide at the bust. The fabric was premium. The fit still looked cheap in photos. Now I treat the front placket and bust area as the “engine” of the whole style.
Transition paragraph.
What makes a shirt A-line dress different from a regular shirt dress?
A lot of buyers use these names as the same thing. I do not. I separate them when I plan a line, because the fit and the fabric rules change.
A shirt A-line dress has a clear A-line flare in the skirt, while a regular shirt dress can be straight, belted, or only slightly flared. If I want an A-line effect, I control skirt sweep, waist placement, and hem balance, not just add a belt.
The fastest way I identify it on a pattern
- The skirt has extra sweep from waist to hem
- The side seam angle opens out, not straight down
- The hem circumference is planned, not “whatever comes out”
Where buyers get confused
- A straight shirt dress with a belt is not an A-line skirt
- A trapeze shirt dress can look A-line, but the waist control is missing
- Some “A-line” listings are only A-line on small sizes, then they go straight on larger sizes
A simple comparison table
| Detail | Shirt A-line dress | Regular shirt dress |
|---|---|---|
| Skirt shape | True flare | Can be straight or slight flare |
| Fit focus | Waist + skirt swing | Shoulder + overall ease |
| Best selling angle | Polished + flattering | Easy + classic |
What are the most popular design variations of shirt A-line dress?
I like this category because I can build many SKUs without changing the base block too much. It also helps buyers hit different price points.
The most popular shirt A-line dress variations are: belted, fit-and-flare shirt A-line, tiered shirt A-line, puff-sleeve, sleeveless, denim shirt A-line, and midi/maxi shirt A-line. I choose the variation based on season, target price, and how much structure the fabric can hold.
High-volume variations I see in wholesale
- Belted shirt A-line: strong shape control, easy styling story
- Puff sleeve shirt A-line: trend lift without risky skirt changes
- Sleeveless shirt A-line: warm-weather best seller, needs clean armhole
- Tiered shirt A-line: boho angle, but watch bulk at tier seams
- Denim shirt A-line: higher AOV feel, but needs stronger sewing and topstitch
- Midi shirt A-line: safest length for repeat orders
How I map variations to seasons
- Spring: poplin belted midi, light twill, soft stripes
- Summer: sleeveless, short sleeve, lighter colors, thinner buttons
- Fall: long sleeve, denim or heavier twill, darker solids
- Holiday: satin-look shirt A-line is rare, but a “polished workwear” capsule can move well
How do I choose the best fabric for a shirt A-line dress?
Fabric decides if the collar stays sharp and if the skirt holds the A-line line. This is why I do not treat fabric as decoration. I treat it as structure.
For shirt A-line dresses, I usually pick poplin, twill, chambray, or denim for structure, and I use viscose blends only when I add internal support like fusings. I match fabric weight and drape to the skirt sweep, and I confirm shrinkage and button performance before bulk.
Fabric behavior rules I follow
- If the fabric is too soft, the placket waves and the collar collapses
- If the fabric is too stiff, the skirt “stands” and looks heavy
- If the fabric has low recovery, the elbow and waist bag out fast
Recommended fabric ranges by price tier
| Tier | Fabric picks | Why it works |
|---|---|---|
| Entry | Cotton poplin, poly-cotton | Stable, easy care, low risk |
| Mid | Tencel/chambray, cotton twill | Better drape, nicer handfeel |
| Premium | Denim with soft finish, high-count cotton | Better shape + better photos |
Shrinkage and color are not small details
- Poplin and twill can shrink and twist if the finishing is not stable
- Dark colors in cotton can fade faster if dye and wash are not controlled
- Denim needs shade control across lots, or reorders look different
What are the biggest fit and construction risks, and how do I control them?
This is the part where shirt A-line dresses win or lose. Customers forgive small skirt issues. They do not forgive bust pulling or button gaping.
The biggest risks are bust gaping, placket ripple, collar collapse, armhole gaping, and uneven hem swing. I control them with correct bust ease, button spacing rules, strong placket interfacing, balanced skirt panels, and strict measurement tolerance in the tech pack.
- I increase bust ease in larger sizes, but I do not increase shoulder too much
- I reduce button spacing across the bust area
- I add hidden snap or a modesty button when the brand allows it
Placket quality: where “cheap” shows first
- I use proper fusible interfacing for the fabric weight
- I set topstitch distance and SPI clearly
- I control placket width tolerance tightly, because small deviations look messy
- I match collar fusing stiffness to fabric
- I avoid over-stiff fusing on thin poplin, it can bubble after wash
- I test fold lines and pressing, because factories press differently
Waist seam and skirt balance: how the A-line looks intentional
- I choose a waist placement that matches the target customer
- I balance front and back skirt panels so the side seam does not twist
- I check hem sweep on size curve, not only on sample size
A practical measurement tolerance set I often use
| Point of measure | Typical tolerance | Why it matters |
|---|---|---|
| Bust | ±1.0 cm | Controls gaping and pull lines |
| Waist | ±1.0 cm | Controls shape and comfort |
| Shoulder | ±0.5 cm | Affects collar and sleeve hang |
| Sleeve bicep | ±0.8 cm | Comfort and movement |
| Dress length | ±1.0 cm | Visual balance and fit promise |
QC checklist I run in-line for this style
- Button pull test on placket
- Placket symmetry check left vs right
- Collar stand height consistency
- Armhole gaping on fitting form
- Hem measurement at 4 points for swing balance
How do I price, plan MOQ, and build a shirt A-line dress capsule for buyers like Emily?
This style is friendly for repeat orders, so I plan it like a “core with updates.” I do not chase only trends here. I protect the fit block.
I usually build a capsule with 1 core midi shirt A-line, 1 short sleeve seasonal color, 1 denim or twill upgrade, and 1 trend add-on like puff sleeve or tiered skirt. I set MOQ based on shared fabric and trims, so the buyer can test more colors without risking deep inventory.
My capsule structure that sells in e-commerce
- Core: solid color poplin midi, belt included
- Seasonal: stripe or soft pastel in the same fabric base
- Upgrade: denim/chambray for higher AOV
- Trend: puff sleeve or tiered skirt for content marketing
Trims and details that change cost fast
- Buttons: resin vs shell-look vs metal
- Belt hardware: simple D-ring vs covered buckle
- Topstitch thread: contrast thread increases sewing attention
- Pocket shape: patch pockets are cheaper than inseam pockets
A simple cost-control map
| Cost driver | How I control it | Trade-off |
|---|---|---|
| Too many button types | Use 1–2 buttons across colors | Less variety |
| Too many fabrics | Share one base fabric | Less “newness” |
| Complex sleeves | Keep sleeve head simple | Less dramatic shape |
| Heavy topstitch | Limit to key seams | Less denim vibe |
Tiered A-Line Dress
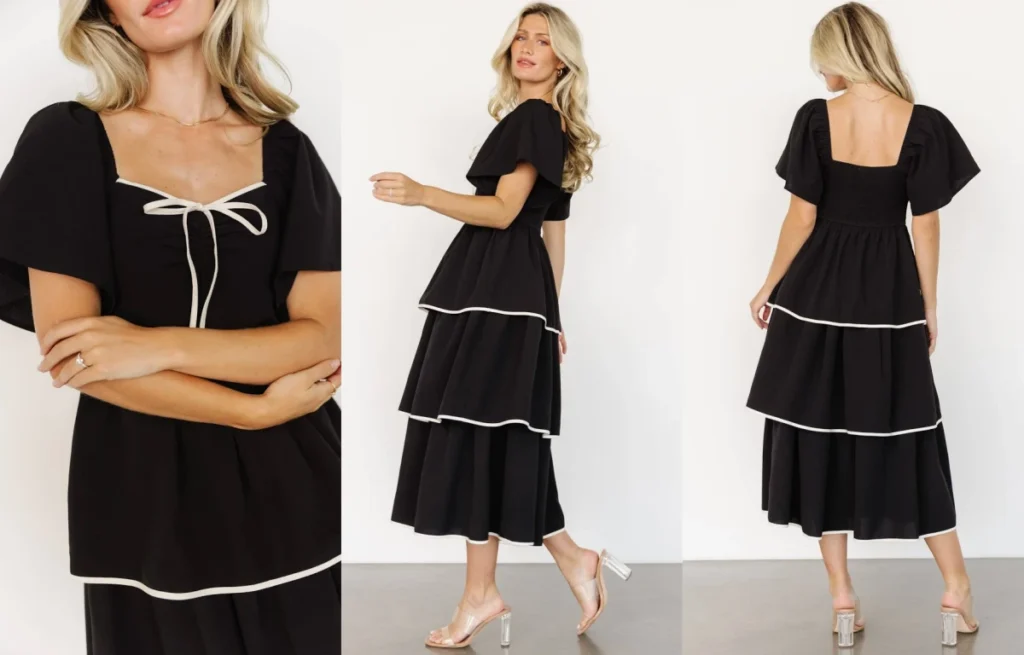
Many buyers add a tiered A-line dress because it looks easy and “boho.” But the wrong tier placement can make it bulky, and the wrong fabric can make it look cheap. Then the photos look fine, but customers complain when they wear it.
A tiered A-line dress is an A-line silhouette built with 2–5 horizontal tier seams that add controlled volume as the dress goes down. It sells well because it feels relaxed, it fits more body types, and it creates movement in photos. I choose it when I need an easy, high-conversion summer style with strong repeat potential.
I learned this the hard way when I placed the first tier too low on a midi dress. The skirt looked heavy at the calf, and the waist disappeared on many sizes. Since then, I treat tiering like pattern engineering, not decoration.
What makes a tiered A-line dress different from a regular A-line dress?
Tiering sounds like a small detail, but it changes the whole product. It changes how the skirt hangs, how the waist looks, and how the fabric behaves in bulk production.
A regular A-line dress usually uses one main skirt shape with darts or panels, while a tiered A-line dress uses multiple gathered or flared panels joined by tier seams. Those seams control volume, create a “floaty” look, and hide minor fit issues, but they also add risk in bulk if the gathers, shrinkage, or seam bulk are not controlled.
The practical difference I explain to buyers
- Regular A-line: clean lines, less seam bulk, easier pressing
- Tiered A-line: more movement, more “story,” more forgiving fit
- The tradeoff: tiered styles need tighter fabric and sewing control
A quick comparison table
| Item | Regular A-line | Tiered A-line |
|---|---|---|
| Visual effect | Minimal, clean | Boho, textured |
| Fit tolerance | Medium | High |
| Fabric sensitivity | Medium | High |
| Sewing time | Lower | Higher |
| Risk in bulk | Lower | Medium–High |
Where should the tiers sit to look flattering, not bulky?
This is the part most people skip. I never talk about “tiers” without talking about placement. Placement decides if the dress looks premium or like a costume.
The safest tier plan keeps the first tier above the widest part of the hip, then increases skirt volume gradually with each tier. For most women’s sizes, I place the first tier near high-hip level, then I use smaller gathers on the upper tier and larger gathers on the lower tiers to keep the waist visible.
The tier placement rules I use in sampling
- The first seam controls the whole silhouette
- Upper tiers must look light, not heavy
- Lower tiers can hold more volume, but they must not “balloon”
- The hem must have enough sweep to move, but not so much that it flips
A practical guide by dress length
| Dress length | Best first tier position | Common mistake |
|---|---|---|
| Mini | 6–10 cm below natural waist | First tier too low, makes legs look shorter |
| Midi | high hip to mid-hip | Tier hits widest hip, adds width |
| Maxi | high hip + softer increase | Too many tiers, looks heavy |
Size range changes tier math
When Emily buys for AU/US markets, she often needs a wider size range. This changes the tier approach.
- For sizes with fuller hip and tummy, I reduce gather ratio at the first tier
- I increase volume lower, where it reads as “flow,” not “width”
- I adjust tier seam length grading so the seams do not twist in larger sizes
How do I control gather ratio so the tiered A-line looks expensive?
Most “cheap-looking” tiered dresses fail here. The gather ratio is not just a number. It must match fabric thickness, stitch method, and the brand’s target look.
I control gather ratio by using smaller gather at upper tiers and larger gather at lower tiers, then I lock it with a clear spec in the tech pack. In most commercial tiered A-line dresses, I start around 1.3–1.6x on the first tier and go up to 1.6–2.2x on the lower tiers, but I always test it with the real fabric.
What changes gather ratio in real production
- Fabric weight: heavier fabric needs lower ratio
- Fabric friction: “grippy” cotton gathers differently than satin
- Stitch choice: two-row gathering stitch vs elastic thread
- Seam allowance: bigger allowance adds bulk and stiffness
The gather methods I choose and why
- Two-row gathering stitch: clean control, best for woven viscose and cotton
- Elastic thread at seam: faster, more comfort, but harder to keep consistent
- Ruffle foot / attachment: fast, but quality depends on operator skill
A tech pack mini table I often include
| Spec item | Upper tier | Lower tier |
|---|---|---|
| Gather ratio | lower | higher |
| Stitch | stable | stable + reinforced |
| Pressing | light press | steam only, avoid shine |
| QC focus | even gathers | seam strength + bulk |
Which fabrics work best for a tiered A-line dress?
Fabric is the silent “designer” of this style. Tier seams show everything. A fabric that looks fine on a flat A-line can look messy on tiers.
The best fabrics for a tiered A-line dress are light to midweight woven fabrics with soft drape and stable shrinkage, like viscose challis, cotton voile, cotton poplin (light), and some crepes. I avoid stiff, thick fabrics because tiers become bulky, and I avoid unstable fabrics because the seams twist after washing.
Fabric selection rules I follow
- I pick fabrics that gather without looking “cracked”
- I avoid fabrics that hold hard crease lines at tier seams
- I confirm shrinkage before bulk cutting, especially in viscose
Good vs risky fabric list
- Safer: viscose challis, cotton voile, light crepe, chiffon with lining
- Medium risk: poplin (must be light), linen blends (wrinkle story)
- Higher risk: heavy satin, thick twill, heavy denim, stiff taffeta
Lining decisions that change quality
- No lining: only if fabric is not sheer and seams feel soft
- Partial lining: bodice lined, skirt unlined for airflow
- Full lining: for light colors, but it adds cost and reduces movement
What are the biggest production and QC risks for tiered A-line dresses?
This is the part I care about most as a factory. Tiered A-line styles can run smoothly, but only if the process is designed for consistency.
The biggest risks are uneven gathers, tier seam twisting, bulky seam joins, shrinkage mismatch between tiers, and hem waviness. I reduce these risks by pre-shrinking or testing fabric lots, using notches and match points at every tier, standardizing gather stitch settings, and running inline QC on seam alignment and hem drop.
The failure points I watch on the line
- Operators gather “by eye,” and the left and right side do not match
- Tier seams stretch during sewing, then twist after wash
- Thread tension marks appear on lightweight fabrics
- Hem becomes wavy because lower tier is too full or too stretched
My QC checkpoints that actually prevent claims
- Measure tier seam circumference at 4 points, not just one
- Check gather distribution: front vs back must be balanced
- Hang test: hang 24 hours before final hemming for bias areas
- Wash test: confirm shrinkage and seam puckering
- Photo test: flash photo to catch sheerness and seam shadows
Bulk production process that keeps it stable
- Cut with strict ply limits to reduce distortion
- Mark tier match points with notches
- Gather with fixed stitch length and tension settings
- Sew tiers with consistent feed and minimal stretching
- Hang garments before hemming, then finish hem
How do I price and position a tiered A-line dress for wholesale buyers?
Emily often wants a “hero” tiered dress because it is easy to market. I still need to protect her margin and reduce returns, so I position it with clear value signals.
I price a tiered A-line dress based on tier count, fabric width usage, sewing minutes, and lining needs, then I position it as a comfort-trend piece with strong photo movement. For better margins, I keep tier count to 3 on minis and midis, and I use one signature detail like a lace trim or covered button, not five small extras.
Cost drivers I explain clearly
- Tier count increases sewing time and thread usage
- Full lining increases material and labor
- Ruffles and lace add trimming time and QC risk
- Yardage increases fast because lower tiers need wide panels
Simple positioning angles that work
- “Easy summer throw-on” for casual buyers
- “Boho event” for brunch and holiday edits
- “Bump-friendly” for comfort fit marketing
Denim A-Line Dress

Many buyers treat denim like a “safe” fabric, so they rush a denim A-line into production. Then the fit feels stiff, the wash looks cheap, and the reorder dies fast. I see this a lot when the pattern is fine, but the denim choice is wrong.
A denim A-line dress is an A-line silhouette made in denim or denim-like twill, usually with a structured drape and strong shape. The best-selling types focus on wearable fits: shirt denim A-line, button-front denim A-line, pinafore denim A-line, wrap-style denim A-line, and midi denim A-line, because they photograph well and hold shape after wash.
I still remember a buyer who wanted “soft like chambray” but also wanted the sharp A-line swing. The first sample looked flat. After I switched to a mid-weight denim with a little stretch and better wash control, the same pattern suddenly looked premium.
Which denim A-line dress types should I include in a wholesale collection?
Denim has a strong identity, so I do not need 20 versions at once. I only need the right mix. I usually build a range that covers daily wear, layering, and one fashion-forward option.
For wholesale, I usually include 6–8 core denim A-line dress types: classic denim A-line, shirt denim A-line, button-front denim A-line, pinafore denim A-line, belted denim A-line, and midi denim A-line, plus 1–2 trend options like corset-bodice denim A-line or tiered denim A-line.
Core denim A-line types that sell steadily
- Classic denim A-line dress: simple seams, low risk, easy repeat
- Shirt denim A-line dress: collar + placket, strong “utility” story
- Button-front denim A-line dress: center front buttons, vintage vibe
- Pinafore denim A-line dress: best for layering drops
- Belted denim A-line dress: clear waist, strong fit perception
- Midi denim A-line dress: broad market, higher AOV feel
Trend denim A-line types I use carefully
- Corset-bodice denim A-line: high conversion in photos, higher fit risk
- Tiered denim A-line: boho twist, but can look bulky in heavy denim
- Puff-sleeve denim A-line: romantic trend, sleeve cap QC is critical
A simple assortment grid I use for buyers like Emily
| Style Type | Target Customer Use | Best Wash Direction | Risk Level |
|---|---|---|---|
| Shirt denim A-line | daily, work-casual | mid blue, stone wash | Medium (placket/bust) |
| Button-front denim A-line | casual, vintage | light blue, acid wash | Medium (button gaps) |
| Pinafore denim A-line | layering, fall | dark indigo, rinse | Low (easy fit) |
| Belted denim A-line | “snatched waist” | mid/dark, clean wash | Low-Med (belt loops) |
| Corset denim A-line | party, trend | clean dark, coated look | High (support/fit) |
My rule to avoid style overlap
- I only keep one button-front option
- I only keep one belted option
- I pick one hero wash for the whole drop
- I choose lengths as a set: mini + midi, or midi + maxi, not all three
How do denim weight, stretch, and wash change the A-line silhouette?
This is where most buyers lose money. Denim is not “just denim.” The weight, the stretch, and the wash decide how the A-line holds shape, how it feels on body, and how it looks online.
Denim weight controls structure, stretch controls comfort and recovery, and wash controls both color stability and perceived quality. For a denim A-line dress, I match heavier denim to sharper A-lines, add small stretch for comfort, and choose a wash that stays consistent across lots to protect reorder stability.
Denim weight: the first decision I make
- 6–8 oz: soft, better for summer, but A-line may look weak
- 9–11 oz: the sweet spot for most denim A-line dresses
- 12+ oz: strong structure, but can feel stiff and hot
Stretch: how I decide “stretch” vs “rigid”
- Rigid denim: better shape, more vintage feel, higher return risk
- Comfort stretch (1–3% elastane): best for bust/waist comfort
- High stretch: not ideal for A-line structure, it can look cheap faster
Wash: what changes quality perception fast
- Rinse / raw look: clean and premium, lower risk of shade variation
- Stone wash: classic, but needs strong shade control
- Acid wash: trend-driven, higher wash inconsistency risk
- Coated denim look: premium vibe, but rub-off tests matter
What I check before I approve a wash for bulk
- Shade band approval across 3–5 panels
- Color crocking (dry + wet) for bags and light tops
- Shrinkage after wash and tumble
- Handfeel consistency between lots
The fabric-to-silhouette match I use
| Denim Choice | Best A-line Outcome | Where it can fail |
|---|---|---|
| 9–11 oz rigid | sharp A-line, clean flare | stiff waist, hard sitting |
| 10 oz comfort stretch | best balance | can “grow” if recovery is weak |
| 7 oz chambray | soft movement | loses A-line shape, looks flat |
| 12 oz heavy denim | strong structure | heat, stiffness, seam bulk |
Denim shows every mistake. If the seam is twisting, the topstitch is messy, or the hem is wavy, the garment looks cheap even with a good wash. I treat denim like “visible engineering.”
A premium denim A-line dress needs clean topstitch, stable seams, correct ease at bust and waist, and controlled hem sweep. I usually upgrade the garment by using better thread, consistent stitch length, strong seam finishing, and smart paneling that supports the A-line flare without adding bulk.
Seams and paneling that support the A-line
- Princess seams: better shaping, but more sewing time
- Side panels: control flare with less bulk than heavy gathers
- Waist seam vs no waist seam: waist seam reads more “tailored”
- Darts: quick shaping, but must be pressed clean
Topstitch and thread choices that matter
- Thread: thicker topstitch thread for denim identity
- SPI: consistent stitch length is more important than “tiny stitches”
- Twin needle: faster, but tension must be perfect to avoid tunneling
Hardware and trims that raise perceived value
- Metal shank buttons or rivet buttons for button-front styles
- Real denim tack button at top for strength
- YKK-grade zipper option for side-zip silhouettes
- Clean belt loop bartacks for belted styles
Finishing details I insist on in bulk
- Consistent bar tacks at stress points
- Pocket symmetry and pocket bag stability
- Clean collar stand shape on shirt styles
- Hem pressing process that prevents roping
What are the key fit risks for denim A-line dresses, and how do I reduce returns?
Denim is less forgiving than soft wovens. If the bust is tight or the waist seam is high, the customer feels it immediately. That is why my fit process is strict for denim.
The biggest fit risks are tight bust, restricted armhole, waist digging, and hip walking restriction. I reduce returns by adding controlled ease, using comfort stretch when needed, placing the waist correctly, and testing movement with sitting and stair steps before I lock the pattern for bulk.
Fit risks by style type
- Shirt denim A-line: bust button gap, armhole tightness
- Button-front denim A-line: center front gaping and pulling lines
- Corset denim A-line: cup fit and rib pressure
- Pinafore denim A-line: armhole too small for layering
My movement test checklist for denim
- Raise arms to check armhole bite
- Sit down to test waist pressure
- Take 10 steps and climb stairs
- Carry a bag to test crocking risk
- Check neckline and straps for slipping
Size grading notes that help in denim
- Do not grade bust and waist too aggressively
- Keep consistent shoulder slope across sizes
- Add small ease in upper hip for walking comfort
- Control hem sweep so it does not flip up in mini lengths
What QC tests and production controls matter most for denim A-line dresses?
If denim quality is unstable, reorders become a nightmare. The same style can look “different” in every drop. I focus on controls that protect color, shrinkage, and seam performance.
For denim A-line dresses, I focus QC on shade consistency, shrinkage, crocking, seam twisting, and topstitch stability. I control this by locking fabric lots early, approving shade bands, setting wash recipes, and running inline checks on key points like plackets, hems, and pockets.
The denim QC points I write into tech packs
- Shade band and lot approval process
- Shrinkage target and tolerance
- Colorfastness and crocking requirements
- Topstitch thread spec and needle spec
- Seam allowance and stitch type at stress seams
Production risks I flag early
- Wash yield changes that shift measurements
- Seam torque after wash due to skew
- Pocket placement drift in bulk cutting
- Wavy placket from poor fusing or tension
- Hardware scratches during wash
A practical QC table for buyers
| QC Item | Why it matters | How I control it |
|---|---|---|
| Shade consistency | keeps photos + reorders stable | shade band approval, lot lock |
| Shrinkage | protects final measurements | pre-test, adjust pattern |
| Crocking | protects customer experience | dry/wet tests, recipe tweak |
| Seam twisting | avoids cheap look | skew control, pattern balance |
| Topstitch stability | denim identity | thread + tension control |
Lace A-Line Dress

Many buyers add lace because it looks premium, but then the dress fits badly or feels itchy. I see this problem when lace is treated like a normal woven. Then photos look great, but returns show up fast.
A lace A-line dress works best when I match the lace type, lining plan, and bodice structure to the A-line silhouette. Lace adds texture and a “dressy” signal, so I focus on comfort, stretch, and seam strategy to avoid scratchy feel, gaping, and bulky joins in production.
I once had a buyer rush a lace drop for a holiday capsule. The lace looked expensive, but the lining choice made the skirt cling and twist. After that, I always test lace with the lining as one system, not two separate materials.
What are the most popular types of A-line dress when the main fabric is lace?
Lace changes how an A-line behaves. The same pattern can look heavier, stiffer, or more “bridal” just because of the lace surface. So I pick the A-line type first, then I choose lace that supports that type.
The best-selling lace A-line dress types are classic lace A-line, fit-and-flare lace A-line, empire-waist lace A-line, wrap or faux-wrap lace A-line, midi lace A-line, maxi lace A-line, and tiered lace A-line. I also use lace panels or lace overlays to control cost and keep the fit stable.
My practical list of lace-friendly A-line types
- Classic lace A-line (easy for broad market)
- Fit-and-flare lace A-line (strong waist emphasis)
- Empire lace A-line (soft comfort fit, good for daytime events)
- Faux-wrap lace A-line (wrap look with more control)
- Shirt lace A-line (rare, but good for “modern formal” if done clean)
- Midi lace A-line (most stable length for repeat orders)
- Maxi lace A-line (resort + occasion, but needs weight control)
- Tiered lace A-line (boho lace story, but can get bulky fast)
- Lace overlay A-line (solid base + lace top layer)
- Lace panel A-line (lace only at yoke/sleeves/hem)
Quick decision table for wholesale planning
| A-line Type in Lace | Best Occasion | Lace Direction | Risk Level |
|---|---|---|---|
| Classic / Midi | Wedding guest, dinner | Cord lace, guipure, cotton lace | Medium |
| Fit-and-flare | Party, prom | Stretch lace + stable lining | High (bust/waist) |
| Empire | Day events | Soft floral lace overlay | Medium (bust fit) |
| Faux-wrap | Work-to-event | Stretch lace or lace overlay | Medium (gaping) |
| Maxi | Resort formal | Light lace overlay | High (weight + hem) |
| Tiered | Boho | Light lace with clean tiers | High (bulk) |
How do I choose the right lace for an A-line dress without risking comfort and returns?
Lace is not one fabric. Buyers often say “use lace,” but the lace construction decides everything. If I pick wrong, the dress will scratch, snag, or lose shape after wash.
I choose lace by checking hand feel, stretch direction, pattern scale, and edge stability, then I decide lining and seam methods. The goal is a lace A-line dress that looks detailed in photos but still feels soft, moves well, and stays consistent across reorders.
Lace types I use most in production
- Cord lace: raised outlines, clear texture, premium look
- Chantilly-style lace: fine, delicate, often needs full support
- Guipure lace: heavier, no net base, strong visual impact
- Stretch lace: better comfort, but needs recovery control
- Cotton lace: breathable, more casual and less “bridal”
- Lace mesh: lighter cost, but can look cheap if pattern is small
What I check before I approve lace yardage
- Hand feel: I rub on inner arm to detect itch risk
- Stretch: I test stretch in width and length, and rebound
- Snag risk: I do a simple ring and nail snag check
- Pattern repeat: I confirm if cutting will create mismatched motifs
- Color depth: I compare lace + lining color under flash light
A simple lace selection matrix I use
| Lace Feature | What It Affects | My Target |
|---|---|---|
| Large motif scale | Visual “premium” | Medium to large for hero styles |
| Soft net base | Comfort | Soft net for sleeveless and fitted bodice |
| Stable edge | Sewing speed | Stable scallop if exposed hem |
| Stretch + recovery | Fit tolerance | Stretch lace for wrap/fit-and-flare |
| Thickness | Bulk at seams | Avoid thick lace on tier joins |
How should I structure and line a lace A-line dress for a clean fit?
This is the part most buyers underestimate. Lace on its own is see-through and unstable. The lining is not just for coverage. It is the “real dress” that holds the silhouette.
I treat the lace as a design layer and the lining as the support layer. For a lace A-line dress, I plan lining length, attachment points, and seam finishes so the lace stays smooth, the bodice does not collapse, and the skirt does not cling or twist.
My lining options and when I use them
- Full lining (bodice + skirt): safest for most markets
- Bodice lined, skirt unlined with shorts slip: better for summer, but risky
- Separate slip lining: premium feel, but higher cost and more parts
- Partial lining with lace sleeves: best for “modest” look without heat
Lining fabric choices that usually work
- Stretch satin: smooth, but can cling in humid climates
- Knit tricot: comfort, good for stretch lace
- Woven poly lining: stable, but watch static and noise
- Modal blend lining: premium comfort, higher cost
Stitch and seam strategy that keeps lace clean
- Avoid overlocking directly on visible lace edges if possible
- Use French seams only when lace is thin and stable
- Use binding or clean finish at neckline and armhole
- Add stay tape at shoulder and neckline for stretch lace
Support details for bodice stability
- Bust darts or princess seams for fitted bodices
- Light fusing on lining only, not on lace face
- Boning for strapless lace A-line, but only with soft channeling
- Clear elastic at top edge for off-shoulder lace styles
What pattern and grading changes do I make because lace behaves differently?
Lace changes the tolerance window. It can distort with heat, pull at seams, and show every small mismatch. If I grade it like a normal woven, the fit will drift across sizes.
For lace A-line dress production, I adjust seam allowance choices, reduce stress points, and control ease in the bodice. I also plan motif placement and cutting rules so each size looks consistent, not random or cheap.
Pattern rules I follow for lace A-line
- I reduce sharp curves where lace can pucker
- I keep neckline shapes simple unless I add stabilizers
- I avoid too many small panels that create bulky joins
- I add a little extra ease if lace has low recovery
Motif placement and cutting control
- I decide if motifs must match at center front and side seams
- I mark “nap” or direction if lace has a visible grain look
- I plan scallop edge usage only when repeat is consistent
- I estimate extra fabric needs for matching to prevent shortages
Grading risks and how I control them
- Bust increase: lace gaping shows faster, so I add support points
- Armhole: lace can scratch, so I refine armhole depth by size
- Waist seam: lace bulk grows with size, so I choose cleaner seams
A planning table for cost and consistency
| Decision Point | Cheaper Option | Premium Option | My Recommendation |
|---|---|---|---|
| Motif matching | No matching | Center front + key seams match | Match only key seams |
| Hem finish | Turn-up hem | Scallop lace edge | Use scallop only on hero SKU |
| Lining build | Simple full lining | Separate slip | Full lining for most orders |
| Lace usage | Full lace body | Lace overlay | Overlay to control risk |
What are the most common QC problems in lace A-line dresses, and how do I prevent them?
Lace failures are easy to see. A tiny issue looks big on camera. This is why lace A-line dress QC must be stricter than basic A-line.
The main QC risks are itchiness, snagging, puckering seams, visible lining shadows, uneven hems, and motif mismatch. I prevent them with fabric testing, stabilizers at stress points, clear cutting rules, and inline checks focused on neckline, armholes, and hem symmetry.
The top lace QC checkpoints I run
- Hand feel test against skin at neckline and armhole
- Snag test on lace face and scallop edges
- Seam puckering check after steaming
- Lining shadow check under flash and sunlight
- Hem level check on mannequin and flat table
- Motif alignment check for key seams
Inline QC points that save rework time
- Confirm lace grain direction before cutting bulk
- Verify stabilizer placement at neckline and zipper
- Check zipper wave and lace stretch around zip seam
- Measure lining length tolerance vs lace layer
Packaging and shipping risk
- Lace can crease and crush, so I use tissue and flat fold rules
- I avoid tight vacuum packing for guipure lace
- I add hang tags carefully to avoid snag points
Floral/Printed A-Line Dress
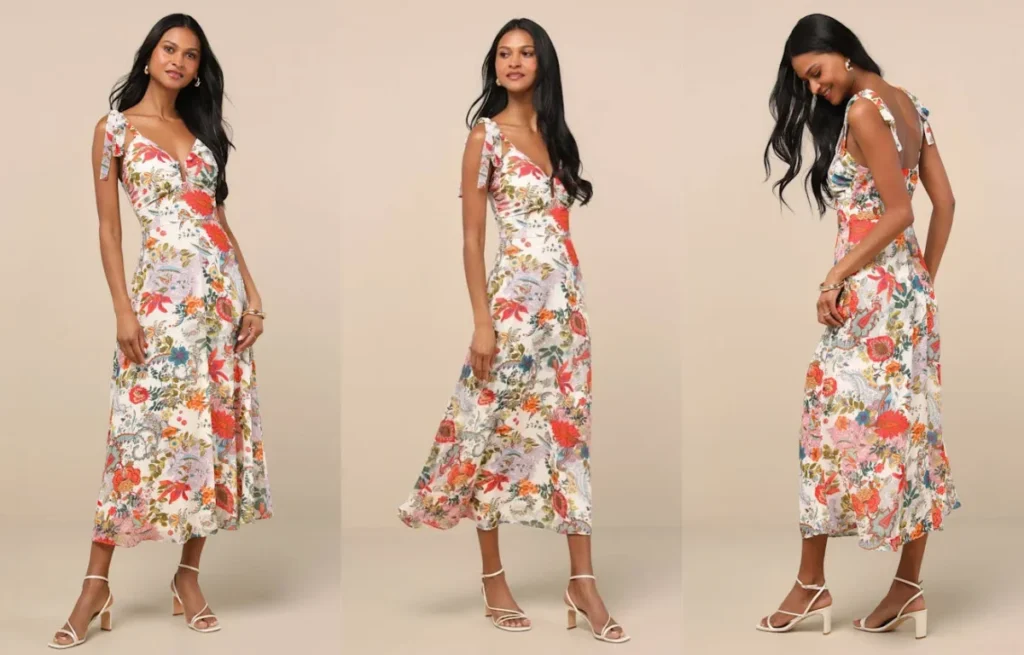
Many floral A-line dresses look good in photos, but they fail in real sales. The print looks cheap, the colors shift, or the fit feels wrong. Then my buyer loses reviews and reorder confidence.
A floral/printed A-line dress sells best when I match the print scale and placement to the A-line silhouette, choose a fabric that supports both drape and colorfastness, and lock print strike-offs before bulk. I also control neckline, waist placement, and hem sweep so the print looks balanced on different sizes.
I learned this the hard way on an early “cute floral” order. The print was nice on the lab dip file, but the bulk fabric came back warmer and slightly muddy. The dresses arrived late, and the photos did not match the product page. Now I treat printing as a full system, not a final decoration.
What makes a floral/printed A-line dress different from a solid-color A-line dress?
A solid A-line can hide small pattern issues. A printed A-line cannot. The print exposes every seam decision and every fit mistake.
A floral/printed A-line dress needs extra control on print scale, motif direction, and placement across seams. I also need tighter fabric and color standards, because customers notice mismatched panels, distorted florals, and shade variation faster than they notice a small stitch issue on a solid dress.
Why prints change the whole pattern strategy
- A-line skirts flare, so motifs can “open up” and look stretched
- Darts and princess seams can cut flowers in awkward places
- Tier seams can shift repeats and look messy if not planned
- Larger sizes need different placement logic, or the print looks crowded
The first decision I make: hero print vs background print
- Hero print: big flowers, clear focal point, higher risk, higher impact
- Background print: smaller repeats, easier production, better reorder stability
How do I choose the right floral print scale and layout for an A-line silhouette?
Print scale is where most buyers lose money. If the scale is wrong, the dress looks dated or cheap, even if the fabric is good.
For a floral/printed A-line dress, I match print scale to dress length and target customer. Small-to-medium repeats usually sell best for everyday midi styles, while large-scale florals work better for maxi and statement drops. I also plan placement so key motifs do not get cut at bust darts or side seams.
Print scale rules I use in production
- Mini floral (dense, tiny): reads “sweet,” but can look busy on tiered skirts
- Medium floral (most commercial): reads “fresh,” works on mini/midi
- Large floral (statement): reads “premium” if placed well, risky if misaligned
Motif direction and garment movement
- All-over tossed floral: easiest for cutting, hides seam joins
- Directional floral: looks premium, but needs strict cutting control
- Border print: looks expensive, but pattern and grading are harder
Placement zones I protect
- Bust apex area: I avoid putting a flower center right on the apex
- Center front seam/placket: I avoid obvious “split flowers”
- Hemline: I keep repeats consistent so the bottom looks clean
| Dress Area | What I aim for | What I avoid |
|---|---|---|
| Bodice front | calmer print, fewer high-contrast motifs | big focal flowers on bust apex |
| Waist seam | repeat alignment or intentional break | random mismatch that looks like a mistake |
| Skirt panels | steady repeat rhythm | stretched motifs near side seams |
| Back bodice | similar density as front | a totally different “busy” look |
Which fabric types and print methods work best for floral/printed A-line dresses?
This is the most technical part. I never select printing method without thinking about fiber, drape, and how the dress will be washed and photographed.
For floral/printed A-line dresses, I usually choose reactive printing for cotton/viscose and digital printing for detailed florals on polyester blends. I match fabric weight and drape to the A-line type, then I confirm colorfastness and hand feel using lab dips and strike-offs before I approve bulk.
Fabric choices I use often
- Viscose/rayon: great drape, strong summer story, but shrinkage control is critical
- Cotton poplin: crisp A-line shape, good for shirt A-line, print can look very clean
- Chiffon: romantic and light, but needs lining and careful seam finishing
- Satin: premium shine, but print shading and snag risk are real
- Polyester crepe: stable supply, good for digital prints, easy care
Print methods and what they mean in bulk
- Reactive print: strong color on cellulosic fibers, better wash performance
- Pigment print: often cheaper, but hand feel can be dry and color can look flat
- Disperse/sublimation: common for polyester, sharp details, but heat setting control matters
- Digital print: great for small runs and complex designs, but batch-to-batch consistency needs strict control
- Rotary/screen print: stable for volume, but setup cost is higher and colors are limited
Quality tests I care about for printed dresses
- Wash colorfastness and crocking
- Light fastness for summer outdoor use
- Shrinkage after wash and steam
- Print penetration on darker grounds
- Shade banding between rolls
A simple fabric + method matching table
| Fabric | Best Print Direction | Best A-line Use | Main Risk |
|---|---|---|---|
| Viscose | Reactive / digital | smock, wrap, midi | shrinkage + shade |
| Cotton poplin | Reactive / screen | shirt A-line | stiffness + wrinkling |
| Chiffon | Digital | maxi, tiered | sheerness + snags |
| Satin | Digital | slip, event | shading + marks |
| Poly crepe | Digital / disperse | day-to-night | batch shade |
How do I manage color, strike-offs, and consistency across bulk production?
Most “print complaints” are not about the art file. They are about process control. I treat approval steps like insurance.
I manage printed A-line risk by approving three things in order: lab dip or color target, strike-off on the real fabric, and a pre-production sample cut from bulk fabric. I also set tolerance rules for shade and I require roll-to-roll checks, because even small shifts can ruin online product photos.
The approval chain I follow
- Color target: I lock a physical reference or clear digital standard
- Strike-off: I approve print on the exact fabric base
- PPS (pre-production sample): I approve fit + print placement together
- Bulk check: I verify first 50 pcs and first 2 fabric rolls
What I put in the tech pack for prints
- Repeat size and repeat direction
- Artwork file format and color system target
- Placement notes for border prints
- Cutting rules for directional motifs
- Acceptable shade range and defect types
Common bulk problems and how I prevent them
- Shade variation between rolls
- I request grouping by dye lot and I label cartons by shade group
- Print misalignment at seams
- I add notches and I set matching points on key panels
- Motif distortion on bias or flare
- I adjust panel grain and I avoid extreme bias on big florals
How should I price and position a floral/printed A-line dress for buyers like Emily?
Emily sells the story, not only the garment. Prints are content. They drive clicks. But they also add cost and risk.
I price floral/printed A-line dresses by separating base garment cost from print complexity. Then I position them in a collection as either a “hero print” for marketing or a “steady print” for repeat sales. For most boutiques, I suggest 1–2 hero florals and 2–3 steady prints per drop.
What increases cost fast
- Custom artwork development and exclusivity
- Border prints and placement printing
- Directional prints with strict cutting rules
- Lining needs for chiffon or light colors
- Higher reject rates from shade control
A practical range plan I use
| Print Role | Visual Goal | Best A-line Type | Bulk Risk |
|---|---|---|---|
| Hero floral | high click rate | maxi, fit-and-flare | higher returns if fit is wrong |
| Steady floral | repeat sales | midi, wrap, smock | lower risk, easier reorder |
| Micro print | everyday wear | shirt A-line, mini | can look busy if not controlled |
How I reduce buyer risk without killing speed
- I propose 2 fabric options with similar hand feel
- I keep the same base pattern and change prints
- I lock trims and only change color stories
- I pre-check shrinkage so sizing stays stable on reorders
What are the key construction and QC points for floral/printed A-line dresses?
Printed garments need cleaner sewing, because the eye follows the pattern lines. If stitching waves, the print looks cheap.
The key QC points are seam straightness, print matching where it matters, hem balance, and stable neckline and waist seams. I also control pressing temperature and packing methods, because heat and folding can cause shine, color change, or print cracking on some fabrics.
- Clean topstitch lines that do not wobble
- Balanced gathers so print density stays even
- Hidden snaps on wrap bodices to prevent gaping
- Lining or partial lining to keep light prints from going sheer
Where I require tighter checks
- Center front and side seams on large florals
- Waist seam alignment on fitted bodices
- Tier seams on tiered A-lines
- Button plackets on shirt A-lines
A QC checklist I run before shipment
- I compare bulk to approved strike-off under daylight
- I check seam twist and panel distortion on hanger
- I test 5 pcs for wash and steam behavior
- I review random cartons for shade grouping consistency