Skip to content
 Summer tops look easy, but they fail fast. Heat, sweat, and light colors expose weak fabric and bad fit. If I choose the wrong mix, I get returns, slow reorders, and missed trend weeks.
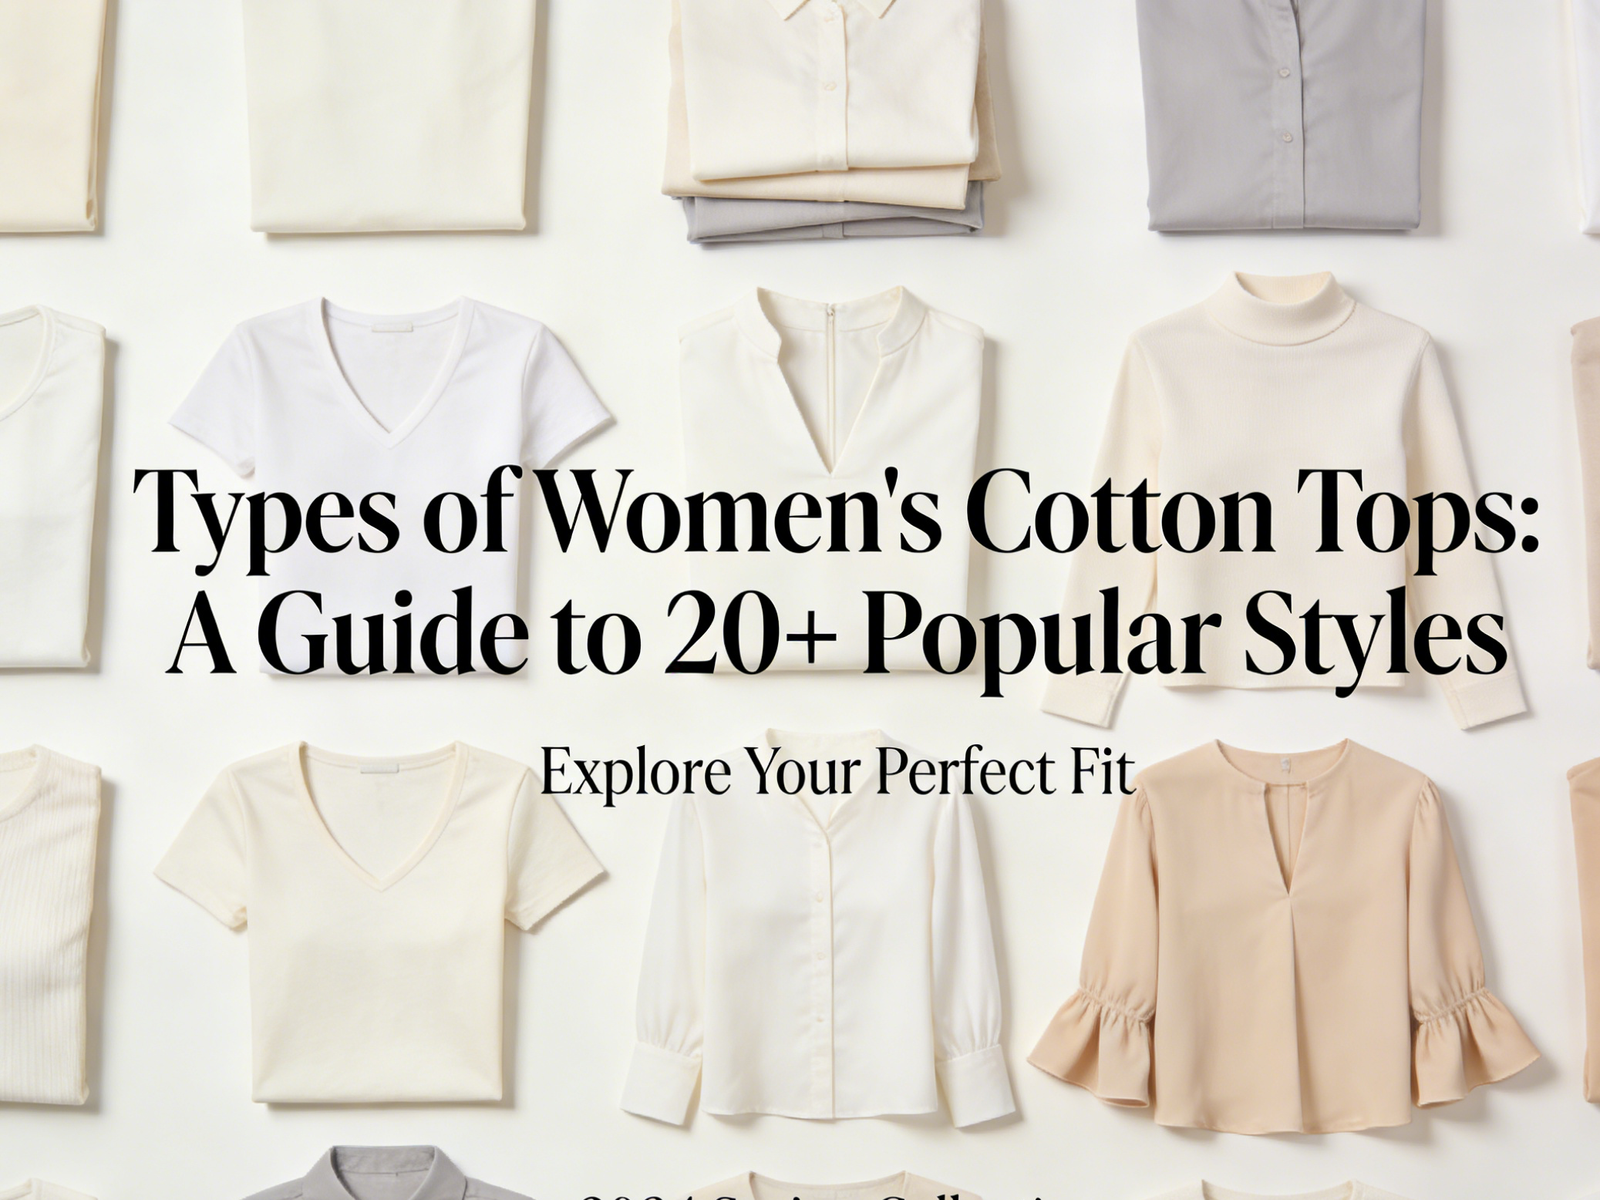
The most practical Types of Summer Tops include 20 core styles that cover airflow, layering-lite outfits, day-to-night looks, and trend drops: T-shirt, tank top, camisole, crop top, tube top, halter top, bandeau top, bodysuit, rib-knit top, knit polo, button-down shirt, linen shirt, blouse, wrap top, peplum top, tunic top, mesh top, lace top, crochet top, and lightweight overshirt.
I used to plan summer like spring, and it cost me. A “cute” fabric that worked in March became sticky in July. After that, I rebuilt my summer list around breathability, opacity, and how a top behaves after sweat and washing.
How do I build a profitable mix of Types of Summer Tops for my market and customers?
Summer buying only works when I match tops to climate, customer lifestyle, and styling habits. I do not start with trend pages. I start with heat and movement.
I build a summer tops mix by splitting styles into three roles: high-volume basics (45–60%), margin builders (20–30%), and trend tests (10–20%). Then I map each role to climate and outfit use, so I avoid overbuying “going-out” tops that only fit a small part of the week.
Step 1: Sort by climate first
- Hot + humid: tanks, camis, linen shirts, crochet tops, light tees
- Hot + dry: halters, tube/bandeau, mesh tops, lightweight overshirts
- Mixed coastal evenings: button-downs, knit polos, rib tops, overshirts
Step 2: Decide the “wear situation” balance
I use four daily scenes because they drive repeat purchases:
- work or smart casual
- weekend casual
- vacation and beach
- night out and events
Step 3: Use an assortment table to control risk
| Role | What It Does | Target % | Best Summer Styles | Risk Level |
|---|---|---|---|---|
| High-volume basics | steady sales, easy fit | 45–60% | tees, tanks, rib tops | Low |
| Margin builders | higher AOV, better look | 20–30% | linen shirts, blouses, knit polos | Medium |
| Trend tests | traffic and social | 10–20% | crochet, bandeau, mesh, lace | High |
My summer “fast filter” before I approve any style
- Can the customer wear it without a jacket?
- Does it pass a sweat + light test?
- Can it be styled in two outfit types?
- Can I reorder it without changing fabric and shade?
How do I choose summer fabrics so tops stay breathable but not see-through or flimsy?
This is the biggest summer problem. Light fabric sells, but light fabric also shows everything. I treat fabric like a performance spec, not a mood.
For summer tops, I pick fabrics by three tests: breathability, opacity under sunlight, and wash stability. Cotton and cotton blends are safest for basics, linen and linen blends work for shirts, and novelty fabrics like lace, mesh, and crochet need clear layering plans and stronger seam control.
Fabric families I use for summer tops
- Knits (comfort basics): cotton jersey, cotton-modal, cotton-spandex, rib knits
- Wovens (polished shirts): linen, linen-viscose blends, cotton poplin, light viscose
- Novelty (trend pieces): lace, mesh, crochet, satin-like weaves
The “summer opacity” issue I see most
Light colors and thin structures create returns. I stop it with:
- higher GSM or tighter knit structure for tees
- double-layer panels for bandeau and tube tops
- clean lining plans for blouses and camis
Fabric-to-style matching table
| Style | Best Fabric Options | Main Risk | My QC Focus |
|---|---|---|---|
| T-shirt | cotton jersey, cotton-modal | shrink/twist | wash test + spirality |
| Tank | cotton rib, jersey | gaping | armhole spec |
| Linen shirt | linen, linen blend | shrink/wrinkle | preshrink + seam strength |
| Blouse | viscose, polyester | transparency | sunlight test |
| Crochet | cotton yarn crochet | stretch-out | measurement after hang |
| Mesh | nylon mesh, power mesh | scratch | seam and thread choice |
My minimum QC tests for summer programs
- wash test for shrink and twist
- sunlight opacity test
- color fastness to sweat
- seam slippage check on light wovens
How do I prevent the top 6 quality complaints that hit summer tops?
Summer returns are predictable. The same problems repeat every year. I plan against them before sampling ends.
The most common summer top complaints are: see-through fabric, neckline stretching, armhole gaping, strap failure, sweat marks or odor retention, and shape loss after washing. I reduce these by setting clear fabric specs, adding stabilization where needed, and testing the garment under heat and movement.
Complaint 1: “It’s see-through”
- Fix: tighter structure, lining, double layer, darker color options
Complaint 2: “The neckline got wavy”
- Fix: clear elastic, shoulder tape, better rib binding
Complaint 3: “The armholes gape”
- Fix: adjust armhole curve, add bust shaping, change binding method
Complaint 4: “The straps broke or slipped”
- Fix: better adjusters, stronger strap elastic, bartack at stress points
Complaint 5: “It smells after one wear”
- Fix: breathable fibers, avoid cheap heavy polyester for basics
Complaint 6: “It lost shape”
- Fix: recovery tests for rib, better seam type, better elastic specs
A simple test routine I do with my team
- 10 arm raises
- 10 sit-stand cycles
- 10 twists
- then I re-measure key points and check seam stress
How do I plan MOQ and production timing for Types of Summer Tops without missing peak weeks?
Summer timing is brutal. If the tops arrive late, the season is already on sale. I treat summer like a short race, not a long campaign.
I plan summer tops with a two-track system: core basics start early with stable fabrics and fit blocks, while trend tops run later with smaller MOQ and faster sampling. This protects cash flow and keeps the brand in the market during peak heat weeks.
Two-track plan I use in my factory
- Core track (reorder-safe):
- tees, tanks, rib tops, button-downs, linen shirts
- stable colors and repeatable blocks
- Trend track (fast drops):
- bandeau, tube, crochet, lace, mesh, peplum
- smaller MOQ and faster decision rules
A practical calendar logic I follow
| Stage | Core Tops | Trend Tops |
|---|---|---|
| Sampling rounds | 2–3 | 1–2 |
| Bulk MOQ | higher | lower |
| Color strategy | stable neutrals | seasonal colors |
| Reorder plan | ready pre-launch | triggered by sell-through |
Production risks that hurt summer deadlines
- linen shrink not controlled early
- lace and crochet lead times for trims
- shade variation across reorders
- inaccurate grading on short tops
How do I make Types of Summer Tops feel “custom” for a wholesale buyer without unstable development?
Most buyers want their own DNA. They also want speed. I like customization that shows clearly but does not break fit.
I customize summer tops by changing visible details that keep blocks stable: neckline shapes, strap details, trims, button choices, embroidery, and print placement. This creates brand identity with less sampling risk and faster bulk approval.
Low-risk customization that sells
- neckline: square, sweetheart, halter variations
- straps: adjustable, tie straps, double straps
- trims: contrast binding, lace edge, piping
- branding: embroidery logo, woven labels, branded buttons
- prints: placement graphics for tees and tanks
Higher-risk changes I control tightly
- removing lining from light colors
- changing elastic specs on tube/bandeau
- using new yarns on crochet without stretch tests
- changing armhole shapes on tanks
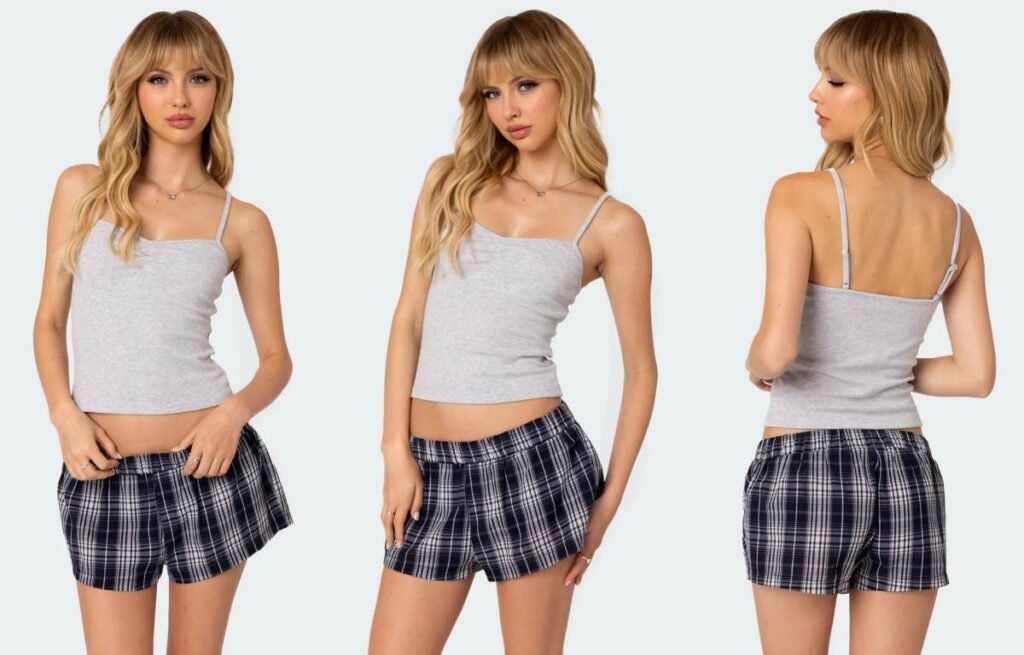
Tank Top
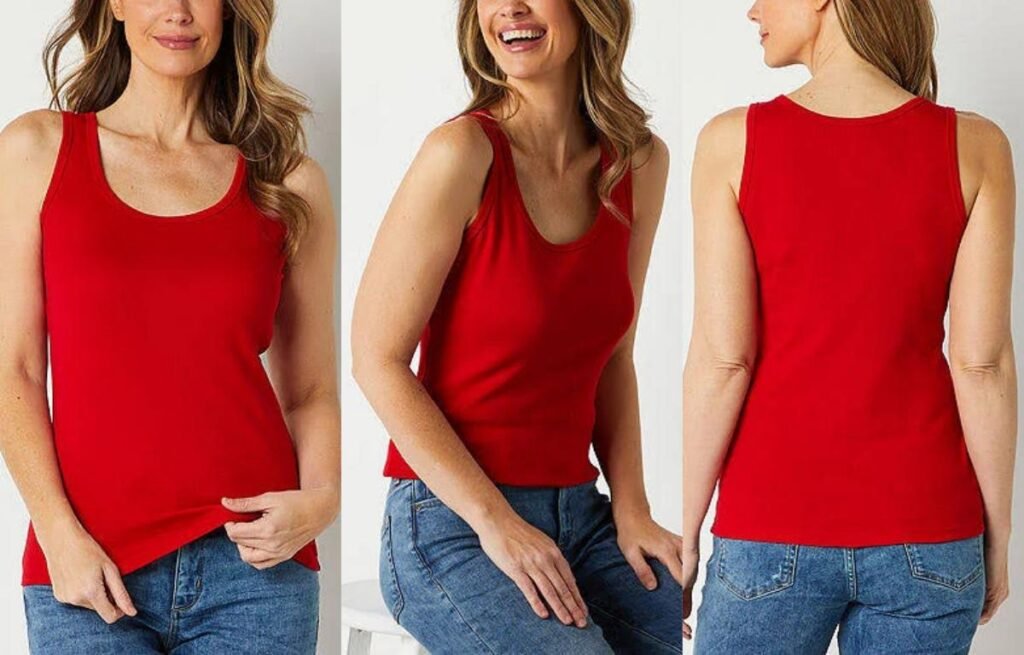
Tank tops look like the safest summer item, but they trigger the most “small” complaints. Armholes gape, straps slip, and light colors turn see-through. One bad fit block can ruin a whole drop.
A summer tank top sells best when I control three things: neckline and armhole shape, fabric opacity under sunlight, and stretch recovery after sweat and washing. I treat tanks as a technical core item, then I pick 8–12 proven sub-styles and lock a stable fit block for reorders.
I learned this after a reorder that looked identical on paper, but customers said the second run felt looser and showed bra lines more. Since then, I never judge a tank by the flat pattern alone. I judge it by tension zones and movement tests.
What counts as a “tank top” in summer, and which fits are the most commercial?
People call many things “tank.” In production, that word is too vague. If I do not define it, the sample can drift away from what the buyer expects.
A tank top is a sleeveless knit or woven top with straps and an open armhole. In summer, the most commercial fits are classic scoop tanks and rib-knit fitted tanks because they work for layering, they fit more body types, and they reorder well with stable fabric and grading rules.
The 4 tank categories I use to avoid confusion
- Classic tank: medium strap, medium armhole, scoop or soft square neck
- Racerback tank: narrower shoulder, athletic back shape
- Muscle tank: wider shoulder, deeper armhole, relaxed body
- Fashion tank: halter-inspired, twist strap, cut-out, asymmetrical
The summer fit reality I always explain
- A tank top must handle sweat + movement.
- A tank top must work with bras or bralettes, unless it is clearly marketed as no-bra.
- A tank top must pass sunlight opacity, not just indoor lighting.
Which tank top sub-styles sell best in summer, and what is each best for?
I do not want 30 tank versions that fight each other. I want a clean menu that covers casual, athleisure, and going-out.
The best-selling summer tank sub-styles are: classic scoop tank, square-neck tank, high-neck tank, rib-knit fitted tank, racerback tank, athletic performance tank, muscle tank, cropped tank, baby tank, and ruched tank. This set covers basics, trend looks, and sport use without overcomplicating production.
10 tank top sub-styles I keep in my “summer core + trend” list
1) Classic scoop tank
- Best for: high volume basics
- Risk: armhole gaping if pattern is too open
2) Square-neck tank
- Best for: clean, premium look
- Risk: neckline wave if binding is weak
3) High-neck tank
- Best for: modern minimal styling
- Risk: neck tightness complaints
4) Rib-knit fitted tank
- Best for: reorder-friendly fitted basics
- Risk: bagging after wear if recovery is weak
5) Racerback tank
- Best for: athleisure
- Risk: bra strap exposure complaints
6) Performance tank
- Best for: active customers
- Risk: odor retention if fabric is wrong
7) Muscle tank
- Best for: relaxed casual, beach
- Risk: deep armholes show bra and side body
8) Cropped tank
- Best for: Gen Z and summer sets
- Risk: ride-up and hem curl
9) Baby tank
- Best for: tight, short trend look
- Risk: high return rate if size range is narrow
10) Ruched tank
- Best for: flattering body fit
- Risk: ruching elastic failure and uneven gathers
How do I choose fabric for a summer tank top so it stays breathable but not see-through or stretched out?
This is where tanks win or lose. Tanks use less fabric, so every defect shows. Light colors and thin ribs can turn into instant returns.
For summer tank tops, I choose fabric by four tests: sunlight opacity, sweat comfort, stretch recovery, and wash stability. Cotton-spandex jersey and stable rib blends are the safest for mass sales, while very light jerseys need lining or double-layer panels to avoid sheerness and strap distortion.
The tank top “fabric truth” I use
A tank top sits close to skin. It also sits near bra lines. So fabric must be:
- breathable
- smooth enough
- stable after wash
- not too transparent
Fabric options and what they really do
- Cotton jersey (with a little spandex):
- Pros: breathable, easy care, stable
- Cons: can twist if grainline control is weak
- Rib knit (cotton rib, rayon/nylon rib blends):
- Pros: fitted look, strong demand
- Cons: can bag out if recovery is weak
- Modal blends:
- Pros: soft, premium hand-feel
- Cons: can pill and stretch if low quality
- Poly blends (for performance):
- Pros: quick dry
- Cons: odor complaints if finish is not right
Fabric-to-style matching table (what I recommend to wholesale buyers)
| Tank Style | Best Fabric Options | Main Risk | What I Control |
|---|---|---|---|
| Classic scoop | cotton-spandex jersey | sheerness in light colors | GSM + opacity test |
| Rib fitted | stable rib blend | bagging at hem/neck | recovery test |
| Racerback | jersey or rib | strap distortion | binding spec |
| Muscle tank | cotton jersey | side exposure | armhole depth |
| Performance | poly blend | odor retention | fabric finish choice |
My “sunlight opacity” test (simple but strict)
- I check the fabric on a form.
- I shine strong light from behind.
- I test white and light colors first.
If it fails, I either: - increase GSM
- change knit structure
- add double-layer panels
How do I engineer a tank top pattern to stop armhole gaping and bra exposure?
Armhole gaping is the number one tank complaint I see. It is not random. It comes from pattern shape, strap position, and bust balance.
To reduce armhole gaping, I control armhole curve, strap placement, and the balance between front chest and side seam. I also match binding elasticity to body elasticity, so the opening lies flat instead of pulling away from the body.
Why armholes gape (the real causes)
- armhole curve is too deep for the bust block
- strap point sits too far toward the shoulder edge
- side seam angle pushes the armhole outward
- binding is too stiff or too loose
- grading rules increase opening too fast
My pattern controls that actually work
- Move strap point inward by small steps on gaping samples
- Raise the underarm point slightly for fitted tanks
- Add bust shaping for woven or structured fashion tanks
- Adjust side seam angle to reduce outward pull
- Control armhole depth differently for muscle tanks vs fitted tanks
Binding elasticity: where many factories get it wrong
If binding is too tight:
- it bites and causes “dig-in” complaints
If binding is too loose: - it flares and shows bra
So I set a clear spec: - binding stretch and recovery must match the body fabric
I use a quick “bra compatibility” checklist
- Can the customer wear a standard bra without showing side cup?
- Do straps cover most bra straps on the classic tank?
- For racerback, is it clearly marketed as bra-revealing or not?
How do I build a tank top that survives sweat, washing, and reorders without losing shape?
Tank tops get abused. Customers wear them in heat and wash them often. If the tank loses shape, the buyer loses trust.
To keep tank tops stable, I focus on seam selection, neckline stabilization, and recovery testing. I require wash testing and stretch cycling so I can predict how the tank will look after real life, not just after fitting day.
The stability problems that show up after 10 wears
- neckline waves
- armhole edge becomes loose
- hem twists
- rib knit bags out
- strap seam pops
My construction choices for stability
- Neckline and armhole finish options:
- self-fabric binding (good for basics)
- rib binding (good for sporty looks)
- clean facing (better for premium woven tanks)
- Stabilizers I add when needed:
- clear elastic at neckline and armhole
- shoulder tape for knit tanks
- Seam types that reduce seam popping:
- stretch-friendly overlock + coverstitch
- correct needle and thread for spandex blends
My stretch cycling test (easy but very telling)
I stretch the neckline and armhole opening 20 times, then I let it rest.
- if it does not return, I change binding or add elastic
- if it waves, I stabilize the seam
How do I plan MOQ and a tank top assortment so I do not overbuy basics or miss trend demand?
Tanks are “basic,” but not all tanks reorder the same. Some shapes are safe. Some shapes are risky and seasonal.
I plan tank tops using a core-and-trend split: core tanks (classic scoop, rib fitted, square-neck) take most of the MOQ because they reorder well, while trend tanks (ruched, baby tank, cropped) run in smaller MOQ and faster drops. This keeps cash flow safe and reduces dead stock.
My tank top assortment rule for wholesale
| Role | Styles | MOQ Strategy | Why |
|---|---|---|---|
| Core basics | scoop, rib fitted, square-neck | higher MOQ | stable reorders |
| Core fashion | high-neck, racerback | medium MOQ | trend-aware but safe |
| Trend tests | ruched, baby, cropped | low MOQ | high volatility |
Color strategy that avoids summer slowdowns
- Core: black, white, heather grey, navy, neutral tones
- Trend: seasonal bright colors and prints
- Light colors: only if opacity test passes
Lead time risks I plan for
- rib fabric availability shifts fast in peak season
- dye lot differences on white and pastels
- binding and elastic lead times for premium finishes
Camisole Top
Camisole tops look light and easy, but summer makes every flaw obvious. If the fabric turns see-through, the straps slip, or the bust line gapes, customers return it fast.
A summer camisole top sells best when I match it to the customer’s bra needs, heat level, and styling scene. I treat camis as a technical balance of strap design, bust shaping, and opacity, then I choose 8–10 reliable sub-styles and control fabric weight, lining, and hardware quality.
I once shipped a satin cami that looked premium in photos, but buyers got “snag” and “too thin” complaints in week one. After that, I started building camisole programs with real tests, not just sample-room opinions.
What counts as a camisole top in summer, and how is it different from a tank top?
People mix up camis and tanks, but the construction is different. In summer, this difference decides comfort and returns.
A camisole top is a sleeveless top with thin straps, usually designed for layering or a delicate look. A tank top has wider shoulder coverage and more structural support. In summer, camisoles need better control for sheerness, strap slip, and bust gaping because they carry more tension in smaller areas.
The quick way I explain it to wholesale buyers
- Camisole: thin straps, lighter look, often needs lining or bra-friendly design
- Tank: wider straps, more stable fit, usually safer for mass sizing
My “summer cami risk” checklist
- strap hardware strength
- front neckline gaping
- underarm exposure
- opacity under sunlight
- snag risk (especially satin and lace)
Which camisole top sub-styles are the most popular for summer, and what is each best for?
I do not run “one cami.” I run a small range of cami sub-styles, because each one matches a different customer need.
The most practical camisole top sub-styles for summer are: basic V-neck cami, square-neck cami, cowl-neck cami, satin cami, lace-trim cami, rib-knit cami, double-layer cami, built-in-bra cami, tie-strap cami, and button-front cami. This set covers basics, going-out, and vacation demand.
1) Basic V-neck cami
- Best for: layering and daily wear
- Watch: neckline gaping
2) Square-neck cami
- Best for: modern look and bra coverage
- Watch: strap placement
3) Cowl-neck cami
- Best for: dressy nights and soft drape
- Watch: drape control and bra show
4) Satin cami
- Best for: elevated shine and margin
- Watch: snag and seam puckering
5) Lace-trim cami
- Best for: romantic styling
- Watch: itch and lace curl
6) Rib-knit cami
- Best for: fitted basics and reorders
- Watch: stretch-out at hem
7) Double-layer cami
- Best for: light colors and confidence
- Watch: heat comfort
8) Built-in-bra cami
- Best for: convenience and athleisure crossover
- Watch: cup grading and elastic fatigue
9) Tie-strap cami
- Best for: vacation and adjustable styling
- Watch: knot bulk and strap fray
10) Button-front cami
- Best for: casual cute looks
- Watch: button gap at bust
How do I choose the best fabric for a summer camisole top without see-through issues or sticky comfort?
Fabric is the main reason camis get returned in summer. Heat, sweat, and sunlight expose weak fabric fast.
For summer camisole tops, I choose fabric by four tests: sunlight opacity, skin feel after sweat, snag resistance, and wash stability. Rib knits and stable jerseys are safest for reorders, while satin, lace, and light viscose need smarter lining, better seam control, and clear expectations in product copy.
Fabric families I use for camis (and what they do)
- Knit camis (safer sizing):
- cotton-spandex jersey
- rayon/nylon rib blends
- modal blends
Best for: rib-knit cami, basic cami, double-layer cami - Woven camis (more “dressy”):
- satin (poly or silk blend)
- viscose woven
- lightweight crepe
Best for: cowl cami, satin cami, button-front cami - Trim fabrics (risk zone):
- lace, mesh inserts
Best for: lace-trim cami, going-out cami
The summer “see-through” trap and how I stop it
Light colors in camis are a top return driver. I use:
- double layer front for white and pastels
- lining for satins that flash under sunlight
- tighter knit structure instead of “just thicker,” so it still breathes
Fabric-to-style matching table I use
| Cami Style | Best Fabric | Main Risk | My QC Focus |
|---|---|---|---|
| Rib-knit cami | rib rayon/nylon, cotton rib | stretch-out | recovery test |
| Satin cami | poly satin, heavy satin | snag | snag test + needle choice |
| Cowl cami | soft satin, viscose | drape distortion | bias stability |
| Lace-trim cami | jersey + lace trim | itch/curl | trim softness + edge finish |
| Double-layer cami | jersey/mesh inner | heat feel | breathability check |
How do I engineer straps and hardware so a camisole top does not slip, twist, or break?
Straps are the cami’s weak point. In summer, customers adjust straps more often because they sweat, move, and wear the top longer.
To prevent strap complaints, I control strap width, strap elasticity, adjuster quality, and stitching at stress points. I also set strap angles to match bust tension, so straps do not migrate toward the neck or slide off the shoulder.
The strap problems I see most
- adjusters that slip under tension
- straps that twist because the strap is too soft
- stitch failure at the front strap join
- strap angle too wide, so it falls off shoulder
My strap engineering rules
- Strap width:
- 6–8 mm for delicate looks (higher risk)
- 10–15 mm for commercial comfort (safer)
- Adjuster quality:
- thicker metal or strong coated hardware for longevity
- Stitching:
- bartack or reinforced box stitch at strap joins
- Angle control:
- move strap point inward for narrow shoulders
- add small back strap stabilizer if needed
Hardware decisions that change complaint rates
| Hardware | Looks | Comfort | Risk | When I use it |
|---|---|---|---|---|
| Plastic adjuster | basic | ok | medium | low price camis |
| Coated metal adjuster | premium | good | low | satin and lace trims |
| Ring + slider set | fashion | good | medium | tie-strap and special straps |
How do I prevent bust gaping and bra exposure on camisole tops?
This is where cami returns happen. Many customers want to wear a bra, but they still want a clean neckline.
I prevent bust gaping by combining pattern shaping with neckline stabilization. For woven camis, I use darts or shaped seams and control bias stretch. For knit camis, I adjust negative ease and add clear elastic at the neckline when needed. I also design bra-friendly necklines for mainstream markets.
The three fit issues that cause gaping
- neckline too long for the bust size range
- fabric too soft with no stabilization
- wrong dart position or no shaping in woven camis
My pattern methods (what I do in development)
- Woven camis:
- add bust darts or princess shaping
- reinforce neckline with facing or narrow binding
- control bias areas on cowl styles
- Knit camis:
- use negative ease with recovery test
- add clear elastic to neckline if wave appears
- stabilize shoulder seam with tape
Bra-friendly design rules I use
- square neck hides bra better than deep V for many customers
- strap placement must align with bra strap path
- underarm curve must not expose bra side too much
How do I handle lining and layering so camisole tops stay breathable but still feel “safe” to wear?
This is the hard balance. Customers want light, but they also want confidence. I treat lining as targeted engineering, not a full extra layer every time.
I keep camis breathable by using partial lining and smart double-layer zones. I line the front bust area for light colors, use soft mesh as an inner layer when possible, and keep the back single-layer to release heat. This reduces see-through without making the top feel heavy.
Lining strategies I actually use
- Full lining: for premium satin, light colors, and sheer fabrics
- Front-only lining: best commercial solution for basics
- Bust panel lining: when only the upper area is risky
- Power mesh inner: for support camis and built-in-bra camis
Lining decision table
| Fabric | Color | Best Lining Plan | Why |
|---|---|---|---|
| Satin | light | full or front-only | controls flash + comfort |
| Jersey | white/pastel | front-only | breathable + safe |
| Viscose woven | light | bust panel | keeps drape |
| Lace trim | any | front-only + soft trim | reduces itch and show-through |
How do I set MOQ and production timing for camisole tops so I can reorder fast in summer?
Camis are often “top-up” purchases in summer. If reorders are slow, buyers miss the peak weeks.
I plan camisole tops with a core-and-trend system: core camis (rib-knit, basic V-neck, square-neck) run early with stable fabrics and repeatable blocks, while trend camis (cowl, lace-trim, tie-strap) run later with smaller MOQ and faster sampling. This protects cash flow and keeps the line fresh.
My two-lane camis plan
- Core lane (reorder safe):
- rib-knit cami, square-neck cami, basic V-neck cami
- stable colors and proven straps
- Trend lane (fast drops):
- cowl cami, lace-trim cami, tie-strap cami, button-front cami
- seasonal colors and trims
Production risks I manage early
- satin fabric snag risk and seam puckering
- lace trim lead time and softness variation
- hardware shortage for adjusters
- shade variation on light colors
A simple bulk approval checklist I use
- strap pull test
- sunlight opacity test
- wash test for shrink and edge curl
- wear test for gaping and bra exposure
Tube Top
Tube tops look simple, but they are one of the easiest summer styles to get wrong. If the top slips, rolls, or feels itchy, customers complain fast. Then the whole drop dies.
The best summer tube tops stay up because I design them like a support system, not a basic band of fabric. I control three things: grip (silicone + elastic), structure (boning or stable knit), and sizing rules (stretch and negative ease). When I do this, tube tops sell well and returns drop.
I learned this after a “viral” tube top sample looked perfect on a hanger, but real wear tests showed it slid down in five minutes. After that, I started treating tube tops like swimwear, with clear tension specs and real movement testing.
What counts as a tube top in summer, and which sub-styles are the most popular?
Tube top can mean many patterns. If I do not define it early, sampling becomes chaos. So I always start with a clear style menu.
In summer, a tube top is a strapless, body-hugging top that relies on circumference tension and internal grip to stay in place. The most popular tube top sub-styles are: basic jersey tube, rib-knit tube, bandeau-style tube, corset tube, peplum tube, ruched tube, smocked tube, structured woven tube, zip-front tube, and layered or double-skin tube.
My practical tube top style list (10 options buyers understand fast)
1) Basic jersey tube (simple, high volume)
2) Rib-knit tube (strong recovery, reorder friendly)
3) Bandeau-style tube (clean edge, minimal look)
4) Corset tube (boning/seams, premium feel)
5) Peplum tube (waist focus, fashion look)
6) Ruched tube (forgives body shape, texture trend)
7) Smocked tube (stretch comfort, boho vibe)
8) Structured woven tube (sharp shape, more risk)
9) Zip-front tube (street style, better entry/exit)
10) Double-skin tube (two layers, better opacity and grip)
Why do tube tops slip, roll, or feel tight, and how do I fix those problems in development?
Most slip problems are not “customer shape” problems. They are engineering problems. Tube tops sit on the bust and ribs, which move and compress all day.
Tube tops slip or roll because tension is wrong, grip is missing, or the top is not balanced for bust-to-underbust differences. I fix this by setting clear negative ease targets, adding silicone and elastic in the right places, using stable fabrics with strong recovery, and testing movement before bulk.
The 5 real causes of tube top failure (what I see in factory checks)
- Wrong negative ease: too loose = slip, too tight = discomfort and roll
- Weak recovery: fabric stretches out after 30 minutes
- No grip system: smooth fabric + sweat = slide
- Edge collapse: top edge curls or flips because finishing is weak
- Bust balance issue: top fits ribs but not bust, or bust but not ribs
My fixes, mapped to the exact symptom
| Symptom | Common Root Cause | My Production Fix |
|---|---|---|
| Slips down | low tension + no grip | silicone tape + stronger elastic spec |
| Rolls at top edge | weak finish | add binding, elastic, or double layer |
| Digs into ribs | too much negative ease | adjust pattern circumference and grading |
| Gapes at bust | poor shaping | add seam shaping, boning, or ruched panel |
| Gets loose after wear | weak recovery | change knit structure or add lining layer |
The tension rule I follow (simple but strict)
- I do not “guess” fit by feel.
- I set a stretch target and a recovery target.
- I test the top after it hangs for a few hours, because some fabrics relax.
How do I engineer a tube top “stay-up system” that works in real summer heat?
This is the core technical part. Summer heat adds sweat, and sweat removes friction. So I need a system that holds even when the body is moving and the skin is warm.
A reliable tube top uses a layered hold system: inner grip (silicone), edge stability (elastic or binding), and body structure (double layer, boning, or stable knit). I also design the top edge to match the bust curve, because a straight top line often causes gaping and slipping.
The 3-layer stay-up system I use
- Layer 1: Grip (skin contact)
- silicone tape at top edge is the most direct fix
- for sensitive skin, I use soft silicone or a wider tape
- Layer 2: Edge stability (prevents curl)
- hidden elastic in casing, or clean binding with elastic inside
- double-fold edges reduce flip and roll
- Layer 3: Structure (prevents collapse)
- double-skin panels
- light boning on corset tubes
- firm rib knit for simple “clean” tubes
Silicone tape: where I place it and why
- Top edge: almost always, because slip starts here
- Bottom edge: optional, but helpful for long tubes
- I avoid cheap silicone that cracks after washing
Boning: when I use it
I use boning when the brand wants a premium “corset tube” look.
- pros: better shape, less gaping
- cons: higher cost, comfort risk, more QC points
- my rule: keep boning channels smooth and secure, or it will poke
The neckline shape detail many people miss
If the top edge is too straight, it gapes at the center bust.
I often use:
- a slight curve
- ruched center detail
- soft V or sweetheart seam shaping
Which fabrics are best for tube tops in summer, and how do I avoid sheerness and sweat problems?
Tube tops are small, so buyers often push for low cost. That is risky. Fabric choice controls comfort, grip, and opacity more than people expect.
The best summer tube top fabrics are stable knits with strong recovery, like rib knits and cotton-spandex jersey. For a more elevated look, I use double-layer jersey or structured stretch wovens, but I add lining and edge support. I avoid very light single-layer fabrics in light colors because they turn see-through in sunlight.
My fabric ranking for tube tops (most reliable to most risky)
1) Rib knit with good recovery (best for stay-up)
2) Cotton-spandex jersey (good balance)
3) Double-layer jersey (best for opacity)
4) Power mesh lining + outer fashion fabric (for premium styles)
5) Stretch woven (sharp look, higher fit risk)
Opacity control for summer colors
If the buyer wants white, pale pink, or butter tones:
- I recommend double layer
- or a built-in lining
- and I run a sunlight test on a real body
Sweat comfort rules I follow
- avoid scratchy synthetic yarns for inner layer
- keep seam allowances clean
- choose breathable fiber blends for the lining when possible
How do I set sizing and grading for tube tops so customers can breathe and the top still stays up?
Sizing is where tube tops win or lose money. A tube top that is “one size” can work, but only if stretch and recovery are strong and the size message is honest.
For tube tops, I use controlled negative ease and careful grading, because small circumference changes feel big on a strapless style. I also define stretch level on the spec sheet, so buyers understand who the size range is meant for.
My sizing approach (what I do for wholesale programs)
- Option A: Standard S–XL sizing
- best for: mainstream boutiques, fewer complaints
- needs: stable grading rules for circumference
- Option B: One-size (OS) with clear stretch spec
- best for: trend drops, low SKU count
- risk: higher returns if fabric relaxes
Grading detail I never skip
- I grade the top edge circumference and bottom edge circumference with intent.
- I do not grade only one measurement, because that causes roll and gaping.
| Fabric Stretch Level | Best Size Strategy | Why | Risk |
|---|---|---|---|
| High stretch + strong recovery | OS or S–M / L–XL | wide fit range | medium |
| Medium stretch | S–XL | clearer fit | low |
| Low stretch | XS–XL with shaping | needs precision | high |
What QC tests should I run on tube tops before bulk, and what defects should I watch for?
Tube tops look simple, so teams skip testing. That is a mistake. A tube top must pass real movement and wash cycles.
Before bulk, I test tube tops for slip, roll, recovery, and wash durability. I focus on silicone performance, elastic rebound, seam strength, and fabric relaxation after hanging. If any of these fail, the top will fail in customers’ closets.
My minimum tube top test routine
- Movement test: arm raises, twists, light jog in place
- Wear time test: 30–60 minutes continuous wear
- Hang test: hang overnight, then re-measure circumference
- Wash test: check silicone peel, elastic wave, and seam pop
Defects I watch closely
- silicone tape peeling or cracking
- top edge wavy after sewing
- stitching popping on stretch seams
- fabric getting shiny or rough after sweat and wash
My factory notes that reduce rework
- use the correct needle for high-stretch seams
- control stitching tension to avoid edge waviness
- lock silicone tape placement with clear sewing guides
Halter Top
Halter tops sell fast in summer, but they also fail fast. One wrong neckline angle can cause gaping. One bad strap spec can cause neck pain. If I do not control these details, I get complaints instead of reorders.
A summer halter top works best when I match the neckline shape to bust support needs, choose a fabric that holds its form in heat, and engineer the strap and underbust area to stay stable. I focus on 8–10 proven halter sub-styles and test comfort, slip, and opacity before bulk.
I once shipped a halter run that looked perfect on a hanger. Then customers said the neck felt heavy and the bust felt exposed. After that, I started treating halter tops like a technical style, not a “simple cut.”
What counts as a halter top in summer, and what are the main halter neckline types?
People call many things “halter.” In production, I need clear definitions. The neckline type changes support, comfort, and who can wear it.
A halter top is any top where the main support comes from straps that tie or fasten behind the neck. The key summer neckline types are: classic triangle halter, high-neck halter, plunge halter, wrap halter, and halter with underbust band. Each type changes coverage, lift, and heat comfort.
The halter types I use when I talk to buyers
- Classic triangle halter: most “beach” look, lowest structure
- High-neck halter: more coverage, more stable for movement
- Plunge halter: night-out look, highest gaping risk
- Wrap halter: adjustable, good for varied bust shapes
- Underbust-band halter: most supportive, best for long wear
A quick “who is it for” guide
| Halter Type | Best For | Common Complaint | Risk Level |
|---|---|---|---|
| Triangle | vacation, beach | slip + gaping | High |
| High-neck | day wear + layering | neck heat | Medium |
| Plunge | events | bust exposure | High |
| Wrap | wide size range | tie loosening | Medium |
| Underbust band | long wear | elastic marks | Medium |
Which halter top sub-styles sell best in summer, and when should I stock each one?
I do not stock halters as one item. I stock them as a mini category. That is how I keep sales wide and returns low.
The best-selling summer halter sub-styles are: tie-back triangle halter, high-neck rib halter, satin drape halter, wrap halter crop, halter bodysuit, halter with underbust band, halter peplum, backless halter, and halter with adjustable hardware. I pick 3–4 core halters and 2–3 trend halters each season.
Core halters (reorder-safe)
- High-neck rib halter
- Wrap halter crop
- Halter bodysuit (if the market accepts it)
- Underbust-band halter
Trend halters (traffic drivers)
- Backless halter
- Satin drape halter
- Plunge triangle halter
My assortment split for a boutique buyer
| Role | Target % of Halter Buy | Why |
|---|---|---|
| Core halters | 60–75% | stable fit + wider customer base |
| Trend halters | 25–40% | marketing and social content |
How do I choose fabric for a halter top so it stays supportive, breathable, and not see-through?
Fabric is the engine of a halter. A weak fabric makes the neckline collapse. A hot fabric makes the neck area uncomfortable. Summer also makes light colors risky.
For summer halter tops, I match fabric to the support level: rib knits and stretch jerseys work for daily halters, while satins and light wovens need internal structure like lining, underbust bands, or hidden elastic. I always run opacity and heat-comfort checks because halters expose skin and sit close to sweat zones.
Fabric families and what they do to halters
- Rib knit: best shape hold, best for high-neck halter
- Cotton-spandex jersey: soft comfort, good for wrap halter
- Viscose jersey: great drape, can stretch out if recovery is weak
- Satin: premium look, needs lining to avoid cling and show-through
- Mesh overlay: trend look, must feel soft at neck and seams
Fabric-to-halter matching table
| Halter Sub-style | Best Fabric Options | Main Risk | My Fix |
|---|---|---|---|
| High-neck halter | rib knit, ponte-lite | neck heat | lighter GSM + breathable yarn |
| Triangle halter | stretch jersey, swim-like knit | slip | stronger underbust elastic |
| Satin drape halter | satin + lining | cling + transparency | double layer + clean finish |
| Wrap halter | cotton-spandex, rib | tie loosening | friction tie + stable seams |
| Backless halter | stretch jersey, ponte-lite | exposure | hidden band + secure closure |
My “summer transparency” rule
If it is a light color, I test:
- outdoor sunlight
- indoor strong light
- movement stretch at bust
If it fails, I add lining or I change fabric.
How do I engineer a halter top to prevent neck pain, gaping, and slip?
This is the professional part. Halter tops fail for predictable reasons. The neck strap carries weight. The bust edge needs stability. The back closure needs real holding power.
To prevent neck pain, gaping, and slip, I control three zones: neck strap comfort, bust edge stability, and underbust anchoring. I also balance pattern angles so the top pulls inward, not outward. Then I test movement and long-wear comfort before bulk.
Why neck pain happens (what I see most)
- strap is too thin for the garment weight
- fabric is heavy or lined, but strap spec stays “fashion thin”
- strap placement is too wide, pulling on the neck edge
How I reduce neck pain without killing the look
- I use wider straps or soft folded straps for heavier fabrics
- I add foam or soft interfacing inside straps when needed
- I move strap points inward to reduce neck edge stress
- I use adjustable hardware for better personal fit
Why gaping happens (the bust edge problems)
- neckline curve is too open for the cup area
- low stretch at edge, but high tension at bust
- no stabilizer, so the neckline grows
My gaping control tools
- clear elastic at neckline edge
- light fusible tape on woven halters
- hidden dart or princess seam for shaping
- underbust band to anchor the whole top
Slip prevention: the underbust anchor matters most
If the underbust has no anchor, the neck strap works too hard.
- elastic underbust casing (strongest)
- wide underbust band panel (clean look)
- back hook-and-eye or clasp (better than weak ties)
The fit test I require (simple but strict)
- raise arms 10 times
- lean forward and stand back up 10 times
- walk fast for 2 minutes
- wear it for 15 minutes
If the customer will “adjust it” even once, I revise it.
How do I set sizing and fit rules for halter tops so more body types can wear them?
Halter tops are sensitive to bust shape. If I size them like a normal tank, returns spike. I need a clear sizing logic.
For wholesale halter tops, I reduce returns by offering adjustable elements and by setting two fit blocks: a “stretch block” for knit halters and a “structured block” for woven/satin halters. I also grade strap length and underbust tension, not only bust width.
My fit block approach
- Stretch block (knit halters):
- relies on fabric recovery
- best for S–L range in boutique programs
- Structured block (woven/satin halters):
- needs shaping seams and stable edges
- best when I can spend more time on fit approval
The grading details people forget
- strap length must grade, or taller customers suffer
- underbust elastic must scale with size, or it marks skin
- neckline curve sometimes needs small adjustments by size to reduce gaping
A sizing communication table I send to buyers
| Customer Profile | Best Halter Type | Why It Fits Better | Main Watch-out |
|---|---|---|---|
| Smaller bust | triangle, high-neck | easy coverage | slip if underbust is weak |
| Medium bust | wrap, underbust band | adjustable + anchored | tie loosening |
| Fuller bust | underbust band, structured halter | support + shape | neckline gaping risk |
How do I plan MOQ and production timing for halter tops so I hit summer peaks?
Halter tops are seasonal. If they arrive late, they go straight to discount. I keep development tight.
I plan halter tops with a core-and-trend system: core knit halters run early because they reorder well, while satin/backless halters run later with smaller MOQ because fit and returns are riskier. I also lock trims early because closures and hardware can delay bulk.
My two-track halter plan
- Core (reorder-safe):
- high-neck rib halter
- wrap halter crop
- underbust-band halter
- Trend (test and move fast):
- satin drape halter
- plunge halter
- backless halter
Production risk controls I use
- I approve hardware samples early (rings, sliders, clasps)
- I set elastic specs in writing (width, stretch %, rebound)
- I keep one backup fabric for each core style
- I control stitch type for stretch edges to stop popping
Bandeau Top
Bandeau tops sell fast in summer, but they can also fail fast. If the top slides down, twists, or feels see-through, customers return it the same week. That hurts reviews and ruins reorders.
A summer bandeau top works best when I treat it as a support product, not just a “tube of fabric.” I choose the right internal grip, elastic spec, fabric recovery, and lining plan. Then I stock 6–10 bandeau sub-styles with clear use cases, so buyers can sell confidently.
I learned this after one bulk order that looked amazing on a hanger, but real customers said it kept rolling at the top edge. After that, I started building bandeau tops with a real engineering checklist.
What exactly is a bandeau top in summer, and how is it different from a tube top?
Many buyers mix these two names. In sampling, they are not the same. The difference affects support and customer expectations.
A bandeau top is a strapless top designed to sit flat across the bust with stronger hold and cleaner edges, often with lining, gripper tape, or structure. A tube top is usually more casual, often longer, and often relies more on stretch alone. In summer, bandeau tops need better grip and opacity.
The way I explain it in production terms
- Bandeau top: support-first, clean neckline, often double layer, sometimes removable padding
- Tube top: length-first, more casual, more styling coverage, sometimes less structure
The quick decision rule I use
- If the brand sells it as going-out, I build it like a bandeau.
- If the brand sells it as casual layering, a tube build can work, but I still test slip-down.
Which bandeau top sub-styles sell best in summer, and what is each best for?
Bandeau tops sell for different reasons: tanning, going out, layering, or vacation. I do not use one pattern for all of them.
The most practical bandeau top sub-styles for summer are: basic straight bandeau, ruched bandeau, twist-front bandeau, sweetheart bandeau, bandeau with removable straps, padded bandeau, corset-style bandeau, swim-style bandeau, lace bandeau, and knit rib bandeau. These cover beach, city, and night-out demand.
1) Basic straight bandeau
- Best for: simple styling, low cost
- Risk: slip-down if grip is weak
2) Ruched bandeau
- Best for: bust-friendly look, texture trend
- Risk: uneven gathering after washing
3) Twist-front bandeau
- Best for: vacation photos, shape at center front
- Risk: center twist can flip if not secured
4) Sweetheart bandeau
- Best for: more flattering neckline
- Risk: top edge must be stable or it collapses
5) Bandeau with removable straps
- Best for: customers who want security
- Risk: strap points can tear if not reinforced
6) Padded bandeau (light padding)
- Best for: “no bra needed” selling point
- Risk: pad shifting and heat discomfort
7) Corset-style bandeau (boning or seam shaping)
- Best for: premium going-out
- Risk: boning poke-through, bust fit sensitivity
8) Swim-style bandeau (more compression)
- Best for: beach and resort capsules
- Risk: needs sweat + salt + sun testing
9) Lace bandeau
- Best for: layering and romantic styling
- Risk: itch and snag, needs lining choices
10) Rib-knit bandeau
- Best for: reorder-safe casual
- Risk: bagging if recovery is weak
How do I stop a bandeau top from slipping down, rolling, or twisting in real wear?
This is the main technical problem. A bandeau top sits on a round body with movement, sweat, and skin oils. Gravity wins if the pattern and materials are wrong.
To stop slip-down and rolling, I control four zones: top edge grip, underbust anchor, body compression, and side seam stability. I combine correct elastic tension, gripper tape placement, and balanced pattern shaping so the top holds even when the customer raises arms or sweats.
Why bandeau tops slip down (the causes I see most)
- Top edge has no grip, so it slides on skin
- Underbust is not anchored, so the garment has no “stop point”
- Fabric recovery is weak, so it relaxes after 30 minutes
- Pattern is a straight tube, so it cannot match bust-to-underbust difference
- Sweat reduces friction, especially in hot, humid climates
My “stay-up” engineering checklist
- Top edge control
- add silicone gripper tape or gripper elastic
- avoid gripper that is too hard, because it irritates skin
- Underbust anchor
- add a firmer elastic at underbust
- shape the lower edge slightly so it hugs underbust
- Compression balance
- choose fabric with stable spandex and good recovery
- do not over-compress, because it rolls down
- Side seam stability
- reinforce side seams
- avoid bulky seam allowances that irritate and cause twisting
What I test in fitting (I do not skip this)
- 10 arm raises
- 10 deep breaths
- 10 sit-stand cycles
- 10 twists
If the top moves more than a small amount, I change elastic spec or pattern shaping.
The “rolling edge” problem and my fixes
Rolling often happens when the top edge is too soft.
- Fix options:
- wider binding
- hidden elastic inside binding
- double layer at top edge
- stiffer power mesh lining at top panel
How do I choose fabric and lining for a bandeau top so it feels breathable but not see-through?
Summer bandeau tops run in light colors. They also sit tight to the body, so sheerness and sweat marks show easily.
For summer bandeau tops, I choose fabric based on opacity, recovery, and heat comfort. Rib knits and compression knits work well for casual and swim-style bandeaus. If the outer fabric is light or novelty like lace, I use lining or power mesh to control transparency, support, and sweat behavior.
Fabric options I use and where they fit
- Rib knit (cotton or blends)
- best for: casual bandeau, reorder basics
- watch: recovery and bagging
- Jersey with spandex
- best for: smooth look, graphic options
- watch: curling at edges if too light
- Compression knit / swim fabric
- best for: beach capsules, strong hold
- watch: heat comfort in city wear
- Lace outer with lining
- best for: layering or night-out
- watch: itch and snag
Lining plans that actually work
- Full lining
- best for: white and light colors
- result: best opacity and best stability
- Front panel lining
- best for: cost control, still improves coverage
- result: moderate hold, moderate opacity
- Power mesh internal layer
- best for: support without heavy padding
- result: stable hold, better breathability than thick foam
My “sunlight opacity” test
I hold the fabric under strong light and stretch it to real-wear tension.
- If I can clearly see shape and skin tone, I add lining or change fabric.
How do I add support to a bandeau top without making it uncomfortable in heat?
Support is great until it hurts. Summer customers will not tolerate stiff edges, rough tape, or heavy padding.
I add support in a layered way: soft grip at the top edge, stronger anchor at underbust, and optional light padding. For fuller bust fits, I prefer power mesh and seam shaping over heavy foam, because foam traps heat and causes sweat discomfort.
Support tools I choose from (and when I use them)
- Silicone gripper tape
- use: top edge for slip prevention
- risk: irritation if too aggressive
- Underbust elastic
- use: creates an anchor point
- risk: rolls if too tight
- Power mesh inner layer
- use: support with breathability
- risk: needs soft seams
- Removable padding
- use: “no bra needed” marketing
- risk: pad shifting, heat build-up
- Boning (corset-style bandeau)
- use: premium going-out
- risk: poke-through, higher fit sensitivity
A comfort checklist I use before bulk
- no sharp edges at top binding
- no itchy thread on seams
- no hard gripper that leaves marks
- breathable lining for hot climates
How do I size and grade bandeau tops for wholesale so they fit more body types?
Bandeau tops fail when sizing is treated like a normal knit top. Strapless fit behaves differently. The bust-to-underbust difference matters more.
For wholesale bandeau tops, I use fit blocks built around underbust anchoring and controlled stretch. I grade width carefully and grade length in small steps, because a small length change feels big on a short garment. For fuller bust, I offer structure options like inner mesh or removable straps.
The most common sizing mistakes I see
- grading only bust width and ignoring underbust
- using the same elastic spec across all sizes
- skipping side seam reinforcement on larger sizes
A simple grading guide I follow
- increase underbust support with size, not just body width
- keep top edge binding stable across sizes
- re-test slip-down on at least two sizes, not just one sample size
Fit communication table for buyers
| Customer Segment | Best Bandeau Build | Why It Works | Risk |
|---|---|---|---|
| Small-bust casual | rib bandeau + soft grip | comfort + reorder safe | low |
| Mixed customer base | lined bandeau + underbust anchor | better hold + opacity | medium |
| Going-out premium | corset-style bandeau + inner mesh | shape + support | higher fit risk |
How do I plan MOQ and production so bandeau tops hit summer peak weeks?
Bandeau tops are seasonal and trend sensitive. Timing matters more than most tops because customers buy them for specific trips and weather weeks.
I plan bandeau tops with a core-and-trend split: core rib and lined bandeaus run early with stable fabrics, while trend bandeaus like twist-front or lace run later with smaller MOQ. I lock elastics, grippers, and lining early because these small materials delay bulk the most.
My two-lane planning system
- Core lane
- rib bandeau, straight lined bandeau, swim-style bandeau
- stable colors and repeat blocks
- Trend lane
- ruched, twist-front, lace, corset-style
- smaller MOQ and faster sampling
Materials that can quietly delay production
- silicone gripper tape lead time
- specific elastic widths and softness grades
- removable strap hardware
- padding suppliers
A practical pre-bulk checklist I use
- confirm elastic stretch and recovery by lot
- confirm gripper comfort on skin
- confirm lining shade match under sunlight
- confirm seam type does not pop under stretch
Crop Top
Summer crop tops look like easy money. But heat exposes everything. If the fabric sticks, turns sheer, or rides up, customers refund fast and leave harsh reviews.
The best summer crop tops are the ones I can control by block and fabric: rib-knit crop, tee crop, tank crop, cami crop, halter crop, tube/bandeau crop, wrap crop, off-shoulder crop, corset-style crop, and sporty zip crop. I sell them safely by matching length to rise level, choosing breathable fabrics with strong recovery, and building anti-slip and anti-sheer construction into the sample.
I learned this after one summer order where the photos looked clean, but real customers complained about sweat marks and transparency under sunlight. Since then, I treat crop tops like performance garments, not just fashion pieces.
What exactly makes a crop top “summer-ready” instead of just “short”?
In summer, the same crop top can feel totally different. A spring crop that works at 18°C can feel heavy and sticky at 30°C. So I define “summer-ready” by comfort tests, not by look.
A summer-ready crop top needs three things: airflow, stable coverage, and stay-put construction. That means breathable fibers, enough opacity under strong light, and neckline/hem solutions that stop ride-up and slip-down when the body sweats.
My summer-ready checklist (the one I use before I approve bulk)
- fabric passes a sunlight opacity test
- fabric does not feel sticky after 5 minutes body heat
- hem does not roll after movement test
- straps and elastics do not lose tension after sweat simulation
- fit still looks good when paired with high-rise bottoms, not only low-rise
The biggest difference from spring crop tops
- In summer, sweat reduces friction, so tube and bandeau crops slip more.
- In summer, light colors sell more, so sheerness issues increase.
- In summer, customers wear fewer layers, so finishing and lining choices matter more.
Which summer crop top sub-styles sell best, and what is each best for?
I do not treat “crop top” as one SKU. I break it into sub-styles, because each has different risks, different fabrics, and different best sellers by region.
The most practical summer crop top sub-styles are: rib-knit crop, tee crop, tank crop, cami crop, halter crop, tube crop, bandeau crop, wrap crop, off-shoulder crop, corset-style crop, and sporty zip crop. I keep 3–5 as core reorders and use the rest as trend tests.
My core vs trend split
- Core reorders (safer): rib-knit crop, tee crop, tank crop, cami crop
- Trend tests (higher risk, higher traffic): tube/bandeau, halter, off-shoulder, corset-style, wrap, zip
Quick use-case map
| Sub-style | Best Customer Moment | Main Risk | Risk Level |
|---|---|---|---|
| Rib-knit crop | daily outfits | bagging | Low |
| Tee crop | casual volume | shrink/twist | Low |
| Tank crop | heat + travel | armhole gaping | Medium |
| Cami crop | day-to-night | strap slip | Medium |
| Tube/bandeau | vacation + events | slip-down | High |
| Corset-style | going-out | bust fit | High |
How do I choose the best fabric for a summer crop top without sweat problems or see-through issues?
This is where most crop tops fail. In summer, customers sweat. They also step into sunlight. A fabric that looks fine indoors can become transparent outdoors.
For summer crop tops, I choose fabric by four tests: breathability, opacity under sunlight, recovery after stretch, and comfort against sweat. Cotton-spandex jersey and stable rib knits are safest for core crops. For satin, lace, mesh, or stretch wovens, I add lining, double layers, or structure to keep coverage and shape.
Fabric families I use, and why
- Cotton jersey (with a bit of spandex): breathable, stable, reorder-friendly
- Rib knit (cotton or rayon/nylon blends): fitted look, strong recovery if gauge is right
- Light wovens (poplin, stretch woven): crisp shape, but fit risk is higher
- Novelty fabrics (lace/mesh/crochet): trend wins, but they need layering plans
The “summer sheer trap” and how I control it
I see these issues every year:
- white and pastel crops become see-through
- thin knits show bra lines
- sweat darkens fabric and shows more
What I do in development:
- I run a sunlight test with dark underlayer
- I increase GSM or tighten knit structure for light colors
- I use double-layer front panels for tube/bandeau
- I add full lining for corset-style crops if the outer is thin
Fabric-to-style matching table (my practical version)
| Crop Sub-style | Best Fabric Options | What Can Go Wrong in Summer | My Fix |
|---|---|---|---|
| Rib-knit crop | stable rib, higher gauge rib | bagging at hem | recovery test + firm hem |
| Tee crop | cotton-spandex jersey | twist, sweat marks | wash test + better dyeing |
| Tank crop | rib or jersey | gaping, bra show | armhole curve control |
| Cami crop | satin, rib, stretch woven | sheerness, strap slip | lining + better adjuster |
| Tube/bandeau | double-layer rib, power mesh lining | slip-down | silicone tape + elastic spec |
| Corset-style | stretch woven, ponte | bust gaping | internal structure + grading |
How do I engineer a summer crop top so it stays in place when customers sweat?
Sweat changes everything. It makes the skin slippery. It also makes thin fabric cling and move. If I do not engineer for sweat, the crop top shifts, rides, and slips.
To keep a summer crop top stable, I control four engineering points: friction, tension, balance, and seam stability. I add anti-slip solutions for strapless styles, set elastic stretch ratios with testing, balance front/back length for bust tension, and stabilize necklines and shoulder seams to stop upward pull.
1) Friction control (anti-slip)
This matters most for tube and bandeau crops.
- silicone tape placement must match the body contact zone
- double-layer fabrics increase grip and reduce rolling
- I avoid overly smooth inner linings for strapless tops
2) Tension control (elastic specs that actually work)
A common supplier mistake is “elastic by feel.” That fails in bulk.
I set:
- elastic width
- stretch ratio target
- rebound requirement after 10 stretches
3) Balance control (pattern that respects the bust)
Ride-up often comes from bust tension.
- fuller bust blocks need more front length
- side seam angle must reduce upward pull
- the hem opening cannot be tighter than the bust area in cropped fits
4) Seam stability (so the garment does not deform)
- shoulder tape on knits stops neckline growth
- coverstitch choice affects curl and comfort
- seam type must match stretch level to avoid popping
My movement and sweat simulation test
I do a simple routine before bulk approval:
- wear for 10 minutes in warm room
- 10 arm raises
- 10 twists
- 10 sit-stand cycles
Then I check: - slip-down amount (cm)
- hem roll
- neckline wave
- seam stress marks
How do I grade and size summer crop tops for wholesale so fewer customers say “this is not for real people”?
Crop tops get judged harder because they show skin. If sizing is off by 1–2 cm, customers feel it immediately. I do not grade crop tops like normal tees.
For summer crop tops, I reduce returns by using two fit blocks (fitted and relaxed), grading length in smaller steps, and separating stretch levels by label. I also plan for rise levels, because a high-rise bottom can turn one crop into “perfect,” while a mid-rise bottom turns it into “too short.”
My two-block system
- Fitted block: rib-knit, bodysuit-like crops, going-out shapes
- Relaxed block: tee crops and casual tanks
Length grading rules I follow
- I keep length jumps small across sizes
- I add bust allowance where needed, not only width
- I confirm the final look with both high-rise and mid-rise bottoms
| Buyer Customer Profile | Best Crop Fit | Why It Works in Summer | Main Warning |
|---|---|---|---|
| Mainstream boutique | high-waist crop | coverage + comfort | avoid ultra-thin fabric |
| Trend-led Gen Z | micro to bust-line crop | social styling | higher returns |
| Premium night-out | corset-style crop | strong margin | bust fit complexity |
How do I plan MOQ and production timing for summer crop tops without missing peak heat weeks?
Summer is short. If crop tops land late, the brand goes straight into discount mode. I treat crop tops like fast drops with controlled risk.
I plan summer crop tops with a core-and-trend calendar: core crops run early with stable fabrics and repeat blocks, while trend crops run later with smaller MOQ and faster sampling. I also lock critical trims early for strapless and corset styles, because elastics and hardware delays kill summer timing.
My two-lane production plan
- Core lane (reorder-safe):
- rib-knit crop, tee crop, tank crop, cami crop
- stable colors and repeat fabric lots
- Trend lane (traffic pieces):
- tube/bandeau, halter, off-shoulder, corset-style, wrap
- smaller MOQ and fast approval rules
The production risks that cause late delivery
- elastic and silicone tape lead times
- shade mismatch in light colors across reorders
- lining fabric shortages for double-layer builds
- incorrect grading on short lengths
The rule I follow to protect the season
If a trend crop needs more than 2 sample rounds, I either:
- change it to a safer fabric or construction, or
- move it to the next drop and keep the current drop simple
T-Shirt
Summer T-shirts look basic, but they are the easiest place to lose money. One wrong fabric weight or one unstable neckline can turn a “core” item into endless complaints and size swaps.
For summer, I treat T-shirts as a performance basic. I choose T-shirt types by fit block, fabric weight, and neckline stability. Then I test shrink, twist, opacity, and sweat comfort. With the right specs, a summer T-shirt becomes the safest reorder style in the whole tops program.
I learned this when a buyer reordered the same tee and the second batch looked different under sunlight. The photos were fine, but customers called it “cheap” because the fabric showed through. After that, I started running a summer tee like a controlled product, not a simple item.
What are the main T-Shirt types that actually matter for summer selling?
When buyers say “T-shirt,” they usually mean different things. If I do not define the type, sampling becomes messy and bulk becomes risky.
The most practical summer T-shirt types are: classic crew tee, V-neck tee, scoop neck tee, boxy tee, baby tee, oversized tee, fitted tee, cropped tee, pocket tee, and raglan tee. These cover the core fits that drive volume, plus a few trend fits that create social demand.
1) Classic crew tee
- Best for: core basics, reorders
- Risk: neckline wave if rib spec is weak
2) V-neck tee
- Best for: elongating neckline, smart casual
- Risk: point distortion after washing
3) Scoop neck tee
- Best for: softer feminine look
- Risk: gaping at chest
4) Boxy tee
- Best for: modern silhouette, easy styling
- Risk: looks “short” on tall bodies if length is not controlled
5) Baby tee (tight fit)
- Best for: Gen Z trend
- Risk: high stretch demand, size complaints
6) Oversized tee
- Best for: streetwear, comfort in heat
- Risk: shoulder drop looks sloppy if pattern balance is wrong
7) Fitted tee
- Best for: layering and clean tuck
- Risk: cling + sheerness under sunlight
8) Cropped tee
- Best for: high-waist denim styling
- Risk: ride-up and hem curl
9) Pocket tee
- Best for: casual detail, higher perceived value
- Risk: pocket twisting and puckering
10) Raglan tee
- Best for: sporty look, better shoulder mobility
- Risk: seam puckering if fabric is too light
How do I choose the best summer T-shirt fabric without making it see-through, sticky, or easy to deform?
Fabric is the whole game in summer. The same fit can feel premium or cheap just because the fabric is wrong.
For summer T-shirts, I choose fabric by four checks: breathability, opacity in sunlight, recovery after stretch, and wash stability. Cotton and cotton blends are the safest for mass selling, while heavy polyester basics often feel hot and trap odor. I pick GSM and knit structure based on fit type and target price.
My “summer fabric truth” for T-shirts
- If it is too light, it turns see-through and the neckline waves.
- If it is too heavy, it holds heat and feels stiff.
- If recovery is weak, it bags out at hem, elbows, and neckline.
GSM and structure: how I set the range
I do not treat GSM as one fixed number. I tie it to fit.
- Fitted / baby tee: usually needs a bit more weight or tighter knit so it is not transparent
- Oversized tee: can go lighter if the knit structure is tight and the drape is clean
- White tee: needs the strictest opacity control, no matter the fit
Fabric options I use most for summer tees
- Cotton jersey: classic, breathable, easy reorder
- Cotton-modal: softer hand-feel, good drape, more “premium” touch
- Cotton-spandex: better recovery for fitted tees and baby tees
- Rib knit (for baby tees): strong stretch + shape, but needs recovery testing
Fabric-to-fit matching table
| T-Shirt Fit | Best Fabric Options | Common Complaint | My Spec Fix |
|---|---|---|---|
| Classic crew | cotton jersey, cotton-modal | shrink/twist | preshrink wash test + grainline control |
| Fitted tee | cotton-spandex jersey | see-through | tighter structure + opacity test |
| Baby tee | rib knit, cotton-spandex | too tight | stretch ratio + grading review |
| Oversized tee | cotton jersey, modal blend | “sloppy” drape | pattern balance + side seam control |
| White tee | higher opacity cotton | transparency | sunlight test + tighter knit |
How do I prevent the 7 biggest quality issues that ruin summer T-shirts?
This is the section where I get very strict. Summer tees fail in predictable ways. If I control these, returns drop fast.
The top summer T-shirt issues are: shrink, twisting, neckline wave, pilling, see-through, color change from sweat/wash, and seam distortion. I prevent them with wash testing, rib and stitching specs, controlled cutting direction, and stronger stabilization at stress points.
1) Shrink after wash
- Why it happens: unstable cotton, no preshrink control
- What I do:
- run wash test before bulk
- set shrink tolerance in the tech pack
- adjust pattern if needed
2) Side seam twisting (spirality)
- Why it happens: poor yarn balance or wrong cutting direction
- What I do:
- control fabric spirality in testing
- enforce grainline during cutting
- avoid unstable open-end fabrics for premium tees
3) Neckline wave and rib stretching
- Why it happens: wrong rib ratio, weak recovery, no stabilization
- What I do:
- set rib spec and stretch ratio
- add shoulder tape if needed
- choose better rib structure for white tees
4) Pilling on surface
- Why it happens: short fibers, friction, cheap blends
- What I do:
- fiber quality control
- pilling test on core colors
- adjust finishing if needed
5) See-through under sunlight
- Why it happens: low GSM, loose knit, light colors
- What I do:
- sunlight test on body form
- upgrade to tighter knit structure
- add a second layer only when the price allows
6) Color change and sweat marks
- Why it happens: dye not stable, fabric holds odor
- What I do:
- color fastness to perspiration testing
- avoid heavy polyester for basic tees
- recommend breathable fibers for hot markets
7) Hem and seam distortion
- Why it happens: wrong stitch type for stretch, weak thread
- What I do:
- match seam type to fabric stretch
- reinforce stress points
- control needle choice to avoid holes on light knits
My basic QC checklist for summer tees
- wash test: shrink + twist
- sunlight opacity test
- neckline recovery pull test
- pilling test on core colors
- seam strength check at shoulder and hem
Buyers want margin. Customers want comfort. If I add too many details, costs rise and lead time slows. I like “small moves” that change perception.
To make a summer T-shirt feel premium, I focus on hand-feel, drape, and clean finishing. I use better yarn, tighter stitching control, stable rib, and small branded details like embroidery or woven labels. These changes raise perceived value more than big design changes.
Premium-feel levers that work in bulk
- softer fabric blend (like cotton-modal) for a smooth touch
- cleaner neck rib and consistent topstitch
- better pressing and packaging to reduce wrinkles
- stable color matching for reorders
Detail upgrades that do not break fit
- small chest embroidery or tonal logo
- clean pocket tee with reinforced corners
- subtle contrast stitch on shoulder
- branded neck tape and woven size labels
| Upgrade | Visual Impact | Cost Impact | Best For |
|---|---|---|---|
| better rib neck spec | high | low | all core tees |
| cotton-modal blend | medium-high | medium | premium basics |
| chest embroidery | medium | low-medium | brand identity |
| pocket with bartacks | medium | low | casual lines |
How do I plan MOQ and production for summer T-shirts so reorders are stable?
A T-shirt should be the easiest reorder item. It only becomes hard when the first bulk is not controlled.
For summer T-shirts, I keep two blocks (core and trend), lock a small fabric library, and standardize trims. Then I reserve capacity for reorders and keep color standards for repeat dyeing. This protects delivery and keeps the second batch consistent.
The two-block system I like
- Core block: classic crew, slightly relaxed fit
- Trend block: oversized or baby tee, depending on the brand
Reorder stability rules I follow
- lock fabric mill and color standards early
- keep core colors running across the season
- standardize rib spec and neck tape across styles
- leave production space for quick replenishment
Lead time risks that hit tees
- fabric dye delays for repeat colors
- shade variation between lots
- rib mismatch if the rib source changes
Oversized T-Shirt
Oversized tees sell every summer, but they also disappoint fast. If the fabric is too thick, people sweat. If the pattern is too wide, it looks sloppy. If the neck stretches, the whole top feels cheap.
A great summer Oversized T-Shirt needs three things: a breathable fabric with the right GSM, a balanced oversized block (width, shoulder drop, and length), and stable construction at the neckline and seams. When I control these points, oversized tees become repeatable core sellers, not one-time hype.
I used to think “oversized” meant “make everything bigger.” Then I saw returns. Customers said the sleeves swallowed their arms and the hem looked like a dress. After that, I started treating oversized tees like a designed silhouette, not a scaled-up regular tee.
What does “oversized” actually mean for a summer T-shirt, and how should I measure it?
In production, “oversized” is not a vibe. It is a spec. If I do not define it clearly, every factory sample will look different.
For a summer Oversized T-Shirt, I define oversized by extra ease at chest, a dropped shoulder, and a wider sleeve, but with controlled neck width and a planned body length. I measure it against a standard tee block, then I lock the deltas so reorders stay consistent.
The 3 most important oversized signals
- Chest ease: bigger circumference without tightness
- Dropped shoulder: shoulder point moves outward
- Sleeve volume: wider sleeve opening and bicep
The mistake I avoid: only increasing width
If I only add width, the tee becomes a square. It loses shape and looks cheap. I need balance:
- more shoulder drop
- slightly longer sleeve
- controlled length
- stable neckline
A simple “delta spec” approach (how I keep it consistent)
I compare an oversized tee to my regular tee in the same size:
- chest width: +X cm
- shoulder width: +X cm
- sleeve length: +X cm
- body length: +X cm
This makes oversized repeatable across colors and seasons.
Which oversized T-shirt sub-styles sell best in summer, and when should I use each?
Oversized tees are not all the same. The neckline, sleeve, and hem finish decide whether it looks street, sporty, or premium.
The best-selling summer oversized tee sub-styles are: classic crew oversized, boxy oversized, drop-shoulder oversized, longline oversized, oversized baby-graphic tee, oversized pocket tee, oversized “vintage wash” tee, and oversized split-hem tee. Each one fits a different customer scene and price point.
8 summer-friendly oversized tee sub-styles
1) Classic crew oversized
- best for: broad customer base
- easiest reorder style
2) Boxy oversized (controlled length)
- best for: trend-led brands
- must avoid “too short, too wide” extremes
3) Drop-shoulder oversized
- best for: streetwear look
- watch shoulder seam stretching
4) Longline oversized
- best for: legging outfits and coverage
- risk: customers call it “too long” in heat
5) Graphic oversized tee
- best for: marketing and identity
- print hand-feel must stay soft
6) Pocket oversized tee
- best for: casual premium look
- pocket placement must stay clean
7) Vintage wash oversized tee
- best for: higher margin and “worn-in” feel
- wash consistency is the main risk
8) Split-hem oversized tee
- best for: styling movement
- side slit reinforcement is needed
How do I choose the right fabric for a summer Oversized T-Shirt so it stays breathable but not see-through?
Fabric is the biggest summer decision for oversized tees. Oversized adds more surface area, so heat and drape issues show more.
For a summer Oversized T-Shirt, I pick fabric by airflow, opacity, and drape. Mid-weight jersey that breathes but is not sheer is usually the sweet spot. If the fabric is too light, it clings and looks cheap. If it is too heavy, it feels hot and stiff.
The fabric trade-offs I explain to buyers
- Lightweight jersey: cooler, but can be sheer and clingy
- Mid-weight jersey: best balance for most markets
- Heavyweight jersey: premium hand-feel, but can be hot in summer
GSM guidance I use (not as a rule, as a starting range)
- very hot markets: lower-mid GSM, but tight knit structure
- mixed summer markets: mid GSM, better opacity
- premium streetwear: mid-high GSM, but breathable yarn
Opacity in oversized tees is not just GSM
I also check:
- yarn quality and knit density
- color (white and pastels need more control)
- finishing (too much softener can reduce structure)
Fabric-to-style matching table
| Oversized Tee Type | Best Fabric Options | Main Risk | My QC Focus |
|---|---|---|---|
| Classic crew oversized | cotton jersey, cotton-modal | shrink/twist | wash test + spirality |
| Boxy oversized | tighter jersey, compact cotton | cling or “paper feel” | drape check + hand-feel |
| Vintage wash oversized | cotton jersey for washing | shade variation | wash standard + batch control |
| Graphic oversized | smooth cotton, cotton blend | stiff print | print hand + cracking test |
How do I engineer the pattern so an oversized tee looks intentional, not sloppy?
This is where the professional work is. Oversized looks “easy,” but the block is hard. A good oversized tee has clean lines.
I make an oversized tee look intentional by controlling shoulder drop, neckline width, sleeve opening, and body length at the same time. I also plan the side seam angle and hem sweep so the tee hangs straight instead of ballooning.
The 5 pattern points I lock before bulk
- Neck width: too wide looks stretched and cheap
- Shoulder drop: too much drop makes sleeves collapse
- Sleeve opening: big, but not “wing-like”
- Body length: long enough for coverage, short enough for heat
- Hem sweep: controlled curve or straight, no flare
What “sloppy” usually means in customer feedback
- neckline falls backward
- sleeves look like a cape
- hem spreads outward when walking
- tee twists after wash
- shoulders sit too far down the arm
My “hang test” for oversized tees
I hang the tee on a standard hanger and check:
- side seams hang straight
- hem is level
- shoulder seams are symmetric
- neckline lies flat
If the tee fails this, it will look worse on body, not better.
How do I stop the top 7 quality complaints for summer oversized T-shirts?
Oversized tees are basics, so customers expect them to last. That means small defects become loud complaints.
The most common oversized tee complaints are: hot and heavy feel, see-through fabric, twisting after wash, stretched neckline, pilling, print cracking, and uneven vintage wash shading. I reduce these by testing fabric stability, reinforcing neck and shoulder seams, and controlling wash and print processes.
Complaint 1: “It feels too hot”
- cause: fabric too heavy, poor breathability
- fix: choose breathable yarns and avoid stiff finishing
Complaint 2: “It’s see-through”
- cause: low density knit, light colors
- fix: tighter structure, double-check opacity under sunlight
Complaint 3: “It twisted after wash”
- cause: poor grainline control, unstable jersey
- fix: spirality test and better cutting control
Complaint 4: “The neckline stretched”
- cause: weak rib + no stabilization
- fix: add shoulder tape and stable neck rib spec
Complaint 5: “It pilled”
- cause: short fibers, bad finishing
- fix: better yarn, pilling tests, avoid too soft hand-feel
Complaint 6: “The print feels like plastic”
- cause: heavy ink deposit
- fix: softer print method and hand-feel approval
Complaint 7: “Vintage wash looks different”
- cause: wash process variation
- fix: keep a wash standard and batch control
The test set I run before I approve bulk
- wash test (shrink + twist)
- neckline recovery test
- pilling test for fabric
- print crack test (for graphics)
- color fastness to sweat (summer requirement)
Oversized tees can be cheap, or they can be a hero product. The difference is details that customers can feel.
To position an oversized tee as premium, I focus on fabric hand-feel, neckline build, clean stitching, and consistent fit. Then I add one signature detail like a small embroidery, special wash, or a better hem finish. These moves raise perceived value without breaking production.
Premium signals customers notice fast
- thicker, smoother neck rib
- clean topstitching
- even shoulder and sleeve seams
- soft but stable fabric hand
- consistent sizing across colors
Low-risk upgrades I like for wholesale
- embroidery logo at chest
- branded neck tape
- higher-quality label set
- split hem or curved hem finish
- garment wash with controlled shading
Polo Shirt
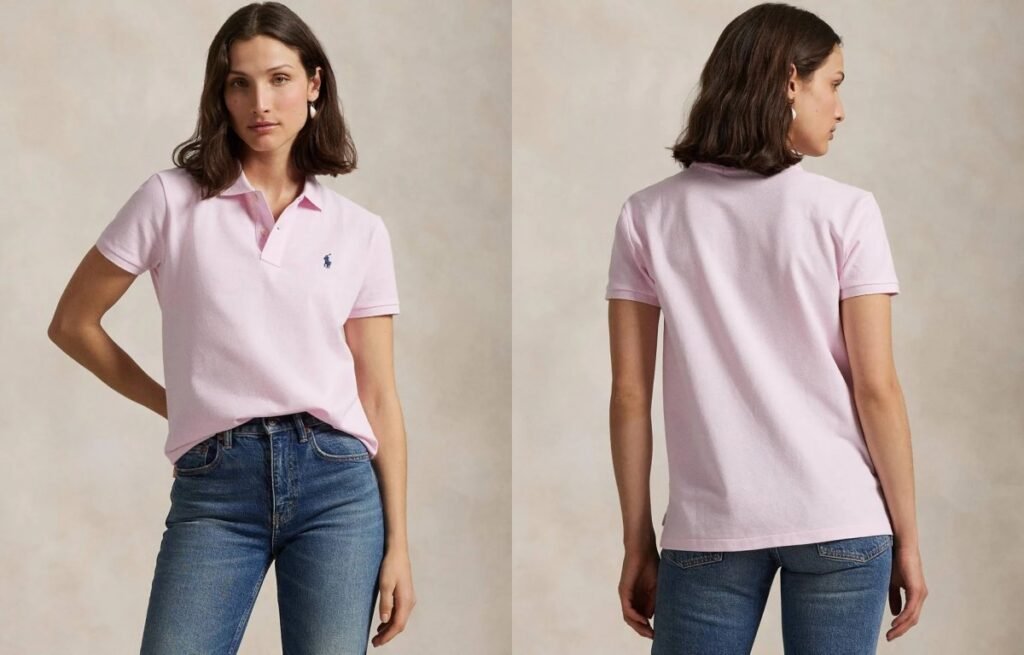
In summer, a polo shirt can look premium in photos but feel hot in real life. If the collar curls or the fabric pills, buyers stop reordering. That hurts margin and brand trust fast.
For summer, the best polo shirt choices balance breathability, collar structure, and wash stability. I usually focus on 6–8 proven polo variants, then control fabric weight, collar interlining, placket construction, and pilling risk so the polo stays crisp after sweat and repeated washing.
I learned this after one early run where the polos looked sharp on day one, then the collar rolled and the surface fuzzed after two washes. Since then, I treat a polo like a technical top, not a basic tee with buttons.
What makes a polo shirt “summer-ready,” and what should I look for first?
A summer polo fails when it traps heat or shows sweat. So I start with airflow and moisture behavior, then I confirm collar and placket stability.
A summer-ready polo shirt uses breathable fibers, a lighter but stable fabric structure, and a collar that holds shape after washing. The first things I check are fabric weight and knit structure, then I test collar curl, placket puckering, and pilling before I approve bulk.
My “summer polo” first-pass checklist
- fabric must breathe and not feel sticky
- light colors must not turn see-through under sun
- collar must stay flat after washing
- placket must not wave or pucker
- surface must resist pilling from friction
A quick rule I use
If the polo is meant for hot cities, I avoid heavy, dense fabrics that feel good in hand but hold heat.
What are the most popular polo shirt styles for summer, and when should I use each?
Polo shirt is a family, not one item. Style choice decides how it sells: sporty, preppy, minimal, or elevated.
The most popular summer polo shirt styles include: classic pique polo, jersey polo, knit polo, open-collar polo, zip polo, cropped polo, oversized polo, and sleeveless polo. I choose the style based on heat level, target age, and whether the brand wants “casual clean” or “fashion statement.”
1) Classic pique polo
- Best for: everyday preppy look
- Risk: collar curl if collar knit is weak
2) Jersey polo (tee-like polo)
- Best for: soft comfort, easy fit
- Risk: placket waviness without stabilizing
3) Knit polo (sweater-like polo, but light)
- Best for: premium feel and margin
- Risk: pilling and snag if yarn is wrong
4) Open-collar polo (no buttons)
- Best for: modern minimal styling
- Risk: neckline stretching on soft knits
5) Zip polo
- Best for: sporty and street
- Risk: zipper wave and weight on neckline
6) Cropped polo
- Best for: Gen Z outfits
- Risk: hem curl and grading mistakes
7) Oversized polo
- Best for: relaxed street-prep trend
- Risk: shoulder drop and sleeve balance
8) Sleeveless polo
- Best for: hot climates and resort edits
- Risk: armhole gaping and neckline distortion
How do I pick the right fabric for a summer polo shirt without pilling, overheating, or see-through issues?
Fabric choice is the biggest driver of comfort and durability. Many “nice-looking” polos fail because the structure is too dense for summer or the yarn pills fast.
For summer polo shirts, I select fabric by knit structure and yarn performance. Pique and breathable jerseys are safest for heat, while knit polos need anti-pilling yarn choices and careful stitch density. I also use opacity checks for light colors and sweat-behavior checks to prevent summer complaints.
The main polo fabric options I use (and what they mean)
- Pique knit
- feel: textured, breathable
- best for: classic polos
- risk: collar curl if collar knit is not stable
- Single jersey
- feel: smooth and soft
- best for: jersey polos and open collars
- risk: placket waves without support
- Interlock
- feel: thicker and smoother
- best for: premium basics, but not peak heat
- risk: holds more heat
- Light knit (fine gauge)
- feel: elevated, “sweater polo” vibe
- best for: knit polos
- risk: pilling and snagging
My fabric selection table for summer polos
| Polo Type | Best Fabric | Why It Works in Summer | Main Risk | My QC Focus |
|---|---|---|---|---|
| Classic polo | pique | airflow + structure | collar curl | collar stability + wash test |
| Jersey polo | cotton-spandex jersey | soft and flexible | placket wave | fusing/tape + stitch density |
| Knit polo | fine gauge knit | premium look | pilling/snags | yarn choice + abrasion test |
| Zip polo | pique or stable jersey | keeps shape | zipper wave | zipper tape + neckline support |
The anti-pilling reality
Pilling is not only “bad yarn.” It is friction + fiber + finishing.
- I reduce pilling with better yarn blends and tighter control of surface finishing.
- I also avoid very fuzzy hand-feel finishes on polos meant for daily wear.
Opacity and sweat checks I always do
- sunlight test for white and pastel colors
- sweat mark check on mid-tone colors
- wash test to see if the fabric goes stiff or loses hand-feel
How do I engineer collars and plackets so a polo shirt stays crisp after washing?
Most polo complaints come from the top area. If the collar curls or the placket puckers, the whole top looks cheap, even if the fabric is good.
I engineer polo collars and plackets by controlling knit stability, interlining or fusing choice, stitch density, and seam reinforcement. The goal is simple: the collar must stay flat and the placket must stay straight after wash, heat, and daily movement.
Why collars curl (what I see most)
- collar knit is too soft or too loose
- collar edge has no stabilization
- collar stand balance is wrong
- wash shrink changes collar shape
Collar build options I use (from classic to fashion)
- Rib collar (classic)
- stable when rib spec is correct
- needs edge control to avoid rolling
- Self-fabric collar (fashion jersey polos)
- looks minimal
- needs tape or interlining support
- Flat knit collar (premium knit polos)
- elevated look
- yarn and gauge decide durability
Placket engineering rules I follow
- For jersey polos, I often use:
- stabilizing tape
- correct fusing
- clean topstitch spacing
- For pique polos, I focus on:
- placket layer thickness balance
- button spacing to prevent pulling
A failure-proof test I use before bulk
- wash and tumble (or line dry, depending on brand standard)
- press lightly
- check collar edge for roll
- check placket for wave
- check buttons for cracking or loose stitching
How do I stop summer polo shirts from feeling hot, sticky, or smelly?
This is the “comfort truth” that decides reorder rate. A polo can be beautiful, but if it feels hot, customers wear it once and stop.
To keep a summer polo comfortable, I control breathability, moisture behavior, and surface finishing. I use lighter structures, avoid heavy finishes that trap heat, and choose fibers that feel dry. I also plan color and fit to reduce visible sweat marks.
Comfort levers I use
- fabric weight: lighter but stable wins
- airflow: pique and open structures breathe better
- fit: a slightly relaxed body reduces cling
- finishing: avoid heavy coatings that block airflow
Sweat mark control (practical choices)
- avoid mid-tone solid colors that show sweat easily
- use texture (pique) to hide marks
- consider small patterns or melange effects for daily polos
Some cheap synthetic-heavy fabrics trap odor. If the polo is for daily wear, I keep comfort first and do not chase only low cost.
How do I grade and fit polo shirts for women’s summer lines without returns?
Women’s polos are not just “smaller men’s polos.” Bust, shoulder angle, and sleeve balance change the fit. In summer, small fit issues feel bigger because customers do not layer.
For women’s summer polos, I reduce returns by using a dedicated women’s block, controlling bust ease, and grading length carefully. I also adjust sleeve opening and armhole shape so the polo stays neat without restricting movement in heat.
Fit points that matter most
- bust pull at placket area
- armhole comfort without gaping
- shoulder slope alignment
- body length that matches rise trends (high waist vs mid rise)
My fit block approach
- core women’s polo block: stable for classic pique and jersey polos
- trend blocks: cropped, oversized, sleeveless, used with smaller MOQ
A measurement table I discuss with boutique buyers
| Fit Goal | Best Polo Variant | Why It Works | Common Return Reason |
|---|---|---|---|
| Daily smart casual | classic pique polo | stable and breathable | collar curl if weak spec |
| Soft comfort | jersey polo | easy fit | placket waviness |
| Premium look | knit polo | elevated texture | pilling and snag |
| Hot climate | sleeveless polo | max airflow | armhole gaping |
How do I plan MOQ and production timing for polo shirts so I can reorder fast in summer?
Polos are strong reorder items when quality is consistent. If the collar spec changes or the dye lot shifts, reorders become risky.
I plan polo shirts with stable core specs for reorders and smaller trend runs for fashion variants. I lock collar and placket components early, keep one approved color standard, and schedule quick replenish capacity for the best-selling colors and sizes.
My MOQ strategy for polos
- higher MOQ for classic pique and jersey polos
- lower MOQ for knit polos, zip polos, cropped polos
What I lock early to protect reorders
- collar knit spec and supplier
- button type and size
- fusing and tapes for plackets
- approved lab dips for core colors
My reorder-friendly production habits
- keep one “golden sample” for each core polo
- keep one consistent shrink standard
- document the collar curl test results by batch
Button-Up Shirt
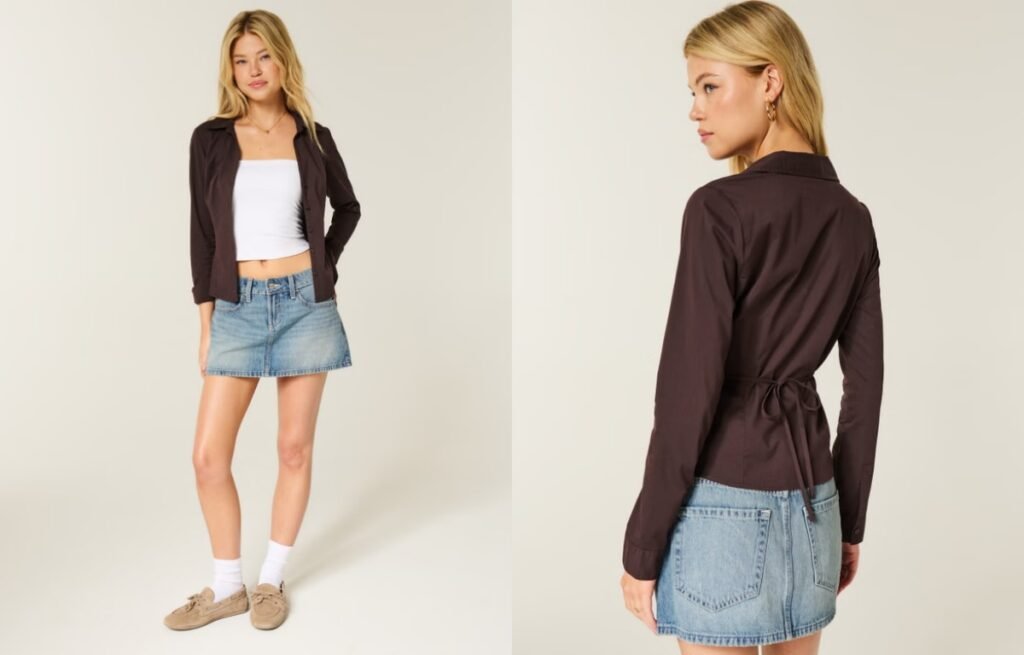
A summer button-up looks “safe,” but it can fail fast. Heat makes wrinkles worse, sweat shows through light colors, and bad collar or placket build makes the shirt look cheap in photos.
For summer, the best button-up shirt is light, breathable, and stable after washing. I focus on fabric (linen, cotton poplin, rayon blends), fit block (relaxed vs tailored), and construction (collar stand, placket, button spacing). Then I pick 6–10 proven sub-styles and control shrink, seam slippage, and shade consistency.
I once helped a buyer rush a button-up for a summer drop. The sample looked crisp, but bulk arrived with collar curl and uneven plackets. That mistake taught me one rule: for button-ups, small construction errors show bigger than any print or trim.
Many buyers say “button-up” when they mean different things. I separate it by structure and how it behaves in heat.
A summer button-up shirt is a woven, front-opening top with functional buttons that is designed for airflow and light layering. It usually uses lighter fabrics, shorter sleeves, or looser fits than spring/fall versions, and it must pass opacity and sweat comfort checks in light colors.
How I separate common terms (so specs stay clear)
- Button-up: has buttons on the front opening
- Button-down: button-up shirt with collar points that button down
- Overshirt: heavier button-up used as a layer, not a base
- Resort/Camp collar shirt: open collar, relaxed summer vibe
The summer-specific performance needs
- airflow at chest and back
- less cling when sweating
- less show-through under sunlight
- tolerable wrinkle level for the price point
I do not treat button-ups as one SKU. I treat them like a small family of styles that match different outfit needs.
The most popular summer button-up sub-styles are: classic poplin shirt, linen shirt, camp collar shirt, oversized boyfriend shirt, cropped boxy shirt, short-sleeve button-up, sleeveless button-up, denim chambray shirt, stripe/oxford-lite shirt, and lightweight overshirt. Together, they cover office casual, vacation, and street styling.
1) Classic poplin shirt
- Best for: clean smart casual
- Risk: wrinkles, transparency in white
2) Linen shirt
- Best for: breathable premium look
- Risk: shrink and heavy wrinkling
3) Camp collar (resort) shirt
- Best for: vacation and relaxed styling
- Risk: collar shape and drape
4) Oversized boyfriend shirt
- Best for: layering over tanks and swim
- Risk: sleeve balance and shoulder drop
5) Cropped boxy button-up
- Best for: Gen Z sets and high-waist pairing
- Risk: button gaping at bust
6) Short-sleeve button-up
- Best for: hot climates, daily wear
- Risk: sleeve opening and arm mobility
7) Sleeveless button-up
- Best for: minimal heat, office-friendly
- Risk: armhole gaping and bra exposure
8) Chambray shirt
- Best for: denim look without heavy heat
- Risk: shade variation across reorders
9) Stripe / “oxford-lite” shirt
- Best for: preppy boutiques
- Risk: stripe matching at seams
10) Lightweight overshirt
- Best for: sun protection + AC indoors
- Risk: becomes too hot if fabric is wrong
Fabric decides 70% of customer satisfaction for summer button-ups. In summer, the wrong fabric turns into cling, odor, and transparency.
For summer button-up shirts, I pick fabrics by airflow, opacity, and seam strength. Linen and linen blends breathe best, cotton poplin gives crisp shape, and rayon/viscose blends drape well but need seam control. Light colors require strict opacity testing, and open weaves require seam slippage checks.
Fabric options and what I watch
- Linen / linen blends
- Pros: top breathability, natural texture
- Cons: wrinkles fast, can shrink, open weave can slip at seams
- Cotton poplin
- Pros: crisp, stable, easy to sew
- Cons: can feel stiff in extreme heat if too dense
- Cotton voile / lightweight cotton
- Pros: airy, soft
- Cons: can be see-through, needs lining plan or darker color
- Rayon/viscose woven
- Pros: smooth drape, cool touch
- Cons: can show sweat marks, can weaken when wet, needs careful finishing
- Chambray (light denim look)
- Pros: casual, durable feel without heavy denim
- Cons: shade variation, crocking risk in dark colors
My “sunlight opacity” test (simple but strict)
- I hold the fabric under strong light
- I check it over skin-tone cards
- I check it over a dark bra color
If it fails, I either change fabric, add lining, or avoid light colors.
Open weaves like some linen blends can pull at seams.
- I increase stitch density where needed
- I avoid too-wide seam allowances that distort
- I use stronger thread and correct needle size
- I run a seam slippage test before bulk
Button-ups look clean only when the front sits flat. In summer, buyers like relaxed fits, but bust gaping still happens.
I control button-up fit by balancing bust ease, shoulder width, and armhole shape. For women’s button-ups, I focus on bust-to-waist grading, button spacing, and placket stability. For oversized fits, I control shoulder drop so sleeves still move well.
The 4 fit problems I see most often
1) Bust gaping
- cause: not enough bust ease or button spacing too wide
- fix: add bust shaping, adjust button placement, strengthen placket
2) Shoulder pulling
- cause: shoulder too narrow or sleeve cap wrong
- fix: adjust shoulder width and sleeve angle
3) Armhole gaping (sleeveless or oversized)
- cause: armhole curve too deep
- fix: adjust armhole curve and side seam angle
4) Collar looks flat or messy
- cause: collar stand too soft or uneven
- fix: correct fusing and collar stand pattern
Button spacing rules I use for women’s summer shirts
- closer spacing around bust line
- consistent placket width
- strong interfacing at button area to reduce ripple
A quick fit movement check I require
- reach forward as if driving
- raise arms as if putting hair up
- twist torso
If the front pulls open, I revise before grading.
Button-ups are “detail garments.” Buyers judge them from the collar, placket, and topstitching first. In photos, these details decide whether the shirt looks cheap.
To make a summer button-up look premium, I control collar stand shape, placket build, stitch consistency, and pattern matching. I also manage wrinkles by choosing the right fabric finish and by setting realistic wrinkle expectations for linen.
Collar and placket details that change the whole look
- Collar stand height: too high feels stiff; too low looks weak
- Collar point symmetry: uneven points show instantly
- Placket stability: prevents rippling and button pull
- Topstitch distance: inconsistent topstitch reads as low quality
My construction checklist (the one I use before bulk)
- clean collar edge and sharp corners
- even stitch length across the garment
- no puckering at placket and yoke seams
- clean buttonholes with tight density
- spare button included and secured well
Stripe and check matching (if the fabric needs it)
- match at center front
- match at pocket edges
- match at yoke if possible
If I cannot match, I avoid putting a pocket on it.
Wrinkles are normal in summer. The problem is not wrinkles. The problem is wrong expectation.
I manage wrinkles by choosing the right fabric for the brand’s price level and by setting clear product positioning. Linen is expected to wrinkle. Poplin can be crisp but may feel warmer. Rayon drapes with fewer hard wrinkles but can show sweat marks. I pick the trade-off on purpose.
The wrinkle trade-off table I explain to buyers
| Fabric | Wrinkle Level | Cooling Feel | Photo Look | Main Risk |
|---|---|---|---|---|
| Linen | High | Excellent | Premium texture | shrink + seam slippage |
| Cotton poplin | Medium | Good | Crisp | can feel stiff |
| Rayon/viscose | Low-Med | Good | Smooth drape | sweat marks |
| Cotton voile | Low-Med | Excellent | Airy | see-through |
Practical ways I reduce wrinkle pain
- garment wash or soft finish for a relaxed look
- avoid ultra-tight packaging for linen
- add clear care instructions for steaming
Button-ups can reorder well, but only if shade and sizing stay stable. Small color shifts look huge on light summer colors.
I plan button-up production with stable core colors and controlled fabric lots. I lock the fit block early, approve lab dips carefully, and standardize buttons and fusing. For trend colors, I keep MOQ smaller and reorder only after sell-through confirms demand.
My core vs trend plan
- Core colors: white, light blue, black, navy, stripe basics
- Trend colors: seasonal brights and pastels
Reorder risks I control tightly
- shade variation between fabric lots
- fusing change that affects collar stiffness
- button supplier variation
- shrink drift if preshrink is not repeated
Linen Shirt
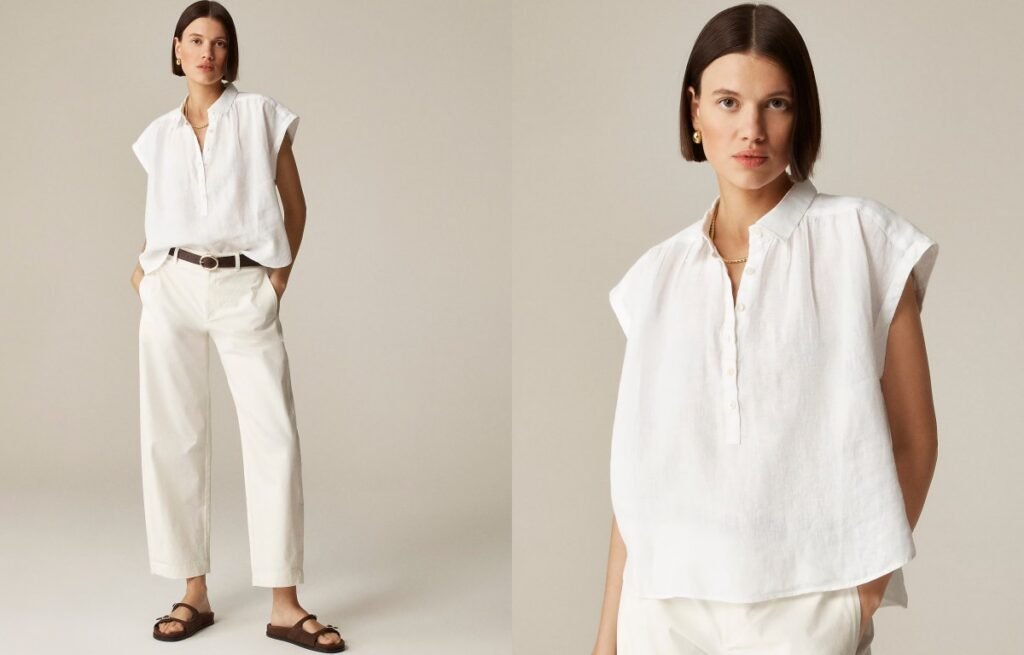
A linen shirt looks “premium” in photos, but summer customers wear it hard. If the fabric shrinks, turns rough, or goes too sheer in light colors, the returns come fast.
A summer linen shirt works when I control four specs: linen content (or blend), fabric weight, pre-shrink process, and construction details like seams and collar. If I lock these early, I can sell linen as “easy summer polish” instead of “high-maintenance trend.”
I used to think linen was only about yarn. Then I saw the same pattern: two shirts with the same look, but one felt cool and stable, and the other twisted and shrank after wash. Now I treat linen like a technical program, not a vibe.
What is a “linen shirt” in summer, and how do I choose the right type for my customer?
“Linen shirt” can mean many things. For wholesale, I define it by fabric content and by how the shirt is meant to be worn.
In summer, a linen shirt is usually a lightweight woven top made with linen fiber or linen blends. The best type depends on use: pure linen for maximum airflow, linen-cotton for softness and stability, and linen-viscose for drape. I choose based on climate, wrinkle tolerance, and price target.
The 4 common linen shirt types I use in sampling
- Pure linen (100% linen)
- best for: hot climates, premium positioning
- trade-off: wrinkles more, can feel crisp
- Linen-cotton
- best for: mainstream boutiques, softer hand-feel
- trade-off: slightly less airflow, but more stable
- Linen-viscose (or linen-rayon)
- best for: drape, relaxed silhouettes
- trade-off: can lose the “dry linen” feel, may pill if low quality
- Linen-poly blend
- best for: lower price, wrinkle reduction
- trade-off: can feel warmer and less breathable
The fit intention matters more than people admit
- Oversized linen shirt: beach cover, layering over tanks
- Classic button-down linen shirt: smart casual
- Cropped linen shirt: Gen Z styling, high-waist bottoms
- Linen overshirt: more structure, works in coastal evenings
What linen shirt styles sell best in summer, and how do I position them?
Linen is not one style. It sells when the styling matches the customer’s week. I plan linen shirts around outfit behavior.
The best-selling linen shirt styles for summer are: classic button-down, oversized beach shirt, short-sleeve camp collar, tie-front linen shirt, cropped linen shirt, and linen overshirt. I position them by scene: sun cover, office casual, vacation, and day-to-night layering.
- Classic button-down
- scene: office casual, dinners
- price: stable mid-range
- Oversized beach shirt
- scene: vacation, pool, festival
- price: easy volume if fabric is right
- Camp collar short-sleeve
- scene: resort looks, sets
- price: strong with matching shorts
- Tie-front
- scene: feminine casual
- price: trend-friendly, moderate risk
- Cropped
- scene: Gen Z, high-waist styling
- price: trend test, smaller MOQ
- Overshirt
- scene: coastal evenings, light layer
- price: good margin if structure is clean
How do I choose linen fabric that feels cool but does not turn see-through, rough, or unstable?
This is the core of linen sourcing. Many linen complaints are actually fabric weight and finishing problems.
I choose linen shirt fabric by checking fiber content, GSM, weave density, and finishing. For most women’s summer linen shirts, a mid-light woven with enough density is the sweet spot: breathable, not too sheer, and stable after wash. Light colors often need higher density or smart pocket and yoke placement to avoid transparency.
What “quality linen” means in real production terms
- Fiber length and consistency: longer fibers usually feel smoother
- Weave type: plain weave vs slub look changes hand-feel and see-through risk
- Density: tighter weave helps opacity and seam strength
- Finishing: soft wash can improve hand-feel, but must be controlled
Fabric weight and density: how I explain it simply
- Too light: looks airy, but becomes sheer and weak at seams
- Too heavy: feels stiff and hot, not a true summer shirt
- Balanced: airy feel + enough coverage + stable seams
Linen fabric selection table (how I decide fast)
| Target Shirt Type | Recommended Fabric Direction | Why It Works | Main Risk |
|---|---|---|---|
| Oversized beach linen shirt | softer wash linen or linen-cotton | comfort and easy wear | see-through in light colors |
| Office casual button-down | tighter weave linen-cotton | cleaner look, less wrinkle shock | less “pure linen” feel |
| Camp collar short sleeve | linen-viscose blend | better drape for relaxed collar | pilling if yarn is weak |
| Linen overshirt | slightly heavier linen blend | structure and layering | warm if fiber mix is wrong |
The “white linen” rule I never break
If a buyer wants white or very light shades:
- I increase weave density or use a slightly heavier fabric
- I avoid thin single-layer pocket bags that show through
- I test in strong light on a real body, not only on a hanger
How do I control shrink, twist, and wash feel for linen shirts in bulk?
Linen changes after washing. That is normal. The problem is when it changes too much or changes differently batch to batch.
I control linen shirt shrink and wash feel by locking a pre-shrink process, setting shrink tolerance in the tech pack, and testing fabric lots before cutting. I also control seam allowance and stitch type so the shirt does not torque or pucker after wash.
Why linen shrinks in a way buyers notice
- linen fibers relax and tighten after wetting and drying
- soft wash processes can change fabric length and width
- cutting without controlling fabric relaxation increases variation
My linen shrink control system
- Fabric relaxation: rest fabric before cutting
- Pre-shrink method: enzyme wash or pre-wash, but consistent
- Shrink targets: I set clear acceptable ranges for length and width
- Lot testing: I test each bulk lot, not only the first one
The measurement points that matter most for linen shirts
- body length
- chest width
- sleeve length
- collar stand length
- cuff opening
- button spacing alignment
A simple bulk approval checklist I use
- wash test garment from bulk fabric
- compare to approved sample after wash
- confirm hand-feel and stiffness level
- confirm shade under sunlight
Wrinkles are part of linen’s identity. The real goal is to make wrinkles look natural and clean, not chaotic.
I manage linen wrinkles by choosing the right weave and blend, designing with relaxed silhouettes, and using construction that stays crisp at key areas like collar and placket. I also align the marketing message so customers expect “lived-in linen,” not “no-wrinkle cotton.”
What makes linen wrinkles look better
- a slightly heavier or denser weave
- linen-cotton blends for softer crease behavior
- relaxed fits that do not pull at buttons
- clean pressing at collar and placket
Design details that improve wrinkle appearance
- placket stability: better interfacing choice
- collar shape: collar stand support, balanced collar points
- pocket placement: avoid awkward bubbling
- back yoke: helps structure in oversized shirts
The buyer communication I prefer
- I do not promise “wrinkle-free.”
- I promise “breathable, natural texture, easy styling.”
That reduces complaint risk.
How do I spec construction and trims so linen shirts do not feel cheap?
Many linen shirts fail because the fabric is good but the build is careless. Linen shows stitching problems more than many fabrics.
I spec linen shirt construction by reinforcing stress points, using the right seam type, and selecting buttons and interfacings that match wash processes. Linen needs clean stitching and stable collars, or it looks low-end fast.
Construction points that matter most
- seams: clean finishes to prevent fraying
- placket: stable and straight, no bubbling
- collar and collar stand: interfacing must survive wash
- buttonholes: tight, clean edges
- hem: smooth curve and even stitch distance
Seam choices I use often
- French seams: premium, good for lighter linen, reduces fray
- Overlock + topstitch: efficient for volume, must be neat
- Flat-felled seam: strong, good for overshirts, more work
Trim and hardware rules
- buttons must handle wash and heat
- spare buttons are a must for wholesale
- thread color must match after wash, not only before wash
Sleeveless Blouse
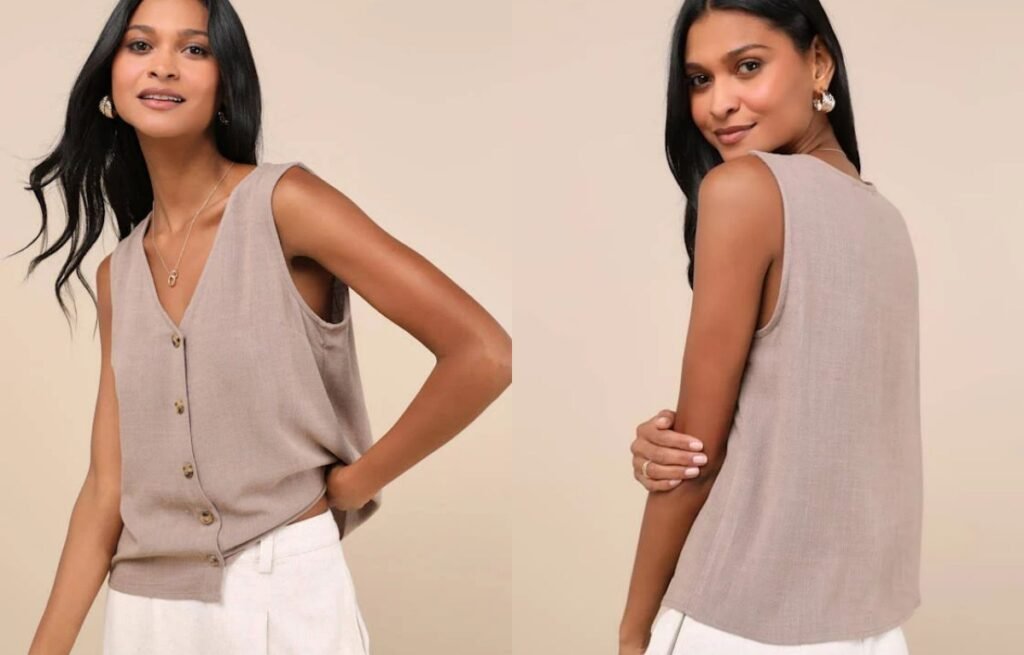
Sleeveless blouses can boost margin fast, but they also fail fast. In summer, customers sweat, fabrics cling, and armholes expose fit problems. If I pick the wrong pattern or fabric, the blouse looks cheap after one wear.
A sleeveless blouse sells best in summer when I match it to heat level, bra coverage needs, and the brand’s “polish” target. I focus on armhole engineering, neckline stability, and breathable woven fabrics, then I build a small set of repeatable sleeveless blouse blocks for fast reorders.
I learned this after one reorder went wrong because the armhole curve changed slightly. The top looked the same on a hanger, but customers said the bra showed and the side seam pulled. Now I treat sleeveless blouses like a technical item, not a simple top.
What exactly is a sleeveless blouse, and how is it different from a tank or sleeveless top?
Many buyers call any sleeveless item a “blouse,” but customers feel the difference. A blouse must look cleaner and more structured than a tank.
A sleeveless blouse is usually a woven, polished top with shaped armholes and a dressier neckline or front detail. Compared with a tank, it has better structure, cleaner finishing, and often a back closure or a refined placket. The goal is “cool + professional,” not “casual basics.”
My quick classification rule
- Tank: knit, casual, wide range of armhole shapes, often binding finish
- Sleeveless top: can be knit or woven, simple, less formal
- Sleeveless blouse: usually woven, cleaner finishing, more “office-ready”
The “polish signals” buyers should look for
- facing or lining at neckline
- clean armhole finishing
- shaped darts or controlled ease
- better buttons or back keyhole
Which sleeveless blouse styles are the most popular for summer, and what is each best for?
I keep a set of sleeveless blouse styles that cover work, weekend, and vacation. That is how I avoid overbuying one silhouette.
The most practical sleeveless blouse styles for summer are: classic shell blouse, pleated-front blouse, button-front sleeveless blouse, tie-neck blouse, wrap sleeveless blouse, peplum sleeveless blouse, high-neck halter blouse, split-neck blouse, ruffle-sleeve cap blouse, and tunic sleeveless blouse. These cover polished daily wear and trend moments with controlled risk.
10 best-selling sleeveless blouse silhouettes I plan around
1) Shell blouse (clean round or V neck)
- Best for: office, repeat orders
- Risk: neckline gaping if facing is weak
2) Split-neck blouse
- Best for: relaxed polish
- Risk: split point tearing if stitch is weak
3) Pleated-front blouse
- Best for: bust-friendly fit
- Risk: pleats opening after wash
4) Button-front sleeveless blouse
- Best for: classic styling
- Risk: button spacing and chest gaping
5) Tie-neck blouse
- Best for: “feminine professional”
- Risk: heat comfort and neck feel
6) Wrap sleeveless blouse
- Best for: adjustable waist
- Risk: gaping and shifting during movement
7) Peplum sleeveless blouse
- Best for: waist definition
- Risk: seam balance and flare volume
8) High-neck halter blouse
- Best for: elevated summer look
- Risk: neck pull and bra coverage complaints
9) Ruffle detail sleeveless blouse
- Best for: trend softness
- Risk: ruffle curling and edge fray
10) Tunic sleeveless blouse
- Best for: coverage, vacation
- Risk: side slit tearing if not reinforced
How do I choose the best fabrics for a sleeveless blouse so it stays cool, not clingy, and not see-through?
This is the core summer issue. Woven blouses can look premium, but the wrong woven feels like plastic. The wrong light color turns transparent in sunlight.
For a summer sleeveless blouse, I choose fabric by airflow, drape, and opacity. Viscose and rayon blends feel cool and flow well, while cotton poplin and linen blends look crisp but wrinkle more. For light colors, I plan lining or double layers in key areas to prevent see-through.
Fabric options and what they signal
- Viscose / rayon: soft drape, cool hand-feel, good for shells and tie-neck
- Polyester crepe: stable, less wrinkle, but must pass “heat comfort” checks
- Cotton poplin: crisp and clean, great for button-front, but wrinkles
- Linen / linen blends: best airflow, vacation polish, but shrink and wrinkle
- Satin weave: elevated shine, but can cling and show sweat marks
Fabric-to-style matching table I use with buyers
| Sleeveless Blouse Style | Best Fabric Choices | Main Summer Risk | My Control Method |
|---|---|---|---|
| Shell blouse | viscose, crepe, light poplin | neckline gaping | stronger facing + stay stitch |
| Button-front | poplin, linen blend | chest gaping | button spacing + hidden snap |
| Tie-neck | viscose, crepe | neck heat | lighter weight + soft ties |
| Wrap | crepe, viscose | shifting | inner tie + hidden snap |
| Tunic | viscose, linen blend | transparency | sunlight opacity test |
The “sunlight opacity” test I do every season
- I hold the fabric under strong light
- I test it in motion on the fit model
- I check if bra lines and seam allowances show
If it fails, I add lining panels or switch to a tighter weave.
How do I engineer the armhole and neckline so the sleeveless blouse does not show bra, gape, or rub the skin?
Sleeveless blouses look simple, but the armhole is where most complaints start. In summer, customers move more, sweat more, and feel every rough seam.
To prevent bra show, gaping, and rubbing, I control armhole shape, finishing method, and balance between bust ease and shoulder width. I also stabilize the neckline with proper facings, stay stitching, and clean turning methods so it stays flat after washing and heat.
The 5 common fit failures I see
1) Bra exposure at side
- cause: armhole curve too deep or too open
- fix: raise underarm point, adjust side seam angle, add modesty panel option
2) Armhole gaping
- cause: too much ease at bust without dart control
- fix: bust dart, princess seam, or controlled pleats
3) Neckline gaping
- cause: weak facing, wrong grain direction, no stay stitch
- fix: stay stitch, better facing width, correct interfacing
4) Chafing at armhole
- cause: rough seam allowance, scratchy fabric edge
- fix: clean binding, soft lining edge, better thread choice
5) Side seam pulling
- cause: shoulder width wrong, armhole too tight
- fix: correct shoulder point placement and grade rules
Finishing methods I choose (and why)
- All-in-one facing: clean look, good for shells and split-neck
- Bias binding finish: cool and light, best for viscose, but must be soft
- Full lining: premium feel, best for light colors, but adds heat if too heavy
A practical armhole spec I use internally
- I define the underarm point height as a fixed reference
- I keep a “bra coverage standard” on the fit block
- I test arm reach and sitting posture
If the blouse shifts and exposes the bra, I revise the curve, not just the size.
How do I set sizing, grading, and fit blocks for sleeveless blouses so reorders stay consistent?
Consistency is where wholesale buyers win. Sleeveless blouses must look “the same” across colors and reorders. Small changes show fast at the armhole and neck.
I reduce reorder risk by using 2–3 sleeveless blouse fit blocks: a classic shell block, a relaxed tunic block, and a fitted darted block. I grade armhole and neckline carefully, because a few millimeters can change coverage and gaping on sleeveless styles.
My block strategy
- Shell block: for most polished basics
- Relaxed block: for tunics and split-neck
- Darted block: for bust shaping and premium fit
Grading rules that matter most
- I grade armhole width and depth with control, not automatic scaling
- I grade neckline width in smaller steps
- I check shoulder width across sizes to avoid bra show
| Customer Target | Best Sleeveless Blouse Block | Why It Works | Main Watchout |
|---|---|---|---|
| Office smart casual | shell block | clean and repeatable | neckline gaping |
| Vacation / resort | relaxed tunic block | airflow and coverage | transparency |
| Premium fashion | darted block | best shaping | more fit sensitivity |
How do I plan MOQ and production timing for sleeveless blouses so I do not get stuck with slow colors or wrong fabrics?
Sleeveless blouses can be strong margin items, but only when the colors and fabrics match real demand. If I run too many fashion colors, I get stuck. If I run too many basics, I lose attention.
I plan sleeveless blouses with a core color set for stable reorders and a small trend color set for testing. I also lock fabric quality early, because light woven fabrics vary by batch and can change drape and opacity across reorders.
My practical MOQ split
- Core colors (higher MOQ): black, white (with lining plan), navy, neutral
- Trend colors (lower MOQ): seasonal brights, prints, soft pastels
Production risks I control before bulk
- shade variation on light colors
- shrink and skew on linen blends
- seam puckering on crepe and satin weaves
- button and trim lead times
A simple reorder protection rule I follow
If a buyer wants a reorder-friendly sleeveless blouse, I keep:
- same fabric mill or same approved standard
- same facing method
- same armhole spec reference
That is how I keep “the same blouse” truly the same.
Wrap Top
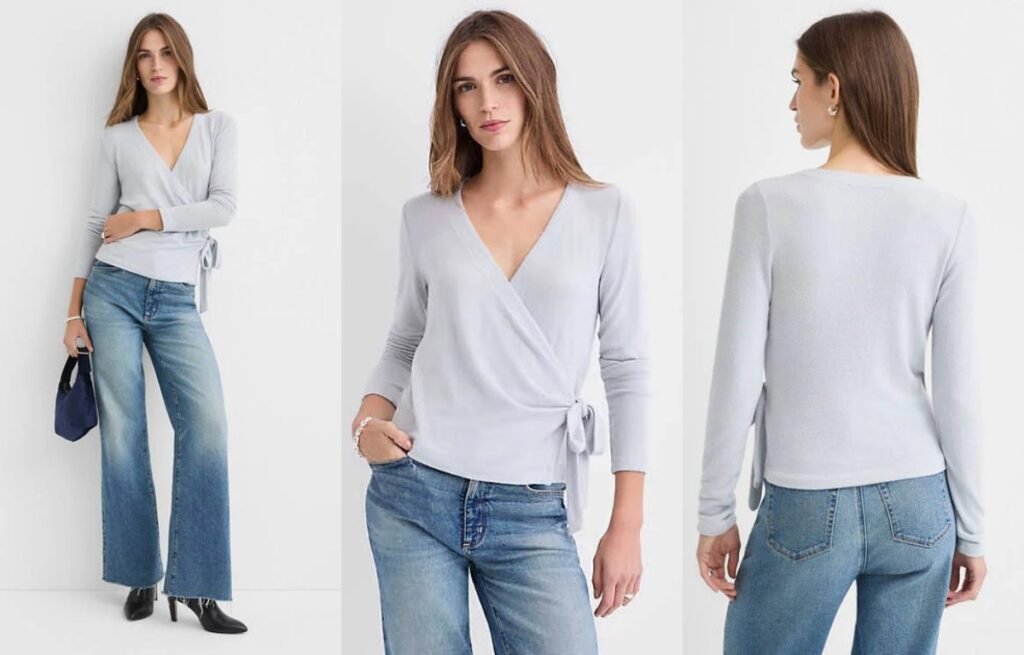
Wrap tops look flattering, but summer makes them unforgiving. Sweat, movement, and light fabrics can turn a wrap into gaping necklines, shifting hems, and “why is this opening?” complaints.
The best summer wrap tops sell when I control three things: wrap coverage (overlap), tie placement, and fabric stability. I treat wrap tops as a fit-engineering product, then I choose 6–10 proven sub-styles and test gaping, tie security, and neckline stability before bulk.
I learned this after a batch of wrap tops looked great on a hanger, but real customers said the bust opened when they walked. After that, I started building wrap tops with repeat rules, not guesses.
What counts as a wrap top in summer, and which wrap structures are the safest?
“Wrap top” can mean a true wrap, a fake wrap, or a wrap-look with fixed seams. In wholesale, that difference decides return rate.
A summer wrap top is any top that creates a crossing front and a V-neck shape, with either adjustable ties (true wrap) or fixed overlap (wrap-look). The safest commercial option is a wrap-look with hidden fixation points, because it keeps the flattering shape but reduces gaping and shifting in heat.
I group wrap tops into 4 construction types
- True wrap (adjustable ties)
- Pros: flexible fit, good for different bust sizes
- Cons: shifts with movement, tie misuse by customers
- Wrap-look (fixed overlap, no real opening)
- Pros: stable neckline, low returns
- Cons: less adjustable
- Hybrid wrap (true wrap + hidden stitch points)
- Pros: adjustable but controlled
- Cons: needs careful pattern and sewing
- Surplice front (overlap sewn at side seam/waist seam)
- Pros: clean look, stable, easy bulk
- Cons: bust fit must be accurate
My “summer safety ranking”
1) wrap-look / surplice (lowest risk)
2) hybrid wrap (medium risk, best balance)
3) true wrap (highest risk, only when brand wants adjustability)
Which wrap top sub-styles are most popular for summer, and what is each best for?
Summer wrap tops sell because they shape the waist while staying light. But each sub-style has different risk points.
The most practical summer wrap top sub-styles are: sleeveless wrap top, cap sleeve wrap top, flutter sleeve wrap top, short sleeve surplice top, wrap cami, wrap crop top, wrap blouse, peplum wrap top, tie-front wrap top, and wrap bodysuit. These cover casual, resort, and going-out demand.
1) Sleeveless wrap top
- Best for: hot climates, layering-lite outfits
- Watch: armhole gaping + side coverage
2) Cap sleeve wrap top
- Best for: mainstream boutiques
- Watch: sleeve angle pulling the neckline
3) Flutter sleeve wrap top
- Best for: romantic summer looks
- Watch: sleeve weight dragging the wrap
4) Short sleeve surplice top
- Best for: work-to-weekend
- Watch: bust fit + overlap depth
5) Wrap cami
- Best for: vacation and night out
- Watch: strap strength + neckline stability
6) Wrap crop top
- Best for: Gen Z styling
- Watch: ride-up + tie security
7) Wrap blouse (woven)
- Best for: polished summer looks
- Watch: wrinkles + gaping in light fabric
8) Peplum wrap top
- Best for: waist definition
- Watch: flounce balance + waist seam stress
9) Tie-front wrap top
- Best for: trend drops
- Watch: tie length and knot slip
10) Wrap bodysuit
- Best for: clean tucked silhouette
- Watch: snap comfort + heat comfort
How do I pick the best fabric for a summer wrap top so it drapes well but does not shift or become see-through?
Fabric decides if a wrap top feels “easy” or feels “dangerous.” In summer, light drape is good, but light instability is bad.
For summer wrap tops, I choose fabric by balancing drape and friction. Fabrics with too much slip (some satins) shift and open at the bust, while fabrics that are too soft (very light rayon) can stretch out and lose overlap. The safest options are stable knits and medium-light wovens with controlled drape.
The fabric behaviors that matter most for wrap tops
- Friction: low friction = more sliding and opening
- Bias stretch: wovens can stretch on the bias and change fit during wear
- Recovery: knits need recovery so overlap stays consistent
- Opacity: V-neck wrap points often sit on light fabric, so show-through looks worse
My fabric-to-wrap matching table
| Wrap Top Type | Best Fabric Options | Main Risk | My Production Fix |
|---|---|---|---|
| Knit wrap top | cotton-spandex jersey, rib knit | neckline wave | clear elastic + shoulder tape |
| Woven wrap blouse | viscose, cotton poplin, linen blend | bias stretch + wrinkles | stay tape + seam stabilization |
| Wrap cami | satin (more stable), stretch woven | slipping + see-through | hidden fixation + lining plan |
| Wrap crop top | rib knit, stable jersey | ride-up | hem finish + overlap depth |
| Peplum wrap | poplin, stable viscose | waist seam stress | reinforcement + stitch choice |
My “sunlight test” for summer wraps
I always check the overlap area under strong light because:
- the overlap is layered, but the side edges can be single-layer
- light colors show bra lines at the V and underbust
How do I engineer a wrap top so it does not gape at the bust in real movement?
This is the core problem. Gaping is not a styling issue. It is an overlap and tension problem.
To prevent gaping, I control overlap depth, neckline angle, and fixation points. I also match the tie location to the body’s tension line, so the wrap closes naturally instead of fighting the bust and opening during walking or arm movement.
The 5 main reasons a wrap top gapes
1) Not enough overlap at bust
2) Neckline angle is too open for the target size range
3) Tie point sits too high or too far to the side
4) Fabric stretches out on bias or during sweat
5) No fixation points, so everything relies on the knot
The pattern numbers I focus on (practical, not theory)
- I increase bust overlap on larger sizes more than on smaller sizes
- I check that the V point does not sit too low for the customer’s bra coverage
- I keep side seam tension balanced so one side is not “pulling” the wrap open
Fixation options (from lowest cost to most secure)
- Hidden snap at V-neck (fast, popular)
- Small hidden hook-and-eye (strong, but must be comfortable)
- Interior button + elastic loop (good for woven blouses)
- Hidden stitch at overlap (best for wrap-look stability)
- Double tie system (inside tie + outside tie) for true wrap tops
A movement test I use to confirm gaping is solved
- arms up and down 10 times
- bend forward and stand 10 times
- carry a bag on one shoulder and walk
If the V opens, I treat it as a fail and adjust overlap or fixation.
How do I stop wrap tops from sliding, twisting, or loosening during sweaty summer wear?
Summer adds moisture, and moisture reduces friction. That is why wraps feel less secure in July than in April.
To stop sliding and loosening, I control tie friction, internal anchors, and seam stabilization. I also avoid ultra-slippery fabrics without hidden closures. For knits, I reinforce shoulders and neckline so the garment does not “grow” during wear.
Sliding risk by fabric (how I think about it)
- High slip: satin, very smooth polyester
- Medium slip: rayon challis, soft viscose
- Lower slip: cotton poplin, linen blends, rib knit
My wrap stability toolbox
- Tie material: use the same fabric only if it grips; otherwise add a more stable tie
- Tie width: narrow ties cut into the body and loosen faster
- Inside anchor: interior tie or snap keeps the wrap aligned
- Neckline stabilization: clear elastic prevents stretching
- Shoulder stabilization: tape prevents growth on knits
Common “cheap fixes” that backfire
- making ties too thin to save fabric
- skipping neckline elastic on knits
- using bias-cut woven panels without stay tape
How do I size wrap tops for wholesale so they fit multiple bust shapes and reduce returns?
Wrap tops look “adjustable,” but returns still happen. Most issues come from bust coverage and where the wrap sits on different torso lengths.
I reduce wrap top returns by using size grading that protects overlap in larger sizes, and by offering two fit directions: a more covered wrap for mainstream boutiques and a deeper V wrap for going-out edits. For true wraps, I use inside ties so adjustability does not create chaos.
The sizing issues that hit wrap tops most
- larger bust sizes need more overlap, not just more width
- shorter torsos need higher waist shaping or the wrap drops too low
- long torsos need longer front panels or the wrap pulls upward
Fit communication table I use with buyers
| Buyer Goal | Best Wrap Option | Why It Works | Risk |
|---|---|---|---|
| Low returns | wrap-look / surplice | stable neckline | low |
| Broad size range | hybrid wrap | adjustable but controlled | medium |
| Trend “deep V” | true wrap | strong styling | higher |
How do I plan MOQ and production timing for wrap tops so they arrive in peak summer weeks?
Wrap tops can be core or trend, depending on the fabric and sleeve. I plan them like a controlled core item, not a wild trend, when I want reorders.
I plan wrap tops with a core-and-trend split: core wrap tops use stable fabrics and wrap-look structures for easy reorders, while trend wrap tops use riskier fabrics or deeper V shapes with smaller MOQ. This keeps delivery on time and protects cash flow.
My planning rules for wrap tops
- Core: knit surplice tops, cap sleeve wraps, stable colors
- Trend: satin wrap camis, deep V wraps, peplum wraps in seasonal prints
Production risks that delay wrap tops
- inconsistent snaps or hook supply
- bias stretch issues discovered too late
- neckline wave from skipping stabilization
- stitch popping on stretch seams
Off-the-Shoulder Top
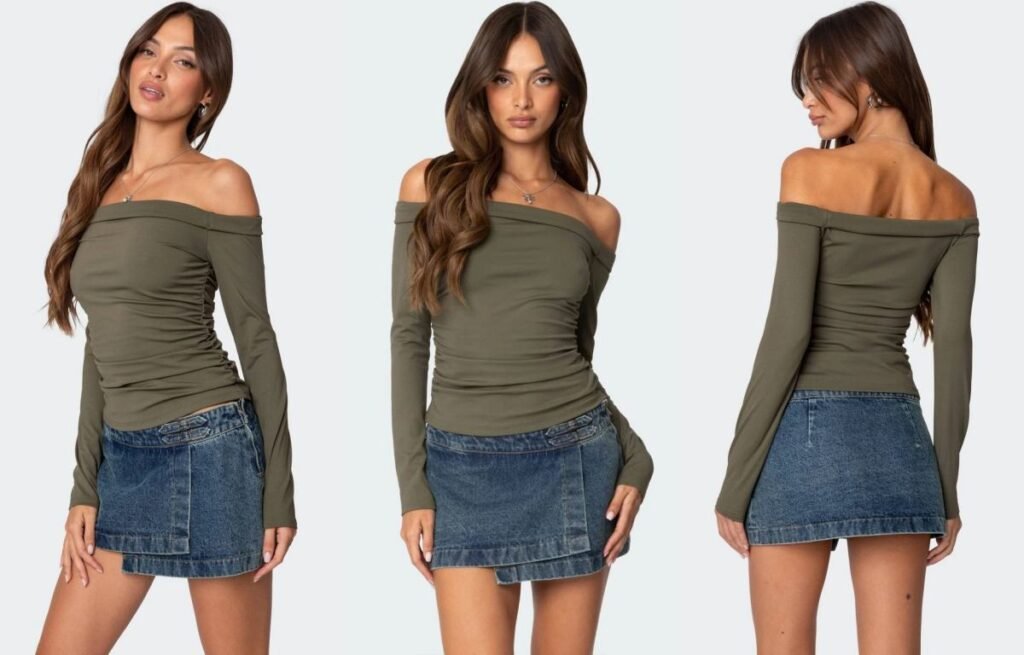
Off-the-shoulder tops sell on photos, but summer exposes every weakness. Sweat, movement, and heat make the neckline slide. If I get the elastic and pattern wrong, customers keep pulling it up all day, and returns follow.
A summer off-the-shoulder top works when I control three things: neckline grip (elastic + construction), arm mobility (sleeve and underarm shaping), and fabric behavior in heat (breathable, not scratchy, not see-through). I treat it as a technical top, not a simple fashion piece.
I learned this after a boutique buyer told me the top looked “perfect,” but her customers hated how it slipped during dancing and driving. That feedback changed how I build off-the-shoulder tops from sampling to bulk.
What exactly is an off-the-shoulder top in summer, and which variations sell best?
Off-the-shoulder is not one pattern. In summer, small silhouette changes decide comfort and support.
In summer, an off-the-shoulder top is any top designed to sit below the shoulder point with a stabilized neckline. The best-selling variations are elastic-banded peasant styles, ruched bodycon knits, and bardot tops with structured necklines, because they balance comfort, grip, and styling.
- Bardot top (clean neckline, fitted): polished, easy to dress up
- Peasant off-shoulder (elastic neckline, relaxed): breathable and forgiving fit
- Ruched off-shoulder (gathers + stretch): strong grip, bodycon look
- Smocked off-shoulder (smocking panel): flexible sizing, boutique-friendly
- Off-shoulder with straps (hidden or thin): lower slip risk, better for larger bust
- One-shoulder (often grouped by buyers): trend-led, different support rules
How I decide “best sellers” by customer type
- Mainstream boutiques: peasant + smocked styles
- Going-out brands: bardot + ruched styles
- Higher bust demand: off-shoulder with straps or supportive smocking
How do I engineer an off-the-shoulder neckline so it stays up in heat and movement?
This is the core professional problem. If the neckline grip is wrong, nothing else matters.
To keep an off-the-shoulder top in place, I balance elastic tension, neckline circumference, friction contact, and garment weight. I also stabilize the neckline seam so stretch happens in a controlled way, not in random spots that cause rolling and sliding.
The slip-down root causes I see most often
- Elastic spec is wrong: too soft, too narrow, or low recovery
- Neckline is too wide: it sits on arm instead of upper chest
- Fabric is too heavy: weight pulls the neckline down
- Seam construction is weak: neckline rolls, elastic flips, and grip disappears
- Sleeve angle is wrong: arm raises drag the whole neckline down
My neckline “grip” toolkit (what I choose based on style)
- Elastic channel (casing):
- good for peasant and relaxed styles
- stable if casing width matches elastic width
- Elastic stitched into seam:
- good for bardot and fitted styles
- needs clean topstitch to stop twisting
- Smocking panel:
- great for flexible sizing
- needs even smocking tension and strong threads
- Clear elastic + stabilizer tape (knits):
- reduces waviness and keeps shape after wash
How I set elastic tension in a practical way
I do not guess. I use a simple rule:
- elastic length is shorter than neckline opening, but not so short it bites
- I test it on a fit model with real movement
The movement test I require before bulk
- raise arms overhead 10 times
- hug self 10 times
- drive-position test (arms forward) 10 times
- quick walk and turn for 2 minutes
If it slides, I adjust neckline width or elastic spec first, not the sleeve.
How do fabric choices change comfort, breathability, and support for off-the-shoulder tops?
Summer fabric needs airflow, but off-the-shoulder also needs grip and stability. Some fabrics feel cool but slip more.
For summer off-the-shoulder tops, I pick fabrics that balance breathability and recovery. Stretch knits and stable wovens with elastic support work best. Very slippery fabrics and overly thin knits increase slip-down, sheerness, and neckline waviness in heat.
Fabric behavior I evaluate (the ones buyers forget)
- surface friction: more friction usually means better grip
- recovery after sweat: heat can weaken some elastics and knits
- opacity in sunlight: off-shoulder exposes more skin, so see-through looks worse
- hand-feel at upper arm: scratchy fabric becomes a fast return
My fabric-to-structure matching table
| Style Type | Best Summer Fabrics | Main Risk | My Fix |
|---|---|---|---|
| Peasant off-shoulder | cotton voile, light viscose, linen blends | see-through + slip | lining or double layer + elastic casing |
| Bardot fitted | cotton-spandex jersey, rib knit | neckline wave | clear elastic + stabilizer tape |
| Ruched bodycon | stretch jersey, rayon/nylon blends | overheating | lighter GSM + breathable yarn blend |
| Smocked | cotton, viscose | smocking break | stronger thread + smocking density control |
A summer “skin comfort” check I always run
- rub test on inner arm for 30 seconds
- sweat simulation (warm water + wear) for 10 minutes
If it irritates, it will get returns.
How do I handle sleeves and arm mobility so customers can move without pulling the top down?
Sleeves are the silent killer. A sleeve that looks pretty can act like a lever and drag the neckline down every time arms move.
To keep arm mobility, I design sleeves that do not fight the neckline. I control sleeve attachment angle, underarm ease, and whether the sleeve is separate from the neckline band. The goal is to let arms move while the neckline stays stable.
Sleeve options ranked by stability
- Detached flutter sleeve (attached below neckline band): best mobility, lowest drag
- Short elastic sleeve (light puff): balanced, good for boutiques
- Long sleeve off-shoulder: highest drag risk, needs stronger neckline support
- Cold-shoulder hybrid (shoulder cutout): less slip risk, but different trend
Pattern fixes I use when sleeves cause slip
- reduce sleeve cap pull by adjusting sleeve angle
- add underarm ease to stop neckline tug
- split construction so sleeve movement does not lift neckline band
The “reach test” that exposes sleeve drag
I ask the model to reach:
- up to a shelf
- forward like steering a wheel
- across the body
If neckline shifts, I revise sleeve mechanics.
How do I size off-the-shoulder tops for wholesale to fit more bust types and reduce returns?
Off-the-shoulder sizing fails when bust and upper chest are not balanced. Customers blame the style, but the real issue is the block.
For wholesale, I reduce returns by building two fit blocks: one for smaller-to-medium bust with standard neckline width, and one for fuller bust with adjusted front length and stronger support. I also grade neckline openings carefully, because big jumps in neckline width cause slip-down.
The bust-fit problems I see most
- too tight at bust, so the top creeps upward then slips
- too wide at upper chest, so it sits on the arms
- front length too short for fuller bust, so neckline drifts
My sizing and grading rules
- I grade neckline opening in small steps
- I add front length and bust shaping for fuller bust blocks
- I specify elastic recovery targets, not just width
A buyer-facing fit table I like to use
| Customer Base | Best Off-Shoulder Style | Why It Fits Better | Main Risk |
|---|---|---|---|
| Broad mainstream | peasant, smocked | forgiving | transparency |
| Going-out | bardot, ruched | clean silhouette | overheating |
| Fuller bust demand | smocked, strap-supported | better support | strap design |
How do I plan MOQ and production timing for off-the-shoulder tops in summer?
Off-the-shoulder tops can be core or trend depending on market. I plan them like a controlled bet.
I plan off-the-shoulder tops with a core-and-trend split. Core styles use stable fabrics and proven elastic specs for reorders. Trend versions use smaller MOQ, faster sampling, and tighter QC on elastic and neckline sewing, because one mistake makes the whole run unwearable.
My core vs trend choices
- Core off-shoulder: peasant, smocked, simple bardot
- Trend off-shoulder: lace overlay, corset-like shaping, dramatic sleeves
Production risks I watch closely
- elastic batch inconsistency
- uneven neckline topstitch causing rolling
- smocking tension variation across sizes
- shade mismatch on light summer colors
The QC checkpoints I add for this style
- elastic stretch and recovery test per batch
- neckline seam inspection every set interval
- fit check on at least 2 sizes before full bulk run
One-Shoulder Top
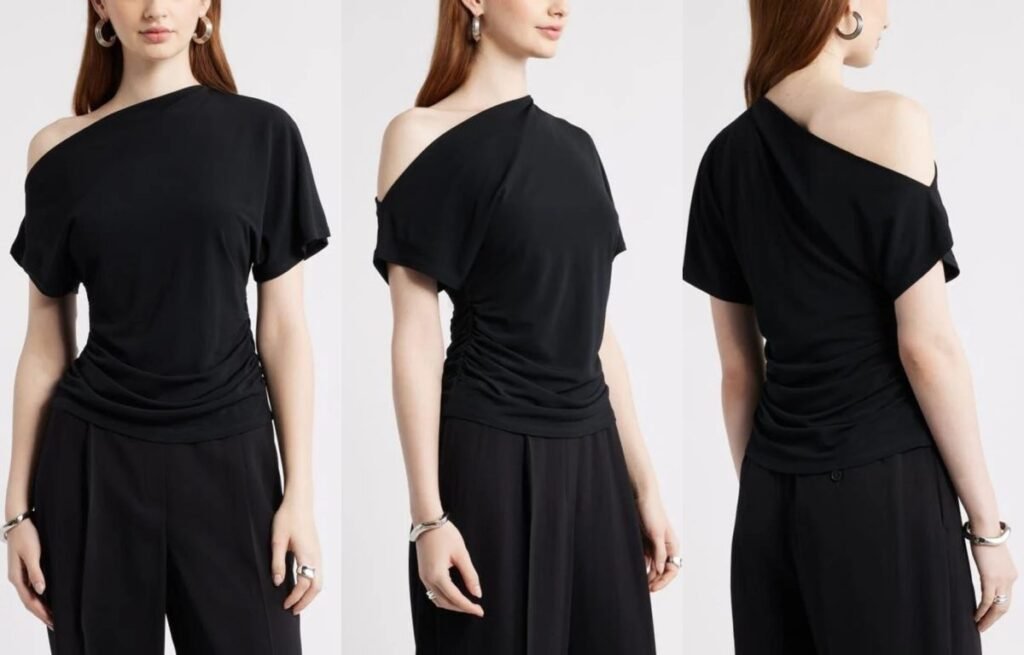
A one-shoulder top looks like an easy “wow” item. In summer, it can become a nightmare. Heat, sweat, and body movement make the neckline slide. Then customers blame the brand, not the pattern.
A summer One-Shoulder Top sells best when I treat it like a support problem, not just a style: I control neckline stability, internal grip, stretch recovery, and balance between the strap side and the open side. Then I choose 6–10 repeatable sub-styles and keep trend versions on small MOQ.
I once made a one-shoulder top that looked perfect on the hanger. After two hours of wear, the neckline drooped and the top twisted. That order taught me one rule: asymmetry needs structure, even when the fabric is “soft.”
What exactly is a one-shoulder top, and why is it harder than other summer tops?
People think “one-shoulder” is only a neckline. In production, it changes the whole load path of the garment. The top is literally hanging from one side.
A one-shoulder top is an asymmetrical top where one shoulder carries most of the garment weight. It is harder than other summer tops because gravity and movement pull fabric toward the open side, so I must add stabilization through elastic, lining, grip, and pattern balance to prevent twisting and slipping.
The key technical difference I always explain to buyers
- A normal top has two shoulder anchors.
- A one-shoulder top has one anchor, so every movement creates rotation.
- In summer, sweat reduces friction, so slip-down complaints rise.
Where one-shoulder tops usually fail
- neckline edge stretches out
- open-side underarm gapes
- strap side digs into shoulder
- body twists after washing
- bra exposure creates bad reviews
Which one-shoulder top styles are the most popular for summer, and what is each best for?
I do not treat one-shoulder as one product. I treat it as a family. Each sub-style needs a different support plan.
The most popular summer one-shoulder top sub-styles are: one-shoulder knit tee, one-shoulder rib crop, one-shoulder bodysuit, one-shoulder ruched top, one-shoulder draped satin top, one-shoulder cut-out top, one-shoulder asymmetrical hem top, and one-shoulder twist-front top. Each fits a different price point and return risk level.
1) One-shoulder knit tee
- Best for: casual daily wear
- Risk: neckline stretch
2) One-shoulder rib crop
- Best for: fitted Gen Z look
- Risk: roll and twist at hem
3) One-shoulder bodysuit
- Best for: clean tucked styling
- Risk: comfort and snap stress
4) One-shoulder ruched top
- Best for: forgiving fit across sizes
- Risk: ruching threads and uneven gathers
5) One-shoulder draped satin top
- Best for: night-out and premium looks
- Risk: slip and snag
6) One-shoulder cut-out top
- Best for: trend drops
- Risk: gaping and bra exposure
7) One-shoulder asymmetrical hem top
- Best for: fashion-forward styling
- Risk: length imbalance after wash
8) One-shoulder twist-front top
- Best for: bust shaping without heavy structure
- Risk: twist loosens over time
How do I engineer a one-shoulder top so it stays up in summer heat and movement?
This is the core of the product. If it does not stay up, nothing else matters. I focus on stability, grip, and load distribution.
To keep a one-shoulder top in place, I stabilize the neckline with elastic or tape, add grip where skin contact matters, balance pattern lengths across the body, and control stretch recovery. For higher-risk fabrics, I add lining or internal support so the open side does not collapse.
The 4 forces that pull a one-shoulder top down
- gravity: the garment weight hangs off one point
- rotation: the body twists and the top follows
- low friction: sweat reduces grip on skin
- fabric creep: some knits relax during wear
My “stay-up” construction toolkit (what I actually spec)
- Neckline stabilization
- clear elastic sewn into neckline seam
- binding with correct stretch ratio
- shoulder tape on strap side
- Internal grip
- silicone tape at top edge for strapless-like versions
- brushed elastic facing where skin contact is high
- Support and coverage
- double-layer front panel for light colors
- built-in shelf bra for some knit versions
- removable cups for certain markets
- Pattern balance
- adjust open-side armhole to prevent gaping
- balance front/back lengths so the top does not rotate
- control side seam angle and grainline to reduce twist
A simple “stretch ratio” rule I use
If the neckline binding is too long, it slides. If it is too short, it cuts in.
- I usually set binding length at 85–92% of neckline length for stable knits
- I test on body and adjust based on fabric recovery
The movement tests I require before bulk
- 10 arm raises
- 10 twists
- 10 deep breaths
If the open side drops or the neckline waves, I revise the neckline spec first.
How do I choose the right fabric for a one-shoulder top without sheerness, twist, or discomfort?
Fabric choice decides return rate. Summer fabrics are often light. Light fabric plus asymmetry equals instability.
For a summer one-shoulder top, I prefer fabrics with strong recovery and enough weight to hold the neckline: rib knits, cotton-spandex jerseys, and stable ponte for premium fits. For satin, mesh, and very light jerseys, I add lining, grip, or internal support because these fabrics slip and show shape problems faster.
Fabric ranking I use for one-shoulder stability (from safest to riskiest)
1) Rib knit (with good recovery)
2) Cotton-spandex jersey
3) Ponte / double knit (premium, less breathable but stable)
4) Viscose jersey (soft but can relax)
5) Satin (slip risk)
6) Mesh (needs layering plan)
Fabric-to-risk table
| Fabric Type | Why Buyers Like It | What Goes Wrong | My Fix |
|---|---|---|---|
| Rib knit | fitted, trendy, reorder-safe | bagging at edge | recovery test + stable binding |
| Cotton-spandex jersey | comfort + stretch | neckline wave | clear elastic + shoulder tape |
| Viscose jersey | soft drape | relax during wear | double layer + tighter binding |
| Satin | glossy night-out | slides, snags | lining + hidden grip |
| Mesh | sexy layering | transparency + scratch | soft thread + clean seams |
The summer “light color problem”
For white and pastels, I do:
- sunlight opacity check
- double layer on bust area
- avoid cheap thin yarn structures that show everything
How do I handle bra solutions and coverage expectations for one-shoulder tops?
This is a silent deal-breaker. Customers buy the look, then complain because they cannot wear a normal bra. Brands often forget to warn them.
For one-shoulder tops, I plan bra compatibility as part of product design: built-in shelf support for knit versions, cup options for premium fits, and clear coverage shaping on the open side. If the top needs special underwear, I make sure the neckline and armhole hide it or the product description sets expectations.
Coverage options I design around
- Concealable strap solution: wider strap side + higher open-side armhole
- Stick-on bra friendly: silicone grip + stable top edge
- Built-in support: shelf bra + removable cups for knit tops
- Fashion coverage: deliberate bra exposure as a styling choice (only for some brands)
My buyer communication checklist
- what underwear works
- whether the top is lined
- whether cups are included
- expected transparency level in light colors
How do I grade sizing for one-shoulder tops so they fit more bodies and do not twist?
Grading is harder because the garment is not symmetrical. If I grade like a normal top, the open side and strap side do not expand correctly.
I grade one-shoulder tops by controlling two separate zones: strap-side stability and open-side coverage. I keep neckline stretch consistent across sizes, adjust open-side armhole for gaping risk, and grade length carefully because small length changes cause visible rotation on asymmetrical tops.
The grading mistakes that create returns
- increasing width without adjusting open-side armhole curve
- grading neckline length too much, causing slide on larger sizes
- ignoring bust fullness changes, causing the top to rotate
My grading control points
- strap-side shoulder width and angle
- open-side underarm height
- neckline edge length and binding ratio
- side seam balance and hem angle
A practical fit table I use when planning blocks
| Customer Segment | Best One-Shoulder Version | Why | Main Risk |
|---|---|---|---|
| Mainstream boutique | ruched knit one-shoulder | forgiving fit | ruching durability |
| Going-out premium | lined satin one-shoulder | higher margin | slip and snag |
| Trend-led Gen Z | cut-out one-shoulder crop | strong visual | coverage complaints |
How do I plan MOQ and production timing for one-shoulder tops without overstock?
One-shoulder tops can spike fast, then drop. I do not treat them like tees. I control MOQ and keep my reorder plan ready.
I plan one-shoulder tops with a split strategy: stable knit versions run as mid-risk core items, while cut-out and satin versions run as trend tests with smaller MOQ. I also lock elastic and lining materials early because small trims decide the final fit.
My two-lane plan for one-shoulder
- Core lane (safer):
- rib one-shoulder crop
- ruched one-shoulder top
- one-shoulder bodysuit
- Trend lane (riskier):
- cut-out versions
- satin draped versions
- asym hem statement shapes
The production details I lock early
- elastic type and width
- silicone tape supplier (if used)
- lining fabric and color matching
- stitch type for stretch seams
The quality gates I do before packing
- neckline recovery test after hang
- fit test after wash
- strap-side seam stress test
- color consistency for reorders
Peplum Top
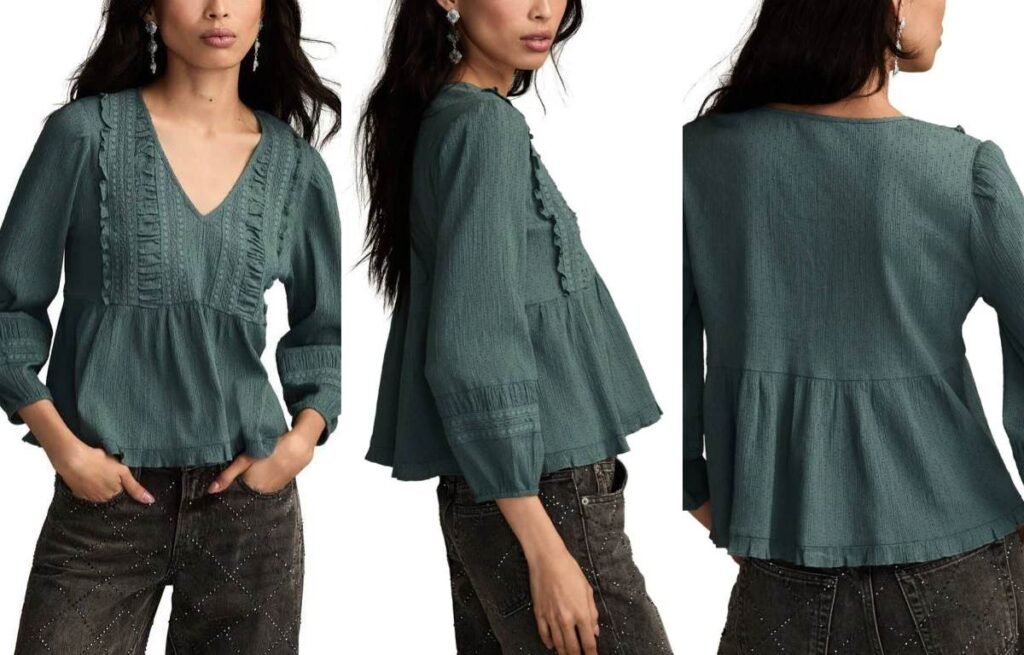
Peplum tops can sell fast in summer, but they also fail fast. If the flare sits in the wrong place, customers feel wider, not shaped. If the fabric is hot or the seams twist, the top looks cheap after one wear.
A summer peplum top works when I control three things: where the waist seam sits, how the peplum flare is shaped, and how breathable the fabric feels. I treat peplum as a body-shaping silhouette, then I pick 6–10 safe sub-styles and test movement, wrinkle behavior, and seam balance before bulk.
I once saw a peplum sample that looked perfect on a hanger, but on-body it made the hips look bigger and the waist disappear. That mistake taught me to design peplum from the waist seam down, not from the neckline up.
What is a peplum top, and why does it work better (or worse) in summer?
Peplum is not just a “cute ruffle.” It is a structure that changes proportions. In summer, structure must still breathe.
A peplum top is a fitted bodice with a flared section attached at the waist or high waist. It works best in summer when the bodice is stable but not tight, and the peplum has enough movement to create airflow. It fails when the flare is heavy, stiff, or placed too low.
The key summer advantage of peplum
- It can create a waist shape without shapewear.
- It can hide the lower belly area while still feeling “light.”
- It gives a dressed-up look without layering.
The key summer risk of peplum
- Too much fabric = heat and sweat marks.
- Wrong flare placement = “boxy” or “hip-heavy” look.
- Light fabrics can collapse and lose the peplum shape.
Which peplum top sub-styles are the most popular for summer, and what is each best for?
When a buyer says “peplum,” I ask what scene they want: casual day, office casual, vacation dinner, or night-out. Sub-style decides the fabric and construction.
The most popular summer peplum sub-styles are: sleeveless peplum, strap peplum, off-shoulder peplum, wrap peplum, button-front peplum, smocked peplum, corset-style peplum, knit peplum, linen peplum, and tie-front peplum. Each one targets a different summer outfit need.
1) Sleeveless peplum
- Best for: hot climates, casual polish
- Watch: armhole gaping
2) Strap peplum (cami straps)
- Best for: vacation looks
- Watch: strap slip and bust support
3) Off-shoulder peplum
- Best for: romantic styling
- Watch: elastic comfort and slip-down
4) Wrap peplum
- Best for: adjustable fit
- Watch: gaping at bust
5) Button-front peplum
- Best for: boutique “cute” tops
- Watch: button spacing and pull
6) Smocked peplum
- Best for: flexible sizing
- Watch: smock stretch fatigue
7) Corset-style peplum
- Best for: higher margin and night-out
- Watch: bust fit and boning issues
8) Knit peplum
- Best for: comfort and low wrinkle
- Watch: flare collapse if fabric is too soft
9) Linen peplum
- Best for: breathable summer polish
- Watch: shrink and wrinkle expectations
10) Tie-front peplum
- Best for: beach-to-brunch
- Watch: tie stability and neckline shift
Where should the peplum seam sit for different body shapes, and how do I avoid the “adds width” problem?
This is the most technical part. The seam position decides if the top shapes the waist or fights it. Small changes here create big differences on-body.
To flatter most customers, I place the peplum seam at the narrowest waist point or slightly above it. If I drop it too low, it cuts across the widest hip area and adds width. If I place it too high without balancing flare, it can look like a maternity shape.
The seam placement rules I follow
- High waist seam (slightly above natural waist):
- best for: shorter torsos, petite customers
- risk: can look “baby doll” if flare is too full
- Natural waist seam (most commercial):
- best for: broad customer base
- risk: needs correct bodice length for each size
- Dropped waist seam (generally risky):
- best for: tall customers and specific fashion looks
- risk: adds width at hip line for many bodies
How I reduce “hip-heavy” complaints
- I keep the peplum flare more vertical near the side seams.
- I add volume more toward front and back, not directly at the sides.
- I control the peplum length so it ends at a flattering point.
| Customer Body Focus | Best Seam Position | Best Peplum Shape | What to Avoid |
|---|---|---|---|
| Wants waist definition | natural to high waist | moderate flare | heavy stiff flare |
| Wider hips concern | slightly high waist | front/back volume | side-heavy flare |
| Fuller bust | natural waist | stable bodice + flare | tight bust + high seam |
| Petite | high waist | short peplum | long peplum that cuts thigh |
Peplum looks cheap when the flare collapses, flips up, or wrinkles into sharp lines. In summer, movement matters because the top should breathe and still hold shape.
I engineer a premium peplum by controlling flare geometry, hem stability, and fabric stiffness. I choose between circle flare, gathered flare, and pleated flare based on the target price and fabric. Then I test how the peplum hangs after heat, sweat, and sitting.
The three main peplum flare constructions
- Circle peplum (clean and premium)
- look: smooth, even drape
- best fabrics: stable wovens, medium-weight knits
- risk: waste if fabric width is narrow
- Gathered peplum (cute and cost-friendly)
- look: more volume, more texture
- best fabrics: light wovens, cotton poplin, viscose
- risk: adds bulk at waist seam
- Pleated peplum (structured and sharp)
- look: tailored shape
- best fabrics: poplin, heavier woven blends
- risk: wrinkles show more in summer
Hem finishing choices that change the whole look
- narrow baby hem for light fabrics
- clean double-turn hem for stability
- binded hem for thin fabrics that curl
- clean facing for premium pieces
The movement test I use for peplum flare
I check the top in three positions:
- arms up
- sitting
- walking fast
If the flare flips up and stays there, I adjust weight and hem finish.
What fabrics work best for summer peplum tops, and how do I balance breathability with shape?
Fabric is where peplum wins or loses. Summer needs airflow. Peplum needs shape. This is a trade-off, so I make it a planned trade-off.
For summer peplum, I prefer breathable fabrics with enough body: cotton poplin, linen blends, viscose with structure, and stable knit blends. Very soft jersey can collapse the flare, and very stiff fabrics can trap heat and look bulky.
Fabric options I recommend by style level
- Best for mass market:
- cotton poplin
- cotton-blend woven
- stable rib knit for knit peplum
- Best for “boutique premium” look:
- linen-viscose blend
- structured viscose woven
- ponte-lite for night-out peplum
- Best for vacation trend:
- light crinkle fabric with controlled drape
- crochet panels with lining plan
Fabric risks I watch in summer
- Wrinkle behavior: linen looks premium only when the brand accepts wrinkles
- Sweat marks: some polyester blends show darker patches
- Sheerness: light colors need lining or thicker structure
- Seam slippage: light wovens can pull at the waist seam
Fabric-to-construction matching table
| Fabric | Summer Feel | Shape Holding | Main Risk | My Fix |
|---|---|---|---|---|
| Cotton poplin | cool | strong | wrinkles | design for casual polish |
| Linen blend | very cool | medium | shrink + wrinkles | preshrink + stable seam |
| Viscose woven | cool | medium | seam slippage | reinforce waist seam |
| Soft jersey | cool | low | flare collapse | choose circle flare + stable hem |
| Ponte-lite | warmer | high | heat | use sleeveless and lighter colors |
How do I prevent the most common peplum top fit complaints in wholesale production?
Peplum complaints are predictable. Most issues come from the waist seam, bust fit, and how the flare sits when customers move.
The most common peplum complaints are: bust gaping, waist seam riding up, flare flipping, and “makes me look wider.” I reduce these with stable bodice blocks, correct grading at the waist seam, and flare shaping that avoids side bulk.
Bust gaping prevention
- add bust darts or princess seams for woven peplum
- adjust neckline curve for off-shoulder and wrap styles
- test on at least two bust sizes in development
Waist seam stability
- reinforce waist seam with clean seam tape if fabric is light
- avoid over-stretching during sewing
- use correct stitch type for knit peplum
Grading rules I follow for peplum
- I grade bodice length carefully because seam position must stay flattering.
- I grade waist circumference with stretch behavior in mind.
- I do not increase peplum volume too fast across sizes, or it becomes side-heavy.
QC checkpoints before bulk
- seam balance check on body
- hem measurement consistency
- wash test for shrink at waist seam
- button pull test if button-front
Babydoll Top
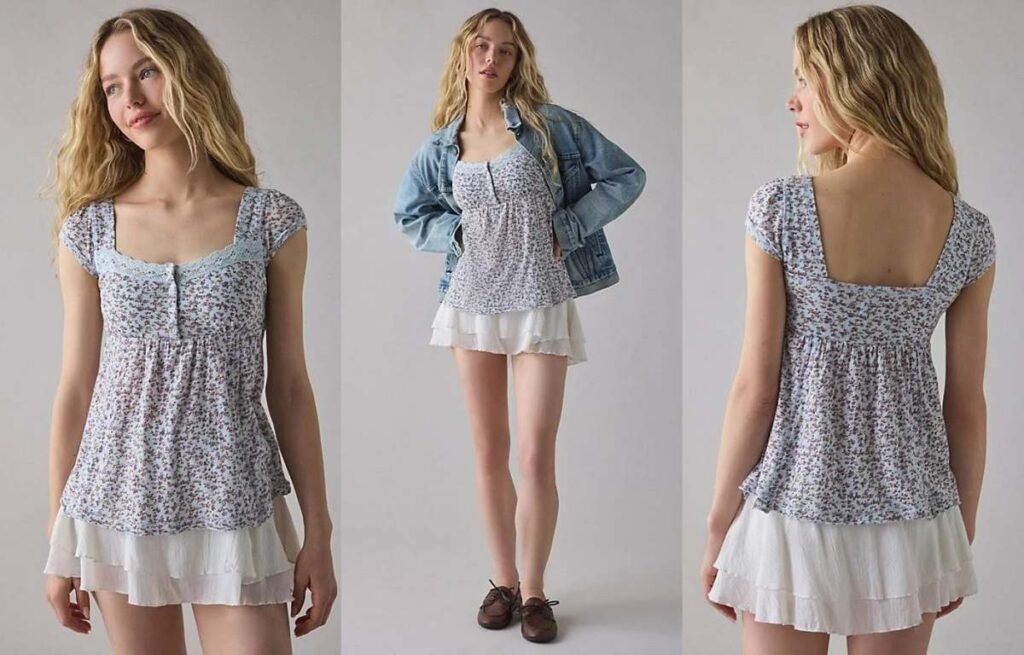
Babydoll tops sell because they look cute and feel easy. But in summer, they can also look bulky, turn see-through, or fit weird at the bust. If I miss the details, customers return them fast.
A summer Babydoll Top works best when I control three things: the bust fit, the seam placement (where the “doll” volume starts), and fabric opacity. If I build 6–10 babydoll sub-styles from one stable fit block, I can sell the trend while keeping size complaints low.
I once shipped a babydoll top that had the right vibe, but the empire seam sat too high for fuller bust sizes. The photos were good. The reviews were not. After that, I started treating babydoll tops like a technical shape, not a “loose top.”
What exactly is a Babydoll Top in summer, and what makes it different from a tunic or peplum?
People mix these words up. In development, the difference changes pattern, grading, and how the garment moves in heat.
A Babydoll Top is defined by an empire seam (or yoke) placed above the natural waist, with gathered or flared volume below it. A tunic is longer with straighter lines, and a peplum adds a defined flounce at the waist. Babydoll is about early volume and airy swing.
My quick identification rules
- Babydoll: volume starts high, often underbust to upper waist, and the body swings out
- Peplum: volume starts at waist, and the shape is more structured
- Tunic: longer length, less “gathered” look, more coverage than swing
Why this matters in summer
- Babydoll tops can trap air in a good way, so they feel cooler.
- But if the volume is too heavy or the fabric is wrong, they look puffy and hot.
Which Babydoll Top sub-styles sell best in summer, and what is each best for?
I do not run babydoll tops as one pattern. I run them as a small family. It keeps the assortment fresh without new risk every time.
The best-selling summer Babydoll Top sub-styles are: cami babydoll, puff-sleeve babydoll, square-neck babydoll, smocked-bust babydoll, tiered babydoll, tie-front babydoll, open-back babydoll, lace-trim babydoll, denim-light babydoll, and crochet-overlay babydoll. Each one hits a different customer mood and price level.
1) Cami babydoll
- Best for: hot weather, easy styling
- Risk: strap quality + bust gaping
2) Puff-sleeve babydoll
- Best for: romantic trend
- Risk: sleeve volume can add heat
3) Square-neck babydoll
- Best for: flattering neckline, stable fit
- Risk: neckline gaping if elastic is weak
4) Smocked-bust babydoll
- Best for: flexible sizing, fewer returns
- Risk: smocking discomfort if tight
5) Tiered babydoll
- Best for: movement and “dressy-casual”
- Risk: can look bulky if tiers are too deep
6) Tie-front babydoll
- Best for: adjustable look, going-out styling
- Risk: tie pulls can distort seam
7) Open-back babydoll
- Best for: summer events
- Risk: bra compatibility complaints
8) Lace-trim babydoll
- Best for: boutique feminine identity
- Risk: itch and snag
9) Denim-light babydoll (chambray or light denim)
- Best for: casual, durable program
- Risk: weight and heat if fabric is too heavy
10) Crochet-overlay babydoll
- Best for: vacation, beach layer
- Risk: snag + clear lining plan needed
How do I choose the right fabric for a Babydoll Top so it stays cool but not see-through?
Fabric is the make-or-break point for summer babydolls. The shape is already voluminous. If the fabric is wrong, the top either balloons or clings in sweat.
For summer Babydoll Tops, I choose fabrics that are breathable, light, and structured enough to hold a soft swing: cotton poplin, cotton voile (with lining plan), viscose, lightweight linen blends, and soft seersucker. I avoid cheap heavy polyester for the body because it traps heat and shows sweat.
Fabric behavior I focus on
- Opacity in sunlight: babydolls often use light colors and gathers
- Drape vs stiffness: too stiff = balloon; too drapey = cling
- Wrinkle expectations: linen wrinkles, but it can still sell if the brand position is right
- Shrink control: empire seam placement shifts after wash if shrink is not controlled
Fabric-to-design matching table
| Babydoll Sub-style | Best Fabrics | Main Risk | My QC Focus |
|---|---|---|---|
| Cami babydoll | viscose, cotton voile | see-through | sunlight test + lining |
| Puff-sleeve | cotton poplin, seersucker | bulky look | sleeve volume control |
| Smocked-bust | cotton, viscose blends | discomfort | stretch + recovery |
| Tiered | viscose, light cotton | tier heaviness | gather ratio |
| Denim-light | chambray, light denim | heat | GSM limit |
The “opacity rule” I use for summer
If a babydoll has:
- light color + gathers + thin fabric
Then I plan one of these: - double layer body
- partial lining
- thicker fabric option
If I skip this step, returns show up fast.
How do I engineer the fit so a Babydoll Top looks flattering, not “tent-like”?
This is where professional work matters. Babydoll tops are meant to be loose, but “loose” still needs shape control.
To make a Babydoll Top flattering, I set the empire seam based on bust apex, control the gather ratio, and balance front/back length. I also shape the neckline and armholes so the top hangs from the upper body cleanly instead of collapsing into a box.
The three fit zones I control
1) Upper bodice (support zone)
- neckline stability
- shoulder width
- armhole curve
2) Empire seam placement (control point)
- too high = bust feels squeezed and seam cuts visually
- too low = loses the babydoll identity and can look like a tunic
3) Lower volume (swing zone)
- gather amount
- length
- flare distribution
Gather ratio: the detail that decides “cute” vs “costume”
I do not guess gather. I set it with a rule:
- soft volume: 1.6x to 2.0x body width
- strong volume: 2.2x to 2.8x body width
If I go beyond that in summer, the top often looks heavy, and it stops being “easy.”
Bust fit problems and my fixes
- Gaping at neckline: add hidden elastic, adjust neckline curve, or add tie detail
- Pulling at bust: add bust ease, change dart position, or use smocking
- Empire seam riding up: adjust grading and add length for fuller bust blocks
How do I reduce the top 7 quality complaints that happen with Babydoll Tops?
Babydoll returns are not random. They follow a pattern. I use the same complaint list every season and build against it.
The top babydoll complaints are: see-through fabric, bulky silhouette, seam sitting wrong, gaping neckline, scratchy trims, strap failure, and shrink shifting the seam. I reduce them by setting clear fabric specs, seam placement rules, trim standards, and wash testing before bulk.
Complaint map and prevention checklist
- “It’s see-through”
- fix: lining or heavier structure, test under sunlight
- “It makes me look bigger”
- fix: reduce gather ratio, shorten tier depth, improve upper bodice fit
- “The seam hits my chest weird”
- fix: bust apex testing on multiple sizes, adjust grading
- “Neckline gaps”
- fix: elastic spec, neckline tape, better pattern curve
- “Lace is itchy”
- fix: softer lace, clean finish, lining at contact points
- “Straps feel cheap”
- fix: stronger strap elastic, better adjusters, bartack reinforcement
- “It changed after washing”
- fix: shrink testing and preshrink process
My simple wear test for babydolls
- raise arms
- bend forward
- sit and stand
If the empire seam climbs or the neckline opens, I revise before bulk.
How do I plan MOQ and production for Babydoll Tops so I can chase summer demand without overstock?
Babydoll tops can spike fast. But the exact sub-style can also drop fast. I plan them like trend items with one stable base.
I plan Babydoll Tops with a stable core block and fast variations. I keep higher MOQ for smocked-bust and square-neck babydolls because fit is more forgiving, and I keep lower MOQ for open-back, crochet-overlay, and heavy-trim versions because they carry higher return and trend risk.
My core vs trend split
- Core babydolls (reorder-friendly)
- smocked-bust
- square-neck
- simple puff sleeve
- Trend babydolls (test first)
- open-back
- crochet overlay
- heavy lace trim
- tie-front with deeper neckline
A practical MOQ guide I use with boutique buyers
| Type | Why I Treat It This Way | MOQ Strategy | Risk |
|---|---|---|---|
| Smocked-bust | flexible sizing | higher | low |
| Square-neck | stable neckline | medium-high | low-medium |
| Tiered | visual trend | medium | medium |
| Open-back | bra issue | low | high |
| Crochet-overlay | snag + lining | low | high |
Production risks that slow summer deliveries
- lace and crochet trim lead time
- inconsistent gather sewing quality
- shade variation on light colors
- shrink shifting empire seam placement
Mesh Top
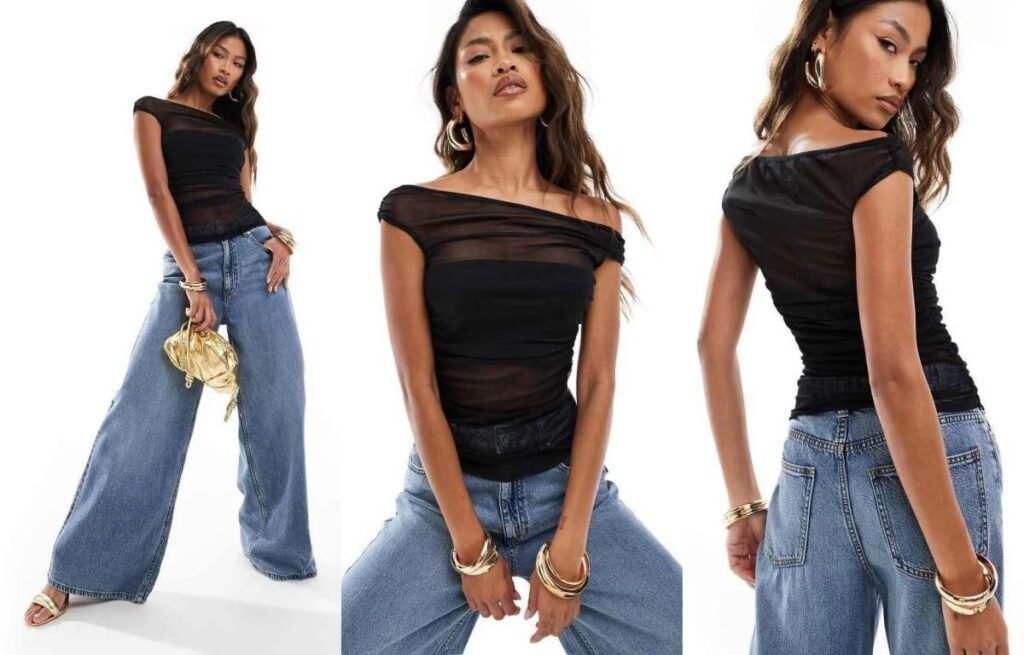
Mesh tops sell fast in summer, but they also fail fast. If the mesh is scratchy, too sheer, or poorly stitched, customers complain on the first wear.
A strong summer Mesh Top program needs the right mesh type (soft mesh vs power mesh), a clear layering plan, and construction that protects seams and comfort. I treat mesh as a performance fabric, then I choose 6–10 reliable sub-styles and test stretch recovery, seam integrity, and sheerness under sunlight.
I learned this after one reorder went wrong. The second batch used a “similar” mesh, but the hand-feel changed. The top looked the same, but customers felt it was itchy. Since then, I write mesh specs like a checklist, not a description.
What exactly is a “mesh top” in summer, and why do customers buy it?
A lot of buyers use “mesh” as a trend word. I do not. I define it by structure, stretch, and how it layers.
A summer mesh top is a lightweight, open-structure fabric top designed for airflow and styling layers. Customers buy it for two reasons: it cools better than dense knits, and it adds texture for “going-out” outfits while still packing small for travel.
What mesh tops do better than many summer tops
- more airflow than jersey
- more texture than plain tees
- more styling options when layered over bralettes, tanks, or bodysuits
What mesh tops do worse (and why returns happen)
- skin comfort issues if the yarn is rough
- transparency complaints if product photos are unclear
- seam popping if the stitch choice is wrong
Which mesh top styles are most popular for summer, and what is each best for?
I keep mesh top sub-styles organized by how people wear them. That makes ordering and marketing easier.
The most popular summer mesh top styles include: long sleeve mesh top, short sleeve mesh tee, mock neck mesh top, fitted ruched mesh top, printed mesh top, off-shoulder mesh top, halter mesh top, mesh cardigan top, cropped mesh top, and mesh layering tank. Each one fits a different scene, from nightlife to beach layering.
1) Long sleeve mesh top
- Best for: nightlife and layering, also works for sun cover
- Risk: scratchy sleeves and seam irritation
2) Short sleeve mesh tee
- Best for: casual trend, easy add-on in carts
- Risk: cheap look if mesh holes are uneven
3) Mock neck mesh top
- Best for: elevated styling, strong photo impact
- Risk: neckline stretching and wave
4) Ruched mesh top
- Best for: flattering shape, hides sheerness in body area
- Risk: ruching elastic failure
5) Printed mesh top
- Best for: statement pieces, faster social reach
- Risk: print cracking or color fastness issues
6) Off-shoulder mesh top
- Best for: romantic going-out look
- Risk: slip-down and weak elastic
7) Halter mesh top
- Best for: warm summer nights
- Risk: neck discomfort and bust pull
8) Mesh cardigan top
- Best for: beach cover-ups and light layering
- Risk: snagging and edge curling
9) Cropped mesh top
- Best for: Gen Z outfits, layered over bralettes
- Risk: hem roll and ride-up
10) Mesh layering tank
- Best for: easy layering under overshirts
- Risk: armhole gaping
How do I choose the right mesh fabric type for summer: soft mesh vs power mesh vs net mesh?
This is the part most people skip, and this is why mesh programs feel inconsistent. “Mesh” is not one fabric. Different meshes behave like different categories.
For summer mesh tops, I choose mesh type based on intended use: soft mesh for comfort and everyday layering, power mesh for shaping and hold, and net mesh for bold texture but higher snag risk. The right choice depends on stretch, recovery, hole size, and hand-feel against skin.
Soft mesh (comfort-first)
- Feel: smoother, lighter, often more drapey
- Best for: printed mesh tops, layering tees, mock necks
- Risks:
- can feel “cheap” if holes look uneven
- can stretch out if recovery is weak
- My focus:
- recovery test after repeated stretching
- seam comfort inside
Power mesh (support-first)
- Feel: tighter, more compressive, stronger recovery
- Best for: ruched mesh tops, fitted silhouettes, layered “hold” looks
- Risks:
- can feel hot if too dense
- can feel tight and cause fit complaints
- My focus:
- stretch ratio and grading accuracy
- seam type that will not pop
Net mesh (look-first)
- Feel: open holes, bold texture, more snag-prone
- Best for: beach layering, fashion drops, festival edits
- Risks:
- snags and pulls show easily
- edges curl or distort if finishing is weak
- My focus:
- edge finishing and snag testing
- packaging method to reduce pulls
A simple mesh decision table I use
| Mesh Type | Best Use | Stretch Feel | Main Risk | Best Fix |
|---|---|---|---|---|
| Soft mesh | daily layering, prints | medium | stretches out | better recovery spec |
| Power mesh | fitted + ruched | high hold | tight/heat | correct stretch ratio |
| Net mesh | statement + beach | varies | snagging | stronger finishing |
How do I control sheerness and customer expectations for mesh tops without killing the trend?
Mesh is meant to be sheer. The return problem happens when the buyer and customer do not agree on what “sheer” means.
I control mesh sheerness by deciding the layering story first, then building product photos, labels, and optional lining around that story. For wholesale, I treat sheerness as a spec: hole size, opacity under sunlight, and whether a base layer is included or required.
The “sheerness mismatch” problem
- Customers see a styled photo with a bralette.
- They receive the top alone.
- They assume it should be wearable as a normal tee.
My three sheerness positioning options
1) Layering-required mesh top
- sells as a styling piece
- needs clear photo and copy
- best for: net mesh, very sheer soft mesh
2) Layering-optional mesh top
- sheer but wearable with nude bra
- best for: printed soft mesh, ruched power mesh
3) Built-in coverage mesh top
- mesh outside + lining or inner cami panel
- best for: mainstream boutique customers
Practical labeling and product page notes I recommend
- “Sheer mesh layering top”
- “Bralette not included”
- “Double-layer front panel” (if true)
This reduces complaints without changing the trend look.
How do I engineer a mesh top so it feels comfortable and does not itch, snag, or pop seams?
This is the real technical core. Mesh is open structure. That means it stresses seams differently than jersey.
To make a mesh top comfortable and durable, I control four areas: seam choice, thread and needle setup, edge finishing, and stress-point reinforcement. I also test snag risk and skin comfort, because mesh failure is usually felt before it is seen.
Seam engineering: what works and what fails
- Overlock-only seams can feel rough and pop under stretch.
- Flatlock or coverstitch can improve comfort on skin-contact areas.
- Binding or facing at neckline reduces irritation and waviness.
My preferred construction options by area
- Neckline:
- binding with soft elastic, or clean facing
- avoid stiff tapes that scratch
- Shoulder seam:
- add shoulder tape to reduce stretching
- Side seams:
- elastic thread or stretch stitch choice, not rigid lockstitch
- Hem:
- narrow cover hem, or clean binding
- avoid raw edges on snag-prone net mesh unless the brand accepts risk
Stress points that need reinforcement
- underarm area
- halter neck join point
- ruching channels
- sleeve cuff seam
Snag control: what I do before bulk
- rub test against a rough surface and check pulls
- hang test to see if the fabric “grows”
- packaging test to prevent hooks and pulls during shipping
How do I grade and fit mesh tops for wholesale without size complaints?
Mesh fits are deceptive. Stretch hides problems in fitting, and then customers feel the issue after movement.
I fit mesh tops by using stretch percentage and negative ease rules, not by copying a jersey tee block. For fitted mesh, I set clear stretch targets and grade carefully, because small grading errors feel bigger when a fabric is clingy and transparent.
Fit rules I use by mesh type
- Soft mesh layering tee: lighter negative ease, comfort first
- Power mesh fitted top: stronger negative ease, but more precise grading
- Net mesh: often looser fit to reduce stress and snags
| Fit Goal | Mesh Type | Ease Strategy | Main Complaint Risk |
|---|---|---|---|
| Layering comfort | soft mesh | low negative ease | itch if seams rough |
| Snatched silhouette | power mesh | higher negative ease | too tight at bust/arm |
| Statement texture | net mesh | relaxed fit | snag and distortion |
My movement test for mesh fitting
- arm raise test for seam stress
- twist test for side seam popping
- sit test to see if neckline shifts and exposes too much
How do I plan MOQ and production for mesh tops so the season stays on time?
Mesh tops are often trend-driven, but some mesh basics reorder well. I treat them as a hybrid.
I plan mesh tops with two lanes: reorder-safe mesh layering basics run in stable soft mesh with consistent hand-feel, while statement mesh drops run in smaller MOQ and stricter timeline control. This keeps speed without sacrificing consistency.
Two-lane mesh plan
- Core lane (reorder-safe):
- long sleeve mesh top, mock neck mesh top, printed soft mesh tee
- Trend lane (drop-driven):
- net mesh cardigan, off-shoulder mesh top, extreme sheer styles
The supplier controls that protect repeat orders
- lock the exact mesh spec and supplier lot
- keep one approved shade standard
- keep one approved seam method for comfort
Crochet Top

Crochet tops sell fast in summer, but they can fail even faster. If the yarn is wrong or the holes are too open, buyers get returns, and the style dies after one drop.
A summer crochet top works when I match the stitch openness to the customer’s comfort level, control stretch-out with the right yarn and structure, and plan the lining or layering story before bulk. I treat crochet tops as a construction product, not just a look.
I learned this after a reorder went wrong. The first batch held shape. The second batch used a slightly different yarn, and the tops grew after hanging. The photos still looked good, but customers noticed the fit changed.
What counts as a “crochet top” in summer, and which sub-styles sell the most?
Many buyers use “crochet top” to mean any open knit. In production, I need clearer language, because the stitch type changes the fit and the risk.
In summer, a crochet top is usually an open-stitch knit made from yarn (often cotton or cotton-blend) that creates visible holes and texture. The best-selling sub-styles are crochet tank, crochet cami, crochet halter, crochet crop top, crochet cardigan, and crochet button-front top because they fit beach, festival, and layered daily outfits.
The 8 crochet sub-styles I see most in summer programs
1) Crochet tank top
- Best for: hot weather basics with texture
- Risk: armhole stretch-out
2) Crochet cami
- Best for: vacation and layering
- Risk: strap stretch and “see-through” complaints
3) Crochet halter
- Best for: beach clubs, festivals
- Risk: neck discomfort and bust support
4) Crochet crop top
- Best for: Gen Z outfits
- Risk: rolling and growing shorter/looser after wear
5) Crochet cardigan
- Best for: summer evenings, AC indoors
- Risk: snagging and sleeve growth
6) Crochet button-front top
- Best for: “top as a layer” styling
- Risk: button area distortion
7) Crochet off-shoulder
- Best for: romantic summer looks
- Risk: slip-down and elastic issues
8) Crochet bandeau
- Best for: minimal tan lines
- Risk: low support, high slip risk
How do I choose yarn and stitch structure for a crochet top so it stays breathable but does not stretch out?
This is the real technical core. Crochet tops stretch differently than jersey knits. They also “grow” with gravity because yarn loops relax over time.
To keep a crochet top breathable and stable, I choose yarn by stiffness and recovery, then I choose stitch by openness and weight distribution. Cotton yarn gives the best summer comfort, but it can stretch out if the stitch is too open or the garment is too heavy. Blends and tighter stitches reduce growth.
Yarn options and what they change
- 100% cotton yarn
- Pros: breathable, soft, summer-friendly
- Cons: can get heavy when stitch is dense; can grow when stitch is open
- Cotton + acrylic blend
- Pros: lighter feel, better shape hold for some stitches
- Cons: can feel warmer; hand-feel must be tested
- Cotton + nylon blend
- Pros: stronger, better recovery, less sag
- Cons: can feel less “natural,” needs good finishing
- Viscose/rayon blends
- Pros: drape and shine
- Cons: higher stretch-out risk because drape adds weight
Stitch openness is not just a design choice
I treat stitch openness like a spec. It changes:
- how see-through the top is
- how much the top stretches with wear
- how heavy the top becomes
- how easily it snags
A practical “stitch openness” guide I use
| Openness Level | Visual Look | Best Use | Biggest Risk | My Control Point |
|---|---|---|---|---|
| Tight | small holes | daily wear, semi-modest | less airflow | keep weight low |
| Medium | visible holes | best commercial balance | mild snag | stable yarn + edging |
| Open | large holes | beach and festival | see-through + stretch-out | lining plan + size control |
The stretch-out mechanism (what I watch)
- Crochet loops relax under heat + movement
- Gravity pulls down the body panels during hanging storage
- If the garment is heavy, the body grows and armholes widen first
How do I prevent snagging, itching, and shape growth in crochet tops?
This is where I get serious, because these three issues kill reorders. If customers call it “itchy,” the style is done. If it snags, the product looks cheap. If it grows, sizing becomes unpredictable.
I reduce crochet top complaints by managing surface friction (to prevent snagging), controlling yarn finishing (to reduce itch), and adding structure at stress points (to reduce growth). I also test the garment after hanging, because crochet changes shape over time more than most tops.
Snag prevention: the product design side
- I avoid extreme open stitches on daily wear pieces
- I reinforce high-friction zones:
- underarm area
- side seams
- neckline edge
- I choose smoother yarns for styles meant to be worn with bags and jewelry
Snag prevention: the production side
- I keep a strict yarn consistency rule across reorders
- I control finishing so loose ends do not pop out
- I set a basic snag test in sampling:
- rub test with a rough fabric swatch
- jewelry snag simulation on neckline area
Itch control: what actually causes “itchy crochet”
- yarn fiber ends are rough
- the stitch surface is uneven
- seams or joins create thick ridges
- dyeing and finishing leave stiffness
My itch-reduction toolkit
- choose combed cotton or softer blends for direct-skin styles
- add soft lining options for sensitive customers
- avoid bulky joins around bust and underarm
- wash/soften test in sampling and approve hand-feel, not only look
Shape growth control: where crochet grows first
- neckline stretches and becomes wider
- armholes widen and gape
- hem drops and the top becomes longer
- straps lengthen on cami and halter styles
My structure fixes
- stable edging at neckline and armhole
- stronger strap construction (double yarn or reinforced strap)
- add internal tape or hidden elastic where design allows
- control garment weight by yarn choice and stitch density
How do I decide lining, bras, and layering rules for crochet tops so customers do not complain about being “too exposed”?
A crochet top always has a transparency story. If I ignore it, customers decide for themselves, and many will return it.
I decide crochet top transparency by target customer and channel. For mainstream boutiques, I plan either a built-in lining, a partial lining at bust, or a clear styling message (bralette, bandeau, bikini). For festival drops, I skip lining but make the exposure intentional.
Lining options and when I use them
- No lining
- Best for: beach cover-ups, festival looks
- Risk: returns from “too see-through”
- Bust-only lining
- Best for: daily wearable crochet cami/tank
- Risk: lining edge shows if not clean
- Full lining
- Best for: premium crochet tops and office-casual layering
- Risk: less airflow, higher cost
A simple decision table
| Target Customer | Best Transparency Plan | Why | Risk |
|---|---|---|---|
| Gen Z festival | no lining + intentional styling | matches trend | higher returns |
| Mainstream boutique | bust lining or included inner | wearable for more people | lower returns |
| Premium resort | clean full lining or high-quality inner set | higher margin | needs perfect finishing |
The “bra compatibility” checks I do
- strap position does not cut into bra straps
- neckline does not expose bra cups in movement
- armholes do not show too much side bra
How do I set sizing and measurement specs for crochet tops when the fabric behaves differently from jersey?
Crochet is tricky because it is flexible in weird ways. It can stretch wide, then drop long. If I use jersey grading rules, the size chart lies.
For crochet tops, I set specs with a stretch range, not one fixed number. I measure relaxed, then I measure after controlled stretch and after hanging. This gives buyers a realistic size story and reduces “it runs big” complaints.
The measurement method I use in sampling
1) measure garment relaxed on a flat table
2) stretch to a standard tension (same person, same method) and record
3) hang for 12–24 hours and measure again
4) wash and dry, then measure again
Key points I always spec for crochet
- neckline width
- armhole opening
- strap length (if any)
- bust width at relaxed and stretched
- body length after hanging
A practical spec table example (how I communicate range)
| Measurement Point | Relaxed | Controlled Stretch | After Hanging | Why It Matters |
|---|---|---|---|---|
| Bust width | 40 cm | 48 cm | 42 cm | comfort + recovery |
| Body length | 38 cm | 39 cm | 41 cm | growth control |
| Armhole | 18 cm | 21 cm | 20 cm | gaping risk |
How do I plan MOQ and production timing for crochet tops so I can reorder without quality drift?
Crochet tops often rely on yarn supply and workmanship consistency. If I treat it like a normal tee, the reorder can look similar but feel different.
I plan crochet tops with tighter supplier control: I lock yarn specs early, keep a physical yarn approval standard, and run smaller first MOQ for new stitches. Then I reorder only after I confirm shape stability and snag performance from real sales feedback.
My production controls for crochet tops
- lock yarn composition and yarn count
- approve color with a physical standard sample
- keep stitch density spec clear (not “similar,” but measurable)
- train workmanship at the joining points and edges
Risk split I use for MOQ
- Core crochet (reorder-safe):
- medium openness, cotton yarn, stable edging
- higher MOQ possible
- Trend crochet (high risk):
- very open stitches, unusual yarns, novelty shapes
- small MOQ, fast test, no overbuy
Lightweight Knit Top
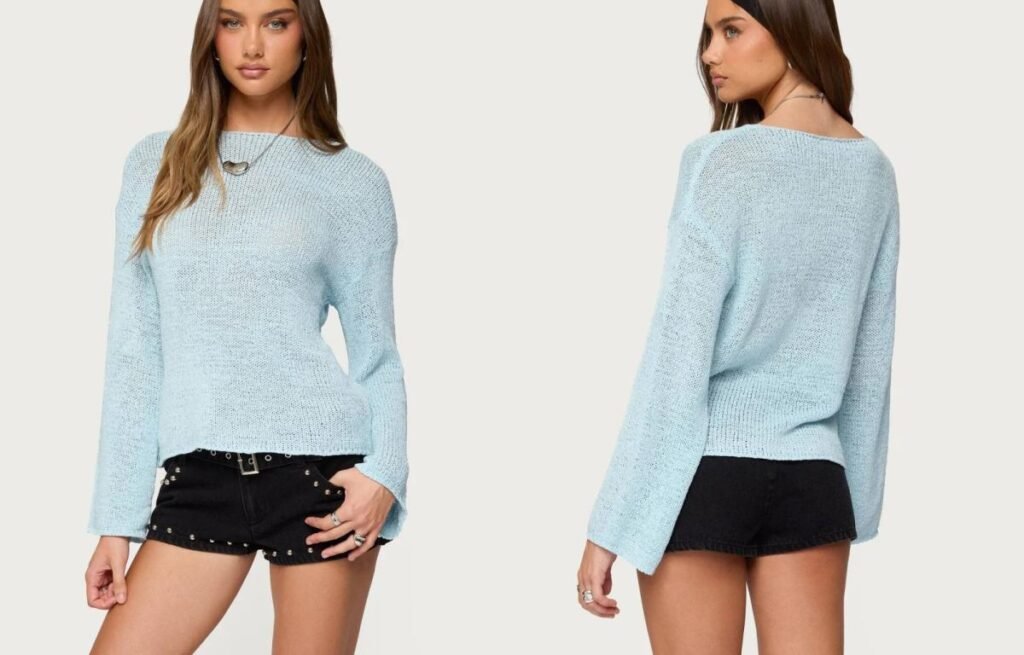
A lightweight knit top can sell like crazy in summer. It can also cause the worst reviews. If the knit is too thin, it turns see-through. If recovery is weak, it stretches out after two wears.
A lightweight knit top works best in summer when I control three things: yarn choice, knit structure, and recovery. I treat it like a “performance basic.” I test opacity under sunlight, measure stretch-and-return, and lock stable specs for GSM, shrink, and neckline support before bulk.
I once ran a “soft” lightweight knit that felt amazing in hand. After washing, the hem waved and the body grew wider. That order taught me one rule: in summer, comfort is not enough. The knit must stay stable.
What counts as a “lightweight knit top” for summer, and how is it different from a normal tee?
Many buyers call anything thin a lightweight knit. In production, I need a tighter definition or the samples will drift.
A lightweight knit top is a knit garment made with lower fabric weight and higher airflow than standard tees, but still engineered to stay opaque and keep shape. Compared to a normal tee, it relies more on knit structure and finishing to prevent curling, stretching, and transparency in heat.
How I define “lightweight” without guessing
I look at four practical signals:
- fabric weight feeling: light on body, not heavy drape
- airflow: breathable when worn in humidity
- opacity: not see-through in strong light
- recovery: returns close to original size after stretch
The biggest difference from a normal tee
A normal tee can hide small stability issues because it is heavier. A lightweight knit shows every weakness:
- neckline waves faster
- hem curls more
- seam puckering is more obvious
- light colors expose everything
Which lightweight knit top styles sell best in summer, and how do I choose the right silhouette?
Lightweight knit is not one silhouette. If I want stable sales, I pick shapes that match real summer outfits, not just runway photos.
The best-selling lightweight knit top silhouettes for summer are: fitted rib knit, slim crew knit tee, knit tank, knit polo, short-sleeve cardigan-style knit, and lightweight knit camisole. I choose the silhouette based on heat level, layering needs, and whether the customer prefers fitted or relaxed looks.
- Slim crew knit tee: safe, reorder-friendly
- Fitted rib knit top: strong margin, “snatched” look
- Knit tank: best for hot weather, easy styling
- Knit polo: sporty-prep trend, higher perceived value
- Cardigan-style short sleeve knit: office AC + casual balance
- Lightweight knit cami: feminine and day-to-night
Silhouette selection rules I follow
- If the brand sells to mainstream boutique customers, I lead with slim crew and rib.
- If the brand is vacation heavy, I add more knit tanks and cami knits.
- If the brand wants higher AOV, I push knit polos and cardigan knits.
How do I pick yarn and knit structure so a lightweight knit top feels cool but does not turn see-through?
This is the technical heart of lightweight knit. Yarn and structure decide comfort, opacity, and durability.
I pick lightweight knit yarn and structure by balancing three trade-offs: softness vs pilling, airflow vs opacity, and stretch vs recovery. In summer, tighter stitches and better yarn quality usually beat “ultra thin” fabric, because the top stays opaque and holds shape after sweat and washing.
Yarn choices and what they really do
- Cotton: breathable and familiar
- Risk: can shrink, can feel heavy if knit is dense
- Viscose/rayon: cool touch and smooth drape
- Risk: can grow in length/width if recovery is weak
- Cotton-modal blends: soft and stable if made well
- Risk: can pill if yarn quality is low
- Nylon blends: improves strength and recovery
- Risk: can trap heat if ratio is too high
- Linen blends: airy and premium feel
- Risk: slubs and more visible texture, needs good finishing
Knit structures I use (and why)
- Single jersey (lightweight):
- Pros: smooth, breathable
- Risks: curling edges, transparency, twist
- When I use it: slim knit tees with reinforced neck and hem
- Rib knit (1×1, 2×2):
- Pros: better recovery, more forgiving fit
- Risks: bagging if yarn is weak, can look “too casual” if gauge is off
- When I use it: fitted summer basics and tanks
- Pointelle / openwork:
- Pros: airflow and texture
- Risks: see-through by design, snag
- When I use it: layered looks with clear styling notes
- Interlock (light version):
- Pros: more opacity and stability than single jersey
- Risks: can feel warmer
- When I use it: light colors that must stay opaque
My “opacity vs airflow” decision table
| Goal | Best Structure | Best Yarn Direction | Main Risk | My Control Move |
|---|---|---|---|---|
| Max airflow | pointelle / openwork | cotton/viscose | too sheer | sell as layering + add inner plan |
| Balanced daily wear | rib / stable jersey | cotton-modal blend | pilling | yarn quality + pilling test |
| Light colors, low risk | light interlock | cotton + nylon blend | warmer hand | keep it thin but tight |
| Premium polish | fine gauge knit | viscose blend | growth | recovery test + finishing |
How do I stop lightweight knit tops from stretching out, bagging, or losing shape in summer?
This is where many lightweight knits fail. Summer adds sweat, washing, and constant movement. So I build stability into the garment, not just the fabric.
To prevent shape loss, I control stretch recovery at the fabric level, then I stabilize key stress areas: neckline, shoulder seams, armholes, and hems. I also set wash and hang tests, because lightweight knits often grow when they hang after washing.
The 5 most common shape-loss causes I see
1) weak recovery yarn or loose stitch tension
2) no stabilization at neckline and shoulders
3) hem finish too light, so it rolls or waves
4) wrong seam type for high stretch areas
5) poor finishing, so shrink and twist are not controlled
Construction fixes that actually work
- Neckline: add clear elastic or stable rib binding
- Shoulders: add shoulder tape to prevent drop and growth
- Armholes (tanks): use binding with controlled stretch ratio
- Hems: coverstitch or stable twin needle finish for jersey; clean hem with controlled tension for rib
- Seams: choose stretch-friendly stitches to avoid popping
The stretch-and-return test I rely on
I do a simple internal method:
- stretch the fabric to a set width
- hold for a short time
- release and measure return
If return is poor, the top will bag out at bust and hem.
The “hang test” most people skip
Lightweight knits can grow under their own weight.
- I wash one sample
- I hang it overnight
- I measure length growth
If growth is high, I either change structure, change yarn blend, or change finishing.
Summer wear is rough on lightweight knits. The top touches skin, bags, sunscreen, and heat. So I plan for real use, not showroom use.
I reduce complaints by matching yarn quality to price tier, avoiding overly fuzzy yarns for high-friction areas, and testing for pilling and color fastness to sweat. I also choose finishes that keep the surface smooth without killing breathability.
What drives pilling in lightweight knits
- low-quality short fibers
- high friction from crossbody bags and denim waistbands
- soft brushed finishes that look good but pill fast
Practical controls I use
- For basics: I avoid overly brushed surfaces
- For fitted rib: I increase recovery support in blend
- For light colors: I test under sunlight for transparency
- For dark colors: I test sweat rub to reduce staining issues
Summer-specific testing checklist
- pilling test on the front chest area
- seam strength at side seam and shoulder
- color fastness to perspiration
- wash shrink and twist
- odor retention feedback from fabric choice
How do I plan MOQ and production for lightweight knit tops without missing summer peak sales?
Lightweight knit tops are perfect for reorders, but only if specs are stable. If fabric changes between runs, the fit changes and the customer notices.
I plan lightweight knit tops as “core reorders” with locked fabric specs, then I add small MOQ fashion colors as quick add-ons. I keep one stable block, one stable knit structure, and I control shade and shrink consistency to protect repeat orders.
The core + color strategy I use
- Core colors for stable reorders: white, black, heather grey, navy, cream
- Fashion colors for speed tests: seasonal pastels, bright accents
My production risk controls
- I lock the yarn and knit structure early
- I set an approved shrink range
- I keep a consistent finishing process
- I keep one measurement standard for each size
| Program Type | MOQ Approach | Best Colors | Best Silhouettes | Main Risk |
|---|---|---|---|---|
| Core reorder basics | higher MOQ | neutrals | slim tee, rib top, knit tank | shade drift |
| Trend color drop | lower MOQ | seasonal | knit polo, pointelle | sell-through risk |
| Premium capsule | controlled MOQ | limited | fine gauge knit | snag and growth |