Spring is tricky. The weather changes fast, and trends change even faster. If I pick the wrong tops, my buyers lose weeks, and I lose repeat orders.
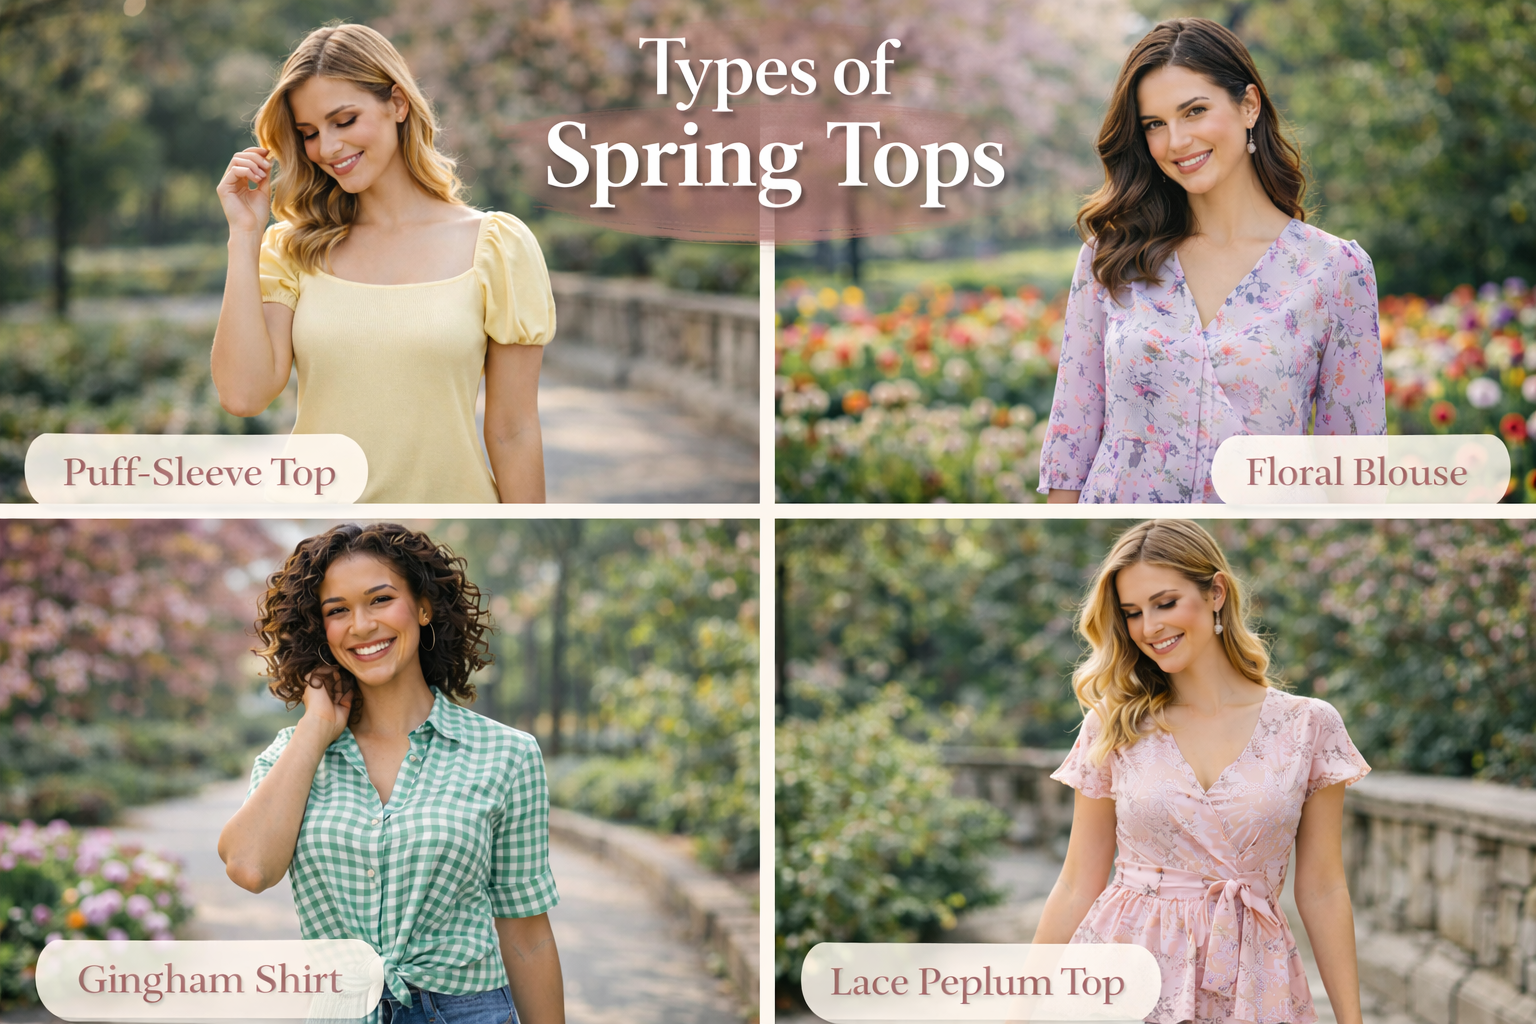
The most practical “Types of Spring Tops” list includes 20 core styles that cover layering, temperature swings, and trend updates: T-shirt, long sleeve tee, tank, camisole, crop top, blouse, button-down, polo, tube top, bodysuit, wrap top, peplum, tunic, rib-knit top, satin top, lace top, mesh top, cardigan top, lightweight hoodie, and denim shirt.
I learned this the hard way when a “cute” top sold well in photos but failed in real wear. After that, I started sorting spring tops by fabric, fit, and how they layer. It saved my customers’ season plans.
How do I choose the right Types of Spring Tops for my brand and climate?
Spring tops only work when they match real weather and real customers. My first filter is always where the brand sells and what the buyer wears day to day.
I choose spring tops by using a simple grid: climate (warm/mixed/cool), styling need (solo vs layering), and fabric behavior (breathable vs structured). Then I pick 6–10 “core” tops for reorders and 3–6 “trend” tops for speed tests.
Step 1: Start with spring temperature reality
- Warm spring (20–28°C / 68–82°F): tanks, camis, tube tops, mesh tops, satin tops
- Mixed spring (12–22°C / 54–72°F): tees, blouses, button-downs, rib-knit tops, bodysuits
- Cool spring (5–15°C / 41–59°F): long sleeve tees, cardigan tops, lightweight hoodies, denim shirts
Step 2: Use a “layering logic” check
I ask one question: Can this top work in at least two outfits?
- If yes, it is a core style.
- If no, it is a trend style and I control MOQ.
Step 3: Control risk with reorder-friendly planning
Here is the planning table I use when I work with boutique buyers like Emily.
| Style Role | Purpose | Target % of Top Assortment | Risk Level | Best Use |
|---|---|---|---|---|
| Core Basics | Repeat sales, stable fit | 45–60% | Low | Tees, tanks, rib tops |
| Core Fashion | Better margin, still safe | 20–30% | Medium | blouses, button-downs, bodysuits |
| Trend Tests | Social traffic, fast wins | 10–20% | High | mesh, lace, tube, peplum |
Fit and QC checks I do before bulk
- Neckline stability: does it wave after washing?
- Armhole gaping: common on tanks and camis
- Sheerness control: mesh/lace needs a clear layering plan
- Seam comfort: bodysuits and rib knits must feel smooth
- Shrink + twist: tees and long sleeves need grainline control
How do I match Types of Spring Tops to fabric choices without getting quality complaints?
Fabric is where most spring problems start. A top can look perfect in photos but feel wrong on the body. That creates returns.
I match spring top styles to fabric behavior: knits for comfort and reorders, wovens for shape and polish, and specialty fabrics for trend impact. Then I control complaints by testing shrink, color fastness, and seam puckering before bulk.
Knit vs woven: what I tell buyers
- Knits: tees, rib tops, tanks, lightweight hoodies
- Pros: comfort, fit tolerance, easy reorders
- Cons: pilling, shrink, twisting
- Wovens: blouses, button-downs, satin tops, denim shirts
- Pros: structure, cleaner look
- Cons: wrinkles, puckering, fit sensitivity
Fabric-to-style matching table I use
| Style | Best Fabric Options | Main Risk | My QC Focus |
|---|---|---|---|
| T-shirt | cotton, cotton-modal, cotton-spandex | shrink/twist | wash test + GSM check |
| Rib-knit top | rayon/nylon blends, cotton rib | bagging | stretch recovery |
| Blouse | polyester, viscose | wrinkles | seam puckering |
| Satin top | polyester satin, silk blend | snag | needle choice |
| Mesh top | nylon mesh, power mesh | scratch | seam and thread |
| Denim shirt | cotton denim, cotton blend | wash shift | shade consistency |
The “complaint triggers” I watch
- Spring sweat: fabric must breathe or it smells fast
- Light colors: show-through becomes a return reason
- Thin knits: neckline waves after a few wears
- Satin and lace: snag and itch are the top two issues
How do I plan MOQ and production for Types of Spring Tops without missing trend windows?
Spring tops fail when lead time is wrong. If sampling takes too long, the trend is gone. If bulk starts too early, the market shifts.
I plan spring tops with two tracks: a stable “core track” that runs early with safe MOQ, and a “trend track” that uses fast sampling, smaller MOQ, and quick replenishment. This keeps the brand in season without overstock.
The two-track plan I use in my factory
- Core track (reorder first):
- tees, tanks, rib tops, button-downs, long sleeve tees
- target: reliable fit blocks and stable colors
- Trend track (speed first):
- mesh, lace, tube, peplum, satin
- target: fast sampling and fast drop timing
A practical calendar I follow (example)
| Stage | Core Tops | Trend Tops |
|---|---|---|
| Sampling | 2–3 rounds max | 1–2 rounds max |
| Fit Approval | strict | “good enough” with clear notes |
| Bulk MOQ | higher | lower |
| Reorder Plan | ready before launch | triggered by sales data |
Risk controls that protect schedule
- I lock trims early for button-downs and blouses.
- I standardize size specs across tees and rib tops.
- I build one shared color book for spring neutrals.
- I keep 1–2 backup fabrics for sudden shortages.
How do I make Types of Spring Tops feel “custom” for a brand without changing everything?
Many buyers want a unique look, but they do not want unstable production. I like simple custom moves that keep fit safe.
I make spring tops feel custom by changing visible details that do not break fit: neckline shape, sleeve length, hem finish, trim, and print placement. For wholesale buyers, this gives brand identity without adding too much sampling time.
Low-risk customization options
- Necklines: crew, square, sweetheart, halter
- Sleeves: cap sleeve, flutter sleeve, raglan
- Hems: lettuce edge, raw hem, shaped hem
- Details: contrast stitching, logo embroidery, branded buttons
- Prints: placement graphics on tees and hoodies
Higher-risk changes I warn about
- changing armhole shape on tanks
- changing wrap point on wrap tops
- changing stretch ratio on rib knits
- changing snap placement on bodysuits
Simple “brand DNA” checklist
- 1 signature neckline
- 1 signature sleeve
- 1 signature trim detail
- 2–3 repeat colors
- 1 repeat fit block for basics
Lightweight Sweater
Spring weather changes every few hours. If my tops are too thin, customers feel cold. If they are too warm, they stop wearing them. This is how returns start.
If my keyword is “Lightweight Sweater,” I focus on spring tops that layer well and keep shape: fine-gauge crewneck, V-neck, cardigan, polo sweater, zip sweater, sweater vest, rib-knit top, pointelle knit, open-knit, and lightweight hoodie. I treat them as “tops,” not heavy outerwear, so they sell longer into the season.
I once pushed a “light” sweater that looked perfect in photos, but the yarn pilled fast and the neckline stretched. After that, I started building a simple sweater-focused system that links gauge, yarn, and real wear.
What exactly counts as a Lightweight Sweater in spring tops sourcing?
Many buyers say “lightweight sweater,” but they mean different things. If I do not define it clearly, sampling becomes messy and spec sheets get vague.
A Lightweight Sweater is a knit top meant for spring layering. It uses finer gauge or lower yarn weight than winter knits, so it drapes, breathes, and fits under jackets. In bulk, I define it by gauge, GSM range, yarn type, and stretch recovery, not by how it looks online.
The definition I put in my tech pack
- Category: top layer or standalone top, not heavy outerwear
- Hand-feel: soft, not stiff
- Thickness: thin to mid-light
- Use case: indoor AC, morning chill, evening wind
Practical spec anchors I use with buyers
| Spec Item | What I set | Why it matters in spring |
|---|---|---|
| Knit gauge | fine to mid gauge | controls warmth and drape |
| Weight (GSM) | low to mid range | prevents “too hot” complaints |
| Stretch recovery | must pass | stops bagging at elbows and hem |
| Pilling grade | target stable | spring sweaters get high wear |
| Shrink range | controlled | avoids short body after wash |
Common confusion I clear up early
- A rib-knit top is not always a sweater. It can be a jersey rib.
- A sweatshirt is not a sweater. It is usually fleece or terry.
- A cardigan top can be woven or knit. I confirm construction.
- “Lightweight” must match climate. Australia spring and UK spring are not the same.
Which Types of Spring Tops fit the Lightweight Sweater keyword best?
If my SEO goal is “Lightweight Sweater,” I still need variety. One style alone cannot carry the season. I build a 20-style list, but I make sure the sweater family is the core.
The best Types of Spring Tops for the Lightweight Sweater keyword include 10 sweater-led tops plus 10 supporting tops for layering and trend tests. This creates a full assortment that can sell from early spring to late spring without forcing buyers into heavy knits.
10 lightweight sweater-led spring tops
1) Fine-gauge crewneck sweater
2) Fine-gauge V-neck sweater
3) Lightweight cardigan
4) Button-front cardigan top
5) Polo sweater top
6) Half-zip sweater top
7) Sweater vest
8) Pointelle knit top
9) Open-knit sweater top
10) Ribbed lightweight sweater top
10 supporting spring tops that boost the sweater sell-through
11) T-shirt (for under-cardigan sets)
12) Long sleeve tee (for cool mornings)
13) Tank top (for warm midday)
14) Camisole (for soft layering)
15) Button-down shirt (preppy layering)
16) Blouse (work-ready mix)
17) Bodysuit (clean base layer)
18) Mesh top (trend layering under knits)
19) Denim shirt (structure contrast)
20) Lightweight hoodie (casual alternative)
How I decide the mix for a boutique buyer
| Buyer Goal | Sweater-led % | Supporting % | Notes |
|---|---|---|---|
| Reorder stability | 55–65% | 35–45% | focus on fine gauge + neutrals |
| Trend + social | 40–50% | 50–60% | add pointelle, open-knit, sets |
| Cool climate | 60–70% | 30–40% | keep long sleeve tee and denim shirt |
How do I choose yarn and knit structure for a Lightweight Sweater without quality issues?
This is where professional sourcing shows up. Lightweight sweaters can fail fast if yarn is wrong. Thin knits also reveal every weakness in stitching and finishing.
I choose Lightweight Sweater quality by linking yarn type, knit structure, and finishing to the target customer. For spring, I prioritize breathability, shape stability, and low pilling. I test recovery at cuffs and hem because that is where buyers complain first.
Yarn options I use, with honest trade-offs
- Cotton yarn
- Good: breathable, natural feel
- Risk: growth and sag if structure is weak
- Viscose/rayon blends
- Good: soft drape, smooth look
- Risk: bagging if recovery is poor
- Cotton-acrylic blend
- Good: better stability and cost control
- Risk: pilling if fiber quality is low
- Cotton-nylon blend
- Good: strength and better recovery
- Risk: hand-feel can turn “dry” if not balanced
Knit structures that behave well in spring
- Jersey knit sweater
- clean surface, easy to style, but can curl at edges
- Rib knit
- better recovery, better fit, but can cling too much
- Pointelle
- pretty and airy, but needs careful snag control
- Open-knit
- strong trend value, but needs a clear layering plan
The QC tests I run before bulk
- Pilling test: lightweight sweater tops get friction from bags and seat belts
- Dimensional stability: body length and sleeve length after wash
- Spirality/twist: more visible on fine gauge
- Seam popping: thin knits hide less, so seams must be clean
- Color fastness: spring brights can bleed and stain light bottoms
The “weak point” map I use
- Neckline: must not stretch out
- Cuffs: must not flare after wear
- Hem: must not roll or wave
- Shoulder seam: must hold shape for hanging display
How do I build a Lightweight Sweater assortment that sells across early and late spring?
If I only stock one weight, I lose half the season. Spring has cold mornings, warm afternoons, and windy nights. I plan sweaters like a temperature ladder.
I build a Lightweight Sweater assortment with three warmth levels: airy knits for warm days, fine gauge basics for daily wear, and slightly heavier mid-light knits for cool evenings. Then I pair each with a base layer top, so the styling story is clear for customers.
The three-level ladder I use
1) Airy level
- pointelle, open-knit, sweater vest
2) Daily level - fine-gauge crewneck, V-neck, ribbed sweater top
3) Evening level - cardigan, half-zip, polo sweater
Simple pairing rules that improve conversion
- Open-knit sweater + cami or bodysuit
- Cardigan + tank + denim
- Fine-gauge crew + button-down collar layering
- Sweater vest + blouse for office look
A small but effective color plan
| Role | Colors I pick first | Why it works |
|---|---|---|
| Core basics | black, ivory, heather grey | low return risk |
| Spring update | butter yellow, sage, sky blue | seasonal feel |
| Accent | red, cobalt, hot pink | social photo pop |
How do I control MOQ and lead time for Lightweight Sweater tops in wholesale?
Sweaters can be slower than tees because yarn and knitting capacity matter. If I do not plan the pipeline, buyers miss drop dates.
I control Lightweight Sweater MOQ and lead time by separating “repeat yarns” from “special yarns,” and by standardizing fit blocks. I run core sweater tops with stable yarn supply, and I reserve trend knits like pointelle for smaller MOQ and faster decisions.
The production plan I use
- Core sweater tops
- stable yarns, stable gauges, stable colors
- better for reorders and long selling time
- Trend sweater tops
- special stitches, open-knit, pointelle patterns
- better as small tests, then quick replenishment if hot
| Item | Risk | What I do to reduce it |
|---|---|---|
| Special yarn delays | high | confirm yarn booking early |
| Size drift | medium | lock measurement chart early |
| Pilling complaints | high | set pilling target + test |
| Color inconsistency | medium | lab dips and shade bands |
| Snag returns | high | choose stitch + finishing carefully |
What I standardize to move faster
- one base fit block for crew/V-neck
- one sleeve spec across 3–4 styles
- one cuff and hem rib spec for core items
- shared trims for cardigan buttons and labels
Cardigan
Spring weather changes fast. Many buyers guess. Then they get stuck with the wrong weight, the wrong fit, or the wrong timeline. I have seen cardigan orders turn into slow stock because the plan was not clear.
If I want cardigan-led “Types of Spring Tops” that sell, I build around 20 proven top styles and treat the cardigan as the key light layer: I choose 2–3 cardigan shapes, lock yarn and gauge early, and pair them with basics like tanks, tees, rib tops, and camis for easy outfits.
I once made the mistake of pushing only one cardigan shape because it looked “safe.” It was not. The photos were nice, but customers wanted different lengths and necklines. After that, I started building cardigan options like a small system, not a single item.
What cardigan types work best as spring tops, and when should I use each?
A cardigan is not one thing. In spring, the same word can mean a light knit top, a layering piece, or even a “top replacement” for a blouse.
For spring selling, I rely on 6 cardigan types: cropped cardigan, classic V-neck button cardigan, crew-neck cardigan, cardigan top (as a blouse substitute), longline cardigan, and cardigan set (cardi + matching knit tank). Each one fits a different climate, customer, and styling need.
Cardigan types I use most in spring
- Cropped cardigan
- Best for: Gen Z silhouettes, high-waist bottoms
- Risk: hem riding up, sleeve fit too tight
- Classic V-neck button cardigan
- Best for: work-to-weekend, reorders
- Risk: button spacing gaping
- Crew-neck cardigan
- Best for: sweet and “preppy” looks
- Risk: neckline curl or stretching
- Cardigan top (shorter, more fitted, worn closed)
- Best for: top replacement, higher margin
- Risk: needs cleaner finishing
- Longline cardigan
- Best for: cool spring, layering coverage
- Risk: dragging hem, shape collapse
- Cardigan set (twinset feel)
- Best for: outfit selling and AOV
- Risk: color match across pieces
Quick pairing logic I follow
- Cropped cardigan + rib tank + wide-leg pants
- V-neck cardigan + camisole + denim
- Crew cardigan + tee + skirt
- Cardigan top (worn closed) + tailored pants
- Longline cardigan + long sleeve tee + leggings
- Cardigan set + jeans + simple jewelry
How do I control cardigan quality so it does not look cheap after a few wears?
Cardigans can fail quietly. The buyer thinks it is fine at sampling. Then pilling and stretching show up after customers wear it twice.
I control cardigan quality by locking yarn choice, gauge, and finishing rules, then testing pilling and growth early. For spring, I prefer smoother yarns and tighter control on rib edges, button plackets, and shoulder stability. This prevents the “baggy, fuzzy, cheap” look.
The real cardigan quality drivers
Yarn choice decides the customer’s first impression
- Cotton or cotton-blend
- Feel: breathable, spring-friendly
- Risk: growth and sagging if structure is weak
- Viscose/rayon blend
- Feel: soft, drapey, “premium touch”
- Risk: snag and seam slippage if too loose
- Acrylic or acrylic blend
- Feel: cost-friendly, easy color
- Risk: pilling and static
- Wool blend
- Feel: warm, premium
- Risk: itch, too hot for many spring markets
Gauge and stitch structure decide shape
I always ask for gauge and stitch details in the tech pack, because “same yarn” can still wear totally different.
- Tighter gauge
- Pros: cleaner, less see-through, better shape
- Cons: can feel stiff if wrong yarn
- Looser gauge
- Pros: airy, relaxed
- Cons: growth, snag, faster pilling
Finishing decides whether it holds up
- Rib edges: must recover, not flare out
- Placket: must lie flat, not wave
- Shoulder: must have stability, not droop
My practical testing checklist (I do this before bulk)
- Pilling test plan: I compare 2 yarn options and pick the one that stays clean
- Growth test: hang the cardigan for 24 hours and measure length change
- Wash test: look for twist and edge waving
- Button stress: pull at chest and check gaping
Common “cheap look” problems and fixes
| Problem customers notice | Why it happens | Fix I use |
|---|---|---|
| Fuzzy surface fast | yarn pills easily | change yarn blend, tighter gauge |
| Hem flares out | rib recovery is weak | adjust rib ratio, add structure |
| Placket waves | uneven tension | stabilize placket, improve knitting tension |
| Shoulders droop | no stability | add shoulder tape or structure |
How do I build a 20-style spring tops lineup where cardigan is the anchor?
Cardigan is a layer, but it can also be the “hero” item. When I plan a line, I use the cardigan to connect basics and trend pieces.
I build a 20-style spring tops lineup by using cardigan as the anchor, then adding basics for volume, polished tops for office use, and trend tops for social traffic. The cardigan should match at least 60% of the tops in color story and styling.
The 20 popular spring top styles (with cardigan integrated)
1) T-shirt
2) Long sleeve tee
3) Tank top
4) Camisole
5) Crop top
6) Blouse
7) Button-down shirt
8) Polo top
9) Tube top
10) Bodysuit
11) Wrap top
12) Peplum top
13) Tunic top
14) Rib-knit top
15) Satin top
16) Lace top
17) Mesh top
18) Cardigan top
19) Lightweight hoodie
20) Denim shirt
My “cardigan anchor” planning rule
I do not treat cardigan like a random add-on. I place it in the center of the plan.
- I pick 2–3 cardigan shapes (not more).
- I choose one core yarn and one premium yarn.
- I set a simple color set: 2 neutrals + 2 seasonal colors.
- I match tanks, tees, and rib tops to those colors.
Assortment structure I recommend to boutique buyers
| Group | What it includes | Why it matters |
|---|---|---|
| Volume basics | tees, tanks, rib tops | steady sales and reorders |
| Outfit builders | cardigan tops, button-downs, blouses | increases styling value |
| Trend drivers | mesh, lace, tube, satin | brings traffic and “newness” |
| Layering heroes | cardigans, denim shirts, light hoodies | handles spring temperature swings |
What specs matter most for a cardigan if I want fewer returns?
Returns often come from fit details that buyers do not notice at first glance. Cardigan fit is subtle, but it is measurable.
The most important cardigan specs are body length, sleeve length, shoulder width, button spacing, and rib edge stretch recovery. If I control these five points, the cardigan looks better on more body types and returns drop.
The five spec points I lock early
1) Body length
- Cropped: easier for Gen Z, but can feel “too short” fast
- Regular: safest for reorders
- Longline: adds drama but higher risk
2) Sleeve fit and length
- Tight sleeves make cardigans feel cheap
- Overlong sleeves can look messy in photos
- I keep a clear tolerance range and do a wear test
3) Shoulder and armhole balance
If shoulder drops too much, the whole cardigan collapses.
- I stabilize shoulder and check drop amount in sample
4) Button spacing and gaping
This is the #1 complaint on fitted cardigans worn closed.
- I test gaping by pulling at bust and checking the placket
5) Rib edge recovery
If ribs lose shape, the whole top looks tired.
- I stretch the hem and cuff, then see if it returns
A simple “fit risk” table I use
| Fit area | Customer complaint | What I change |
|---|---|---|
| Bust area | gaping at buttons | add button, adjust spacing |
| Hem | rides up or flares | change rib ratio, adjust length |
| Sleeve | tight upper arm | widen bicep, adjust armhole |
| Neckline | curls or stretches | stabilize neckline, adjust rib |
How do I price and position cardigan tops for wholesale buyers without killing margin?
Cardigans can be margin-friendly, but only if the plan is honest. Too many variations can break cost control.
I position cardigan tops as “outfit builders” with stable reorders: one core cardigan at competitive cost and one premium cardigan with better yarn or details. I protect margin by limiting trims, keeping shared yarn across colors, and using consistent blocks.
Cost drivers I track in cardigan development
- yarn type and yarn price
- knit gauge and production speed
- buttons and placket finishing
- special details like embroidery or contrast trim
- wash and anti-pilling finishing
My margin protection moves
- I keep the same button across multiple styles.
- I build one shared cardigan block for 2–3 silhouettes.
- I avoid too many yarn types in one season.
- I reserve premium yarn for the style that will be the hero.
- when the brand sells at higher retail prices
- when the buyer wants strong brand feel
- when the photos must look expensive up close
Knit Top
Spring sales can look easy from the outside. But one wrong fabric choice can ruin fit, lead time, and reviews. I have seen knit tops sell fast, then get returned because they twist, pill, or turn sheer.
A knit top is a spring top made from knitted fabric, so it stretches and feels soft. For most women’s brands, knit tops are the safest spring “core” because they fit more body types, layer well, and reorder easily. The best spring knit top range covers 20 popular styles with clear fabric and fit rules.
I used to treat “knit top” like one simple category. Then I started running repeat orders for boutique buyers. I noticed the winners were not random. They followed the same fit blocks, the same stretch ratios, and the same QC tests.
What makes a top a “knit top,” and why does it matter in spring?
Many buyers ask me for “knit tops” but they do not define what they mean. So I always start with construction, not trend words.
A knit top is defined by fabric structure, not the silhouette. Knits are built from interlocking loops, so the fabric stretches and recovers. In spring, this matters because it improves comfort in changing temperatures, makes sizing more forgiving, and lets brands move faster with fewer fit issues than many woven tops.
Knit top vs woven top in one simple view
| Item | Knit Top | Woven Top |
|---|---|---|
| Fabric structure | loops | crisscross yarns |
| Stretch | usually yes | usually low |
| Fit tolerance | higher | lower |
| Common spring use | layering + casual | polished + office |
| Main risk | pilling, twist, bagging | wrinkles, puckering, gaping |
The spring advantage I see in knits
- I can grade sizes faster because knits forgive small spec errors.
- I can reorder colors easier because core knit fabrics are more stable in supply.
- I can run more silhouettes on one base fabric, so MOQs feel lighter.
Knit tops do not fail in photos. They fail after wear.
- necklines can wave
- hems can flip
- sleeves can twist
- the body can grow after hanging
These problems are preventable, but only if I treat knit tops like an engineered product.
Which 20 Types of Spring Tops work best as knit tops?
This is where I like to be very practical. A knit top can look like many silhouettes. The key is picking the right knit for the right style.
The most workable “Types of Spring Tops” as knit tops include: T-shirt, long sleeve tee, tank, cami-style knit, crop top, rib-knit top, polo knit, knit blouse-style top, knit button-front top, bodysuit, wrap knit top, peplum knit top, tunic knit top, knit sweater-light top, cardigan top, lightweight hoodie, henley, off-shoulder knit, mock neck knit, and knit denim-look shirt.
A quick mapping: silhouette → best knit direction
| Spring Top Style | Best Knit Type | Why it works |
|---|---|---|
| T-shirt / long sleeve tee | jersey | smooth drape, easy reorder |
| Tank / cami-style knit | rib or jersey with elastane | shape hold at armhole |
| Rib-knit top | rib | fitted look, strong recovery |
| Polo knit / henley | pique or rib | texture + structure |
| Wrap / off-shoulder | rib with elastane | hold and return |
| Lightweight hoodie | French terry | stable, casual premium feel |
| Cardigan top | sweater knit or rib | layer-friendly weight |
The “not every knit works” rule
- A loose jersey can be perfect for a tee, but it can fail on a bodysuit.
- A heavy rib can be great for a mock neck, but it can look stiff on a peplum.
- A mesh knit can be trendy, but it needs a clear layering story.
How do I choose the right knit fabric for a knit top without quality problems?
This is the part that decides if a brand gets reorders or refunds. I never pick knit fabric only by feel. I pick it by behavior.
I choose knit fabric by matching four things: weight (GSM), stretch and recovery, opacity, and surface durability. For spring, the safest range for many knit tops is mid-weight knits with controlled elastane and proven wash stability. The goal is comfort without twisting, pilling, or see-through issues.
The four behavior tests I run before bulk
1) Stretch and recovery
I check if the fabric returns after I stretch it.
- If recovery is weak, rib tops will bag at elbows and hems.
- If recovery is too strong, tees can feel tight and uncomfortable.
2) Wash shrink and twist
I test after wash and dry.
- I measure length and width shrink.
- I check side seams. If they rotate, customers call it “cheap” fast.
3) Opacity under spring light
Spring sun is harsh. Studio light hides problems.
- I test light colors on a mannequin.
- I also test against black underwear, because customers do.
4) Pilling and snag risk
Some yarn blends pill quickly.
- brushed finishes can look premium, but they must pass wear tests
- soft hand-feel is not the same as durable hand-feel
Knit fabric options I use most for spring tops
| Fabric | Best for | Main risk | My control method |
|---|---|---|---|
| Cotton jersey | tees, long sleeves | twist/shrink | pre-shrink + grain control |
| Cotton-modal jersey | premium tees | pilling | yarn quality + abrasion test |
| Rib knit (cotton/rayon blends) | fitted tops | bagging | recovery requirement |
| Pique knit | polos, henleys | stiffness | pattern balance |
| French terry | hoodies | shrink | wash test + stable rib |
| Sweater knit (light) | cardigan tops | snag | needle choice + handling rules |
What I tell buyers who want “super soft”
If softness is the only goal, returns go up.
I set a minimum bar:
- must keep shape after wash
- must not turn sheer in light colors
- must not pill in high-friction zones
How do I control fit for knit tops so sizing stays consistent across reorders?
Fit is where knit tops look easy but behave hard. Knits stretch, and factories can “pull” them during sewing. That creates size drift between batches.
I control knit top fit by locking a base block, defining stretch direction, using stable seam specs, and measuring garments after rest. The biggest mistake is measuring knit tops straight off the sewing line. Knits need time to relax, or the final size will change.
The fit controls that actually work
Lock one base block per category
- 1 tee block
- 1 rib fitted block
- 1 tank block
- 1 bodysuit block
When a buyer wants a new neckline, I modify the block, but I do not rebuild everything.
Define stretch direction in the tech pack
- body stretch should run around the body
- length stretch should be controlled for tanks and bodysuits
Stabilize the weak points
- shoulder seams
- neckline seam
- armhole seam
- snap area on bodysuits
If I skip stabilization, necklines wave and straps fall.
Measure “after rest,” not “right now”
I let knit garments rest flat before measuring.
This reduces arguments about sizing.
The knit top measurement points I care about most
- chest width
- body length
- shoulder width
- sleeve length
- bicep opening
- hem opening
- neckline width and depth
How do I price and plan MOQ for knit tops without losing margin?
Knit tops look low-cost, but small mistakes kill margin. I have seen brands price a knit tee like a basic, then add high-end trim and lose money.
I plan knit top pricing by separating fabric cost, sewing minutes, trims, and defect rate. For MOQ, I build a core knit program with fewer fabrics and more colors, then test trend knit silhouettes with smaller runs. This keeps cost stable and protects timing.
Where knit top costs really come from
- Fabric cost per meter and fabric width
- GSM changes that increase consumption
- Sewing minutes (bodysuits and wrap tops take longer)
- Trims (snaps, buttons, special elastics)
- Defect rate (pilling risk and seam issues)
A practical MOQ structure I use
| Program type | Fabric count | Color count | MOQ approach | Why it works |
|---|---|---|---|---|
| Core knits | 1–3 | 6–12 | higher per color | reorders + stable fit |
| Trend knits | 1–2 | 2–4 | lower per color | speed tests |
The margin trap I warn about
If a buyer wants:
- very light GSM
- very soft finish
- light color
- tight fitted rib
Then returns risk rises. I price that risk, or I change the fabric plan.
Long-Sleeve T-Shirt
Spring weather flips fast. If I pick the wrong long-sleeve tee, customers feel hot at noon and cold at night. Then returns rise, and reorders stop.
A spring Long-Sleeve T-Shirt works best when I balance three things: fabric weight (not too heavy), sleeve and body fit (not too tight), and neckline + cuff stability (so it keeps shape after washing). If I control these, this “basic” top becomes a high-repeat bestseller.
I still remember one early bulk order where the sleeves twisted after washing. The photos looked fine, but customers felt the problem on day one. After that, I built a simple long-sleeve tee checklist and I never skip it.
What makes a Long-Sleeve T-Shirt “spring-ready” instead of “winter-heavy”?
Most people call it the same item, but spring and winter long sleeves behave differently. I treat spring long sleeves as a layering tool, not a warmth tool.
A spring-ready Long-Sleeve T-Shirt uses lighter GSM, better breathability, and cleaner layering seams. It should sit comfortably under a jacket, cardigan, or denim shirt without bunching. The goal is comfort across a 10–15°C daily swing, not maximum heat.
Fabric weight: I pick a “middle band,” not extremes
I often see buyers choose fabric by touch only. I do not do that. I use weight and recovery.
- Too light: it turns sheer, the neckline waves, and the sleeves stretch out
- Too heavy: it traps heat and feels like a winter base layer
Here is the band I normally work inside for spring programs:
| Fabric Type | Spring GSM Range | Hand Feel | Best Use |
|---|---|---|---|
| Single jersey cotton | 160–200 | clean, casual | everyday volume |
| Cotton-modal | 150–190 | soft, smooth | premium basic |
| Cotton-spandex jersey | 170–210 | stable stretch | fitted look |
| Rib knit (fine rib) | 180–240 | clingy, shaped | fashion basic |
Breathability: I check air flow and sweat marks
A spring long sleeve fails when it shows sweat or holds odor.
- I prefer cotton blends or modal blends for better comfort.
- I avoid cheap synthetics that feel “plastic” in warm afternoons.
- I watch for dye behavior in mid tones like grey and tan, because sweat marks show more.
Layering: I design the seams for stacking
Layering is not only about size. It is about seam bulk.
- flat seams feel better under outerwear
- thin neck binding reduces “stack height”
- clean shoulder shape prevents bunching under jackets
Which Long-Sleeve T-Shirt fits sell best: fitted, regular, or oversized?
Fit is the main reason one long sleeve becomes a reorder, and another becomes dead stock. In spring, buyers want comfort, but they also want clean photos.
Regular fit is the safest high-volume spring Long-Sleeve T-Shirt. Fitted works best when stretch recovery is strong and sizing is consistent. Oversized sells when the shoulder and sleeve shape are intentional, not just “scaled up.” I choose fit by the brand’s styling and return tolerance.
Fit decision framework I use with boutique buyers
I decide fit using three questions:
- Does the brand style with high-waist bottoms or low-rise?
- Does the customer prefer layering or solo wearing?
- Can the brand handle size exchange volume?
Then I map it:
| Fit Type | Best Customer Use | Main Risk | My Fix |
|---|---|---|---|
| Fitted | tucked looks, sleek outfits | returns from tight arms | add stretch + adjust bicep |
| Regular | daily wear, easy layering | looks “plain” | upgrade neckline + hem |
| Oversized | street styling, relaxed | sloppy shoulders | control shoulder drop + sleeve taper |
Many long-sleeve tees look okay on flat specs but fail on the arm.
- If the bicep is too tight, customers feel trapped
- If the sleeve opening is too wide, cuffs slide and look messy
- If the sleeve length is long without cuff control, hands disappear
I always treat sleeve fit as its own mini project.
Size grading: I check the jump, not only the base size
Bad grading causes the “M is perfect, L is huge” complaint.
- I keep grading jumps stable at shoulder, chest, and bicep
- I control length changes, because spring customers hate random long bodies
How do I prevent twisting sleeves, wavy necklines, and shrink on a Long-Sleeve T-Shirt?
This is the part that separates a real factory program from a quick market sample. Long sleeves look simple, but they show defects fast.
I prevent long-sleeve tee problems by controlling grainline, shrink testing, and neck binding construction. The most common failures are sleeve twist from poor fabric skew, neckline wave from weak binding, and shrink from unfinished fabric. A basic wash test plus pattern checks remove most risk.
Sleeve twist: why it happens and how I stop it
Sleeve twist usually comes from fabric skew and cutting direction.
- the fabric roll has bias skew
- the cutting markers ignore the fabric direction
- the sleeve pattern shape amplifies the skew after wash
What I do:
- I test skew on fabric before cutting
- I align cutting direction across panels
- I avoid aggressive sleeve curves on unstable jersey
Wavy neckline: the “cheap basic” signal
A wavy neckline kills perceived quality.
Common causes:
- binding width is wrong
- binding stretch ratio is wrong
- stitching tension is off
- fabric is too light for that binding method
My fixes:
- I set a binding stretch ratio and keep it consistent
- I use better recovery trims for light jersey
- I stabilize shoulder seams to reduce pull
Shrink and length change: the return driver
Spring customers notice length change because they layer.
- if the body shrinks, it becomes a crop by accident
- if sleeves shrink, cuffs sit too high
My process:
- I pre-test shrink in warp and weft
- I adjust pattern before bulk
- I repeat the test after dyeing, not only greige
Here is the QC checklist I use:
| Issue | Quick Test | Pass Standard (Practical) |
|---|---|---|
| Shrink | wash + dry | stable within planned tolerance |
| Twist | wash then hang | seam stays near side line |
| Neck wave | wash then flat | neckline lies smooth |
| Pilling | rub test | low fuzz after friction |
| Color fastness | wipe + wash | low staining |
How do I make a Long-Sleeve T-Shirt feel more “fashion” while staying reorder-friendly?
Buyers want “new,” but they also want stable production. I like upgrades that do not break the fit block.
I make long-sleeve tees feel fashion by changing visible details: neckline shape, hem finish, cuff design, stitching, and fabric texture. These changes keep the same core pattern, so sampling stays fast and reorders stay stable.
Low-risk design upgrades that lift retail value
- Neckline: crew to square, wide crew, or mock neck
- Cuff: self-fabric cuff, contrast cuff, thumbhole cuff
- Hem: curved hem, raw hem, split hem
- Stitching: coverstitch detail, contrast topstitch
- Fabric: fine rib, slub jersey, brushed jersey (light)
Trend upgrades with higher risk
I still do these, but I manage MOQ and testing.
- garment dye (shade variation risk)
- heavy enzyme wash (shrink risk)
- distressed holes (tear risk)
- very light jersey (sheer + neckline wave risk)
A simple “spring capsule” plan using long sleeves
I often build a mini set around one long-sleeve tee block:
- 1 regular crew long sleeve in core colors
- 1 rib-knit fitted long sleeve in trend colors
- 1 fashion long sleeve with special cuff or neckline
This keeps the brand consistent while still looking fresh.
Short-Sleeve T-Shirt
Spring changes fast. A tee looks “easy,” but small mistakes ruin fit, color, and reorder speed. I have seen one weak tee damage a whole drop.
A short-sleeve T-shirt is the most practical spring top because it works alone or layered, fits many body types, and supports fast reorders. I get it right by locking a stable fabric range, a proven fit block, and strict wash + seam testing before bulk, so the tee stays soft, keeps shape, and matches shade across reorders.
I still remember a season when a tee sold out in week one, then the reorder came back with a different hand-feel. Customers noticed in two days. After that, I treated short-sleeve tees like a “core product,” not a basic item.
What are the main types of short-sleeve T-shirts, and when should I use each one?
Most people call everything a “tee,” but buyers shop by shape. I always start by naming the tee type before I discuss fabric or MOQ.
The main short-sleeve T-shirt types are classic crew, baby tee, oversized tee, boxy tee, V-neck, scoop neck, fitted rib tee, drop-shoulder tee, raglan tee, and cropped tee. I pick the type based on target customer, layering plan, and how strict the fit tolerance needs to be for reorders.
Quick map: tee type → best use
- Classic crew: high-volume core, easy reorder
- Baby tee: Gen Z fitted look, higher return risk if sizing is off
- Oversized tee: street and comfort, easier fit tolerance
- Boxy tee: fashion shape, needs clean shoulder and sleeve balance
- V-neck / scoop: more feminine lines, neckline stability matters more
- Rib tee: premium feel, stretch recovery must be controlled
- Drop-shoulder / raglan: sporty vibe, seam placement becomes the “design”
- Cropped tee: trend driver, hem recovery and length control are critical
Fit tolerance rule I use
- If the tee is fitted, I keep size spec tolerances tighter.
- If the tee is oversized, I focus more on drape and shoulder point, less on waist width.
How do I choose the best fabric for a short-sleeve T-shirt in spring?
Fabric decides whether the tee feels “cheap” or “keeps getting worn.” In spring, the customer sweats in the afternoon and layers in the morning, so fabric behavior matters.
For spring short-sleeve T-shirts, I usually choose between 100% cotton, cotton-modal blends, cotton-spandex blends, and heavier cotton jersey. I match the fabric to the brand’s styling: breathable cotton for clean basics, modal blends for softness and drape, and cotton-spandex for fitted tees that must recover shape after wear.
Fabric options I use most often
- 100% cotton jersey
- Best for: classic crews, oversized tees
- Risk: shrink + twisting if the fabric and cutting are not controlled
- Cotton-modal
- Best for: premium soft hand-feel, feminine drape
- Risk: bagging at elbows and hem if recovery is weak
- Cotton-spandex (or cotton-elastane)
- Best for: baby tees, rib tees, fitted styles
- Risk: heat damage in finishing, plus pilling if yarn is weak
- Heavier cotton jersey
- Best for: boxy tees and structured looks
- Risk: feels “stiff” if finishing is not done well
A practical GSM guide I use (not a hard rule)
| Tee Style Goal | Typical GSM Feel | Why it works in spring |
|---|---|---|
| Light layering tee | lighter hand | easier to tuck and layer |
| Everyday core tee | medium hand | balance of breathability + stability |
| Structured fashion tee | heavier hand | cleaner silhouette, less show-through |
The “spring comfort” checklist
- Breathability: reduces sweat discomfort
- Low show-through: light colors need extra control
- Soft hand-feel: avoids “scratchy cotton” complaints
- Recovery: stops necklines and hems from waving
How do I stop short-sleeve T-shirts from shrinking, twisting, or losing shape?
This is where most complaints come from. The customer washes the tee once, and it feels like a different size. That kills trust and repeat sales.
I prevent shrink, twisting, and shape loss by controlling fabric pre-shrink, grainline accuracy, seam construction, and wash testing. The key is to test the exact bulk fabric and replicate real washing, then adjust pattern shrink allowance and sewing settings before production, not after returns start.
Why tees twist after wash
Twisting usually comes from one of these issues:
- Fabric torque from yarn and knit structure
- Poor relaxation before cutting
- Cutting off-grain to save fabric
- Unbalanced side seams or poor stitching tension
The controls I use in production
Fabric control
- I require fabric to relax before cutting.
- I use pre-shrink steps when the fabric needs it.
- I check shrink rate by color, not only by fabric lot.
Cutting control
- I enforce grainline rules.
- I avoid “tight marker” layouts that force off-grain cutting.
Sewing control
- I balance stitch tension so seams do not pull.
- I choose a stable stitch for shoulder seams to avoid stretching.
Wash test protocol I follow
- I test length and width shrink.
- I test neckline growth and seam torque.
- I compare before/after against spec tolerances.
| Problem | Customer sees | Root cause | Fix I apply |
|---|---|---|---|
| Shrink too much | tee becomes short | fabric not pre-shrunk | adjust process + pattern allowance |
| Side seam twist | tee rotates on body | torque + off-grain cutting | relax fabric + enforce grain |
| Wavy neck | neckline ripples | neckline stretched in sewing | stabilize seam + reset sewing method |
| Bagging | tee looks tired | weak recovery fiber | change blend or knit structure |
A premium tee is not only “thick.” It is also stable, soft, and clean in detail. Buyers pay for the feeling and the fit consistency.
I make a short-sleeve T-shirt feel premium by improving visible touchpoints: neckline rib quality, stitching cleanliness, hand-feel finishing, and color consistency. These upgrades raise perceived value more than heavy fabric alone, and they protect reorders because the fit stays the same.
- Neck rib: it must recover after stretching
- Topstitch lines: straight and even, no skipped stitches
- Shoulder seam: reinforced to stop droop
- Hand-feel finishing: soft but not slippery
- Shade control: black must stay black after washing
Small upgrades that buyers notice fast
- tighter neckline rib spec
- cleaner inside neck tape
- better hem stitch balance
- improved label placement and comfort
How do I plan MOQ, color, and sizing for short-sleeve T-shirts to improve reorders?
A tee is a reorder product if I treat it like one from day one. That means I plan color and size like a system, not like a guess.
For short-sleeve T-shirts, I usually build a reorder-ready plan with 2–4 core colors, 1–2 seasonal colors, and a proven size curve. I keep the core fit block stable, so I can reorder fast without new fit rounds, and I use sales data to trigger color replenishment instead of guessing.
Color strategy I use for spring tees
- Core colors: black, white, heather grey (and sometimes navy)
- Seasonal colors: 1–2 trend shades that match the brand drop theme
- I avoid too many “almost the same” neutrals because shade control becomes harder.
Sizing strategy I use
- For fitted baby tees, I keep size steps tight and test stretch recovery.
- For oversized tees, I focus on shoulder and length consistency.
| Tee Type | Best Size Strategy | Main Risk | My control point |
|---|---|---|---|
| Classic crew | standard curve | shrink shifts | wash test early |
| Baby tee | tighter curve | returns | fit sample on body |
| Oversized tee | shoulder-led | sloppy look | shoulder point |
| Boxy tee | length-led | looks short | length tolerance |
Henley Top
Spring tops are easy to misjudge. A style can look “basic” online, but fit weird in real wear. When that happens, my buyers lose time, and I lose trust.
A Henley top is a knit top with a partial front placket and buttons, usually with no collar. It works as a spring staple because it layers like a tee, adds detail like a shirt, and fits many aesthetics from clean basics to casual-prep.
I once treated Henleys like “just another tee.” Then a buyer asked why her reorder looked different from her first drop. That made me build a Henley-specific checklist for fabric, placket build, and button plan.
What are the key types of Henley Top styles for spring, and who does each one fit best?
A Henley is not one silhouette. Small changes in sleeve, placket length, and fabric weight can change the whole customer reaction.
The most useful spring Henley types are: short-sleeve Henley, long-sleeve Henley, sleeveless Henley, rib-knit fitted Henley, oversized Henley, crop Henley, and waffle Henley. Each type targets a different wear situation, from warm days to layered mornings.
Spring-friendly Henley variations I use in assortments
- Short-sleeve Henley: daily basic with more detail than a tee
- Long-sleeve Henley: cool mornings, easy layering under light jackets
- Sleeveless Henley: warm spring, sporty look without being a tank
- Rib fitted Henley: body-hugging, strong for Gen Z styling
- Oversized Henley: relaxed street style, higher comfort tolerance
- Crop Henley: pairs with high-waist bottoms, trend-driven
- Waffle Henley: texture-led casual, but needs tighter QC
A quick matching table for buyers
| Henley Type | Best Customer Use | Best Climate | Main Risk |
|---|---|---|---|
| Short sleeve | daily repeat | mixed/warm | neckline wave |
| Long sleeve | layering | mixed/cool | sleeve twist |
| Rib fitted | trendy fitted looks | mixed | stretch bagging |
| Waffle | texture casual | cool/mixed | shrink + torque |
| Crop | trend drops | warm/mixed | hem curl |
What makes a Henley Top “good quality” in production, not just good in photos?
This is where most Henley complaints start. Buyers often focus on fabric first. I focus on the placket build first, because the placket is the stress point.
A high-quality Henley top needs a stable placket, clean button spacing, consistent stretch recovery at the neckline, and controlled shrink. If the placket is soft or uneven, the front will ripple, gape, or twist after wash, even if the fabric is premium.
The Henley placket is the real product
A Henley is basically a tee plus a front structure. That structure must “hold shape” without feeling stiff.
Placket construction choices
- Self-fabric placket: soft and cheap, but easiest to ripple
- Fused placket: clean shape, but can feel stiff or bubble after wash
- Woven facing inside: stable and premium feel, but higher cost and labor
Button spacing rules I follow
- Button spacing that is too wide creates gaping at the chest.
- Button spacing that is too tight makes the placket buckle.
- I usually keep spacing consistent across sizes, but I adjust the top button position to protect fit.
Stress testing I do
- I pull the placket sideways 10–15 times.
- I check if the stitches pop or if the placket edge rolls.
- I check if the buttonholes stretch and stay open.
Fabric quality is still critical, but it must match the placket
Different Henley fabrics behave differently at the button area.
| Fabric Option | Spring Feel | Why Buyers Like It | Common Failure | My Fix |
|---|---|---|---|---|
| Jersey cotton | soft, breathable | easy basic | twist + shrink | prewash test + grain control |
| Cotton-spandex rib | fitted, trendy | clean body line | bagging at neckline | recovery test |
| Waffle knit | textured, cozy | “premium casual” | high shrink | tighten spec + wash method |
| Modal blend | smooth, drapey | comfort + color | seam growth | stabilize seams |
My “3-wash rule” for Henleys
I treat Henleys like repeat items. So I always test after washing.
- Wash 1: check shrink and placket shape
- Wash 2: check neckline wave and buttonhole stretch
- Wash 3: check twisting and seam distortion
How do I avoid fit problems on a Henley Top across sizes?
Henleys look simple, but sizing mistakes show quickly because the placket sits on the center front. If the body is too tight, the placket will pull open. If the body is too loose, the placket will collapse and ripple.
To avoid Henley fit problems, I control chest ease, placket length, and neckline opening by size. I also use one stable base block and only change sleeve and hem variations, so the fit stays consistent across drops and reorders.
Where Henley sizing fails most often
- Chest gaping: buttons pull open at the bust
- Neckline choking: opening is too small, so it feels tight
- Placket collapse: front looks wavy when the wearer moves
- Torso length drift: crop and regular lengths get mixed in grading
The fit numbers I watch first
I do not share exact brand numbers here, but the priorities stay the same.
- Chest ease must match the intended silhouette (fitted vs relaxed).
- Neck opening must stay wearable across sizes.
- Placket length must stay proportional to torso length.
A simple grading logic that reduces returns
- I keep the neckline shape consistent.
- I grade chest and body width normally.
- I adjust placket top position slightly for larger sizes to reduce gaping.
- I do not change button count unless the placket length changes a lot.
How do I style and merchandise a Henley Top for spring so it sells fast?
Even if the product is good, it still needs the right story. A Henley sells best when it is shown as a “wear-anywhere” top, not a niche item.
A Henley top sells fastest in spring when it is merchandised as a layering basic with built-in detail. I usually sell it with two outfit directions: clean casual with denim, and elevated casual with tailored bottoms and simple accessories.
Two spring styling directions that work for boutiques
- Clean casual: Henley + straight jeans + sneakers
- Elevated casual: fitted rib Henley + wide-leg pants + minimal jewelry
Color planning that makes Henleys reorderable
- Core: white, black, heather grey, navy
- Spring add-ons: oatmeal, sage, dusty blue, soft pink
Photos that reduce returns
- Close-up of placket and buttons
- Side view to show body fit
- A layered look to show spring use
How do I plan MOQ and production timing for a Henley Top without missing spring trends?
Henleys sit in a special place. They are basic enough to reorder, but they can also follow trends through rib, crop, and texture. So I plan them like a “core item with trend skins.”
I plan Henley production with a stable core base block and a fast variation system. I keep core Henleys in safe MOQ for reorders, then I run smaller MOQ for trend versions like waffle, crop, and contrast plackets to test demand without overstock.
My two-lane planning method
| Lane | What I Put Here | MOQ Strategy | Lead Time Priority |
|---|---|---|---|
| Core lane | jersey short sleeve, long sleeve | higher | stable quality + reorder |
| Trend lane | waffle, rib fitted, crop | lower | fast sample + fast drop |
What I lock early to protect lead time
- button supplier and button color
- placket method (self vs fused vs facing)
- base fabric and shrink target
- main stitch type and needle plan
What I keep flexible for speed
- colors
- sleeve lengths
- hem finishes
- branding options like embroidery
Button-Up Shirt

Spring changes fast. Buyers want clean looks, but they also want comfort and easy layering. If I pick the wrong button-up shirt, returns rise and reorders stop.
For spring, the best Button-Up Shirt styles balance breathability, shape, and layering: classic poplin shirt, oversized shirt, cropped shirt, linen shirt, Oxford shirt, chambray shirt, denim shirt, stripe shirt, utility shirt, and short-sleeve button-up. I choose based on climate, target customer, and fabric behavior after washing.
I once shipped a “perfect” shirt that looked sharp on a hanger, but the collar collapsed and the front gaped on real bodies. After that, I treated button-up shirts like technical products, not just fashion items.
What makes a Button-Up Shirt “spring-friendly” instead of a year-round shirt?
Spring shirts need to handle temperature swings and styling variety. A spring-friendly shirt must look good worn open, half-tucked, or fully buttoned.
A spring-friendly Button-Up Shirt uses lighter fabric, softer structure, and a fit that layers without pulling. I look for breathable fibers, balanced collar stiffness, and a front placket that stays flat. The goal is a shirt that works in 2–3 outfits, not one moment only.
The three spring checks I use
- Breathability: air flow matters more than thickness
- Layering behavior: does it sit clean over tanks and bodysuits?
- Movement: arm and back ease must match real wear
Quick fabric guidelines for spring
- Best choices: linen blends, cotton poplin, cotton Oxford, chambray
- Risky choices: heavy denim, stiff “crispy” woven with no give
Which are the 20 popular Button-Up Shirt variations I should know for spring buying?
When buyers say “button-up,” they often mean different things. I keep a fixed list so communication stays clear across sampling, bulk, and reorders.
The 20 most common Button-Up Shirt variations for spring include: classic poplin, Oxford, linen, chambray, denim, oversized, cropped, fitted, relaxed, boyfriend, utility, stripe, printed, short-sleeve, sleeveless, tie-front, knot-front, wrap-front button shirt, shacket-lightweight, and longline tunic shirt.
A practical way to group these 20
- Core volume: classic poplin, Oxford, stripe, relaxed, oversized
- Warm spring: linen, short-sleeve, sleeveless, tie-front
- Trend drops: cropped, knot-front, printed, wrap-front
- Layering outer: lightweight shacket, denim/chambray overshirt, longline
How do I pick the right Button-Up Shirt fabric without risking shrink, wrinkles, or see-through?
Fabric is the main reason button-up shirts fail. In spring, the fabric is lighter, so every weakness shows.
I pick Button-Up Shirt fabric by balancing drape, opacity, and wash stability. Cotton poplin gives a crisp look, Oxford feels casual and stable, linen breathes best but wrinkles, chambray offers soft structure, and denim adds shape but can be too warm. I confirm with wash tests before bulk.
Fabric comparison table I use with buyers
| Fabric | Best Spring Use | Strength | Common Risk | My QC Focus |
|---|---|---|---|---|
| Cotton Poplin | office, clean styling | sharp look | wrinkles, shine marks | wrinkle test + placket flatness |
| Oxford | casual-prep | stable hand-feel | bulkiness in layering | collar roll + shrink control |
| Linen / Linen Blend | warm spring | breathes well | wrinkles, slubs | seam strength + color fastness |
| Chambray | everyday | soft structure | shade variation | wash shade check |
| Lightweight Denim | overshirt layer | durable | too warm, stiff | wash softness + weight control |
| Viscose Blend Woven | drape look | smooth drape | shrink, seam puckering | puckering + wash shrink |
My “no-surprise” wash test list
- shrink % in length and sleeve
- twist after wash (grainline issues)
- color change after 1–3 washes
- placket curling and collar edge waving
Opacity rules I follow
- For white and pastel shirts, I always test:
- bra visibility in daylight
- pocket show-through
- seam allowance shadow on the front
How do I prevent gaping, pulling, and collar collapse in a Button-Up Shirt?
This is where most complaints come from. A button-up looks easy, but the pattern and construction are sensitive.
To prevent gaping and pulling, I control the bust ease, button spacing, and dart strategy. To prevent collar collapse, I match collar stand height and fusing weight to the fabric. Small changes in these details decide whether a shirt looks premium or cheap.
Why gaping happens
- the bust point sits too high or too low for target sizing
- button spacing is too wide in the bust zone
- placket is too soft for the fabric weight
- the wearer moves, and the shirt has no back mobility
Construction fixes that actually work
- Bust zone button spacing: tighter spacing around the fullest point
- Placket support: correct fusing or clean topstitch tension
- Back mobility: yoke + pleat or yoke + ease in the back panel
- Armhole balance: too low causes pulling, too high causes tightness
Collar structure: my spring rule
Spring fabrics are lighter, so collars collapse faster.
- poplin and Oxford can take medium fusing
- linen often needs lighter fusing or it looks stiff
- viscose blends need careful fusing or the edge bubbles
Collar checklist I use in sampling
- collar points stay flat after wash
- collar stand does not choke the neck
- top button can close without distortion
- collar roll looks natural, not “paper-like”
How do I set sizing and fit for a Button-Up Shirt when my customers buy online?
Online brands live or die by fit clarity. Buyers like Emily want fewer returns, so they need predictable fit blocks.
I set Button-Up Shirt sizing by choosing one core fit block, then building 2–3 variants from it, like oversized and cropped. I lock shoulder width, chest ease, and sleeve length ranges. Then I write clear fit language for product pages so customers know the shape.
The three fit blocks that cover most spring demand
- Classic: moderate ease, clean shoulder, standard length
- Oversized: dropped shoulder, wider sleeve, longer body
- Cropped: controlled chest, shorter body, balanced sleeve width
Fit spec table example (how I think, not a universal rule)
| Fit Type | Shoulder | Chest Ease | Body Length | Best Customer Need |
|---|---|---|---|---|
| Classic | normal | medium | standard | work-to-weekend |
| Oversized | dropped | high | longer | layering + relaxed trend |
| Cropped | normal | low-medium | short | high-waist styling |
Product page words I like to standardize
- “true to size”
- “relaxed through body”
- “dropped shoulder”
- “cropped at waist”
These words reduce misunderstandings.
How do I plan MOQ and production for Button-Up Shirt programs without slow sampling?
Button-ups can eat time because they need collar, placket, and clean finishing. Spring also has a tight window.
I plan Button-Up Shirt production by standardizing trims and fit blocks, then running fabric tests early. I keep core colors in stable fabrics for higher MOQ, and I run trend colors or prints in smaller MOQ. This protects lead time and reduces sampling loops.
What I standardize to speed up
- button size and buttonhole spec
- collar stand shape for core fits
- pocket template and placement
- thread color rules for core colors
Where I allow change for trend
- stripe direction and scale
- sleeve shape (short sleeve vs long sleeve)
- hem finish (straight vs curved)
- tie-front and knot-front details
A simple MOQ split I use
| Category | Fabric | MOQ Strategy | Why |
|---|---|---|---|
| Core solids | poplin, Oxford | higher MOQ | easy reorder |
| Core stripes | Oxford, poplin | medium MOQ | stable demand |
| Trend prints | lightweight woven | low MOQ | higher risk |
| Warm spring | linen blends | medium MOQ | seasonal demand |
Oxford Shirt
Spring tops look easy, but they fail fast when the fabric feels wrong or the fit shifts. I have seen buyers miss a whole drop because one “basic” top arrived stiff, sheer, or uneven.
Yes. An Oxford Shirt is one of the most useful Types of Spring Tops because it is structured but breathable, it layers well, and it sells across work, casual, and preppy trends. If I build it on a stable fit block and control shrink, collar shape, and button spacing, it becomes a safe reorder style.
I still remember one season when a buyer wanted “just a simple shirt.” The samples looked fine. After bulk, the collar rolled weird and the sleeves twisted. That order taught me that the Oxford Shirt is only “basic” if the factory treats it like a technical item.
Many buyers say “Oxford” when they only mean “button-down.” I always stop and define it, because fabric and collar details change the whole product.
An Oxford Shirt is a woven shirt made from Oxford cloth, which usually has a basket-weave texture and a slightly thicker hand-feel than poplin. Many Oxford styles also use a button-down collar, but the fabric is the true defining point. A regular button-down can use many fabrics.
The quick difference checklist I use
- Oxford Shirt: Oxford cloth, textured basket weave, medium weight, casual-prep look
- Poplin shirt: smooth plain weave, lighter, cleaner and sharper look
- Twill shirt: diagonal weave, softer drape, more “dress” feel
- Chambray shirt: denim-like look, lighter, more rustic vibe
What buyers usually feel on first touch
- Oxford feels grippy and dry, not slippery.
- Poplin feels smooth and crisp.
- Twill feels soft and warm.
- Chambray feels light but sturdy.
Simple naming rule that avoids confusion
If the fabric is not Oxford cloth, I do not call it an Oxford Shirt. I call it a button-down shirt in poplin, twill, or chambray.
Why does an Oxford Shirt work so well as a spring top?
Spring needs layering, and it needs pieces that move between warm and cool hours. Oxford hits that sweet spot when the construction is right.
An Oxford Shirt works in spring because it breathes better than heavy outerwear, but it still holds shape better than most knits. It can be worn open over tanks, half-tucked with denim, or buttoned up for office looks, so it fits many customer scenes.
The three spring use cases I plan for
- Layering shirt-jacket: worn open over a rib tank or tee
- Smart casual top: worn buttoned with tailored pants or skirt
- Beach-to-city cover: worn loose with shorts or swimwear
The style variations that sell in spring
- cropped Oxford shirt
- oversized Oxford shirt
- fitted Oxford shirt with darts
- sleeveless Oxford shirt
- Oxford shirt with contrast collar/cuffs
How do I choose the right Oxford fabric weight and blend for spring?
This is where most “quality complaints” start. An Oxford can feel perfect in a cold sample room, then feel hot and stiff in real spring sun.
For spring, I usually target a medium-light Oxford cloth and pick blends based on the brand’s customer: 100% cotton for premium feel, cotton-poly for easier care, and cotton-spandex only when the brand needs extra comfort. Then I test shrink and stiffness after wash.
Fabric weight thinking that keeps it wearable
- Lightweight Oxford: good for warm spring, but can turn sheer in light colors
- Midweight Oxford: best all-round spring choice for structure and comfort
- Heavy Oxford: better as a shirt-jacket, but it can miss “top” comfort
Blend trade-offs I explain to buyers
- 100% cotton Oxford
- good: breathable, premium touch, better dye depth
- risk: shrink and wrinkle
- cotton + polyester
- good: less wrinkle, better shape hold
- risk: lower breathability if the poly ratio is high
- cotton + spandex
- good: comfort and movement
- risk: collar and placket can warp if the stretch is not controlled
My “spring-wear” warning list
- If the fabric is too stiff, it looks boxy in photos.
- If the fabric is too thin, it looks cheap in white and pastels.
- If the yarn is low quality, it pills at the side seams and cuffs.
Two Oxford shirts can use “the same fabric,” but one feels expensive and one feels like a uniform. The difference is small details done consistently.
Premium Oxford Shirts are decided by collar construction, placket stability, stitch density, and button quality. In production, I also watch pattern matching, seam balance, and wash shrink. If these are controlled, the shirt keeps its shape and looks clean after many wears.
Collar: the first place customers judge
- Collar stand height: too high feels formal, too low looks floppy
- Collar point length: long points feel dressy, shorter points feel casual
- Interlining choice: too hard feels cheap, too soft collapses
- button spacing that is too wide causes gaping at bust
- buttonhole density affects fraying over time
- placket fusing choice affects bubbling after wash
Stitching specs I usually follow for consistency
- higher stitch density on collar and cuffs for clean edge
- back yoke with good seam balance to prevent twisting
- reinforced side seams for long wear
A practical QC checklist I run before bulk approval
- collar roll test after wash
- placket bubbling check
- sleeve twist check
- button pull strength test
- shrink test with measurement report
How do I fit an Oxford Shirt for women so it sells without heavy returns?
Women’s Oxford fits are tricky because the same style must work on different bust and shoulder shapes. If I chase a “tight” look, returns spike. If I go too oversized, it loses shape.
I fit women’s Oxford Shirts by choosing a clear silhouette first, then controlling bust gaping and shoulder mobility. I often use one stable base block and offer two fits: oversized and tailored. For tailored fits, darts or subtle shaping helps without making the shirt restrictive.
Fit types that cover most spring brands
- Oversized fit
- best for: casual, street, Gen Z
- focus: shoulder drop, sleeve volume, hem curve
- Regular fit
- best for: broad audience
- focus: balanced chest ease and armhole
- Tailored fit
- best for: office and polished looks
- focus: bust shaping, waist shaping, no gaping
Bust gaping: how I reduce it without “over-engineering”
- adjust button spacing around bust
- use a slightly deeper placket overlap
- add a hidden snap for some size ranges
- add darts for tailored fits only
The sizing trap I warn buyers about
If the brand sells to both petite and tall customers, I plan two sleeve lengths or I use a cuff design that hides small sleeve length issues.
How do I style and merchandise an Oxford Shirt as a spring top so it sells fast?
Even a great Oxford can sit if the brand shows it like an office uniform. Spring needs styling that looks easy and fresh.
I merchandise an Oxford Shirt in spring as a layering hero and a “clean base” item. I shoot it worn open over tanks, tied at the waist, half-tucked with denim, and paired with shorts. I also plan 2–3 color stories so customers can build outfits fast.
Spring styling formulas that convert well
- Oxford shirt + rib tank + denim shorts
- Oxford shirt half-tucked + wide-leg pants
- Oxford shirt open + slip dress
- Oxford shirt tied + high-waist skirt
- oversized Oxford shirt + biker shorts
Color planning that reduces dead stock
| Color Type | Examples | Why it works in spring |
|---|---|---|
| Core neutrals | white, light blue, stripe | easy reorders |
| Soft tones | sage, butter, blush | seasonal feel |
| Accent colors | red stripe, cobalt | social content pop |
Product page details I tell buyers to show
- close-up of fabric texture
- collar and cuff details
- button spacing on body shot
- transparency test in sunlight for light colors
How do I plan MOQ and production timing for Oxford Shirts without missing spring?
Oxford Shirts look simple, but they have more steps than tees. If I treat them like a basic knit, the timeline breaks.
I plan Oxford Shirts with early fabric booking, fast fit approvals, and controlled SKU count. I keep core colors in higher MOQ and trend colors in smaller MOQ. I also standardize trims like buttons to avoid supply delays.
The production reality I explain clearly
- woven shirts need more sewing operations than tees
- collars and cuffs add time and QC points
- stripe fabrics need better cutting control
A practical MOQ strategy I use
- core colors: higher MOQ and reorder ready
- seasonal colors: lower MOQ and test-first
- stripes: limited SKUs, because matching increases waste
The failure points that slow down bulk
- late confirmation on collar interlining
- changing button size after PP sample
- adding embroidery placement too late
Poplin Shirt
Spring buys fail when a top looks “clean” online but feels stiff, see-through, or hot in real wear. I have seen poplin shirts get returned for all three reasons.
A poplin shirt is a lightweight woven shirt made from poplin fabric, and it is one of the most practical Types of Spring Tops because it stays crisp, layers well, and works for both casual and smart styling. If I pick the right yarn, weave density, and finish, it becomes a reliable core reorder style.
I still remember one early order where the shirt photographed great, but it wrinkled into chaos after one hour of sitting. After that, I stopped treating “poplin” as one fabric. I started treating it like a spec sheet.
What exactly makes a Poplin Shirt different from other spring shirts?
Poplin sounds simple, but the buyer experience depends on small construction and fabric choices. I always define poplin by weave feel, weight, and how it holds shape.
A poplin shirt is different because poplin uses a tight plain weave that feels smooth, looks crisp, and holds structure better than many light wovens. Compared with oxford or linen, poplin is usually cleaner, less textured, and easier to style for a sharp spring look.
How I explain poplin vs common alternatives
| Fabric | Surface Look | Hand-feel | Best Spring Use | Main Risk |
|---|---|---|---|---|
| Poplin | smooth, crisp | cool, firm | clean shirts, dresses | wrinkles, sheerness |
| Oxford | slightly textured | softer, thicker | casual button-down | bulk in warm weather |
| Linen | textured, airy | dry, breathable | relaxed summer vibe | heavy wrinkles, slubs |
| Chambray | denim-like, light | soft, casual | laid-back shirts | shade variation |
| Twill | diagonal lines | drapier, heavier | overshirts | too warm in spring |
The 3 poplin cues I check fast
- Crisp “paper” sound: it usually means higher structure, not always better comfort.
- Surface smoothness: smoother poplin looks more “office,” textured reads more casual.
- Bounce-back: if it collapses fast, it will look tired after wear.
How do I choose the right Poplin Shirt spec for spring weather and customers?
This is where most brands make mistakes. They order “a poplin shirt” and assume the market will like it. I always match poplin specs to climate and customer lifestyle.
I choose poplin shirt specs by setting the target use first: layering shirt, standalone top, or overshirt. Then I lock fabric weight, opacity level, and finish. For spring, I prefer breathable poplin with enough density to avoid show-through and enough softening to reduce harsh wrinkles.
Start from the use case
- Standalone poplin shirt: needs opacity and comfort against skin.
- Layering poplin shirt: can be lighter, but must glide over inner layers.
- Poplin overshirt look: needs more structure and stronger seams.
Practical spring weight ranges I use (factory-side thinking)
I do not treat these as “rules,” but they keep sampling efficient.
- Light poplin: best for warm spring and layering
- Mid poplin: best for mixed spring and office wear
- Heavier poplin: best for overshirt styling, but can feel hot fast
My “no regret” spring spec checklist
- Opacity: light colors must not show bra lines easily
- Breathability: if it traps heat, spring customers stop wearing it
- Wrinkle behavior: it must recover after hanging
- Skin feel: no harsh finishing that feels scratchy
What are the 20 most practical Types of Spring Tops, and where does a Poplin Shirt sit on that list?
When I build a spring tops program, I want coverage for temperature swings and styling needs. Poplin is a core “clean look” piece inside that system.
A poplin shirt usually fits in the “button-down shirt” category within the 20 Types of Spring Tops. In a balanced spring assortment, it works as a core fashion item because it supports reorders, pairs with many bottoms, and can shift between casual, work, and travel looks.
My practical list of 20 Types of Spring Tops
1) T-shirt
2) Long sleeve tee
3) Tank top
4) Camisole
5) Crop top
6) Blouse
7) Button-down shirt (Poplin Shirt lives here)
8) Polo top
9) Tube top
10) Bodysuit
11) Wrap top
12) Peplum top
13) Tunic top
14) Rib-knit top
15) Satin top
16) Lace top
17) Mesh top
18) Cardigan top
19) Lightweight hoodie
20) Denim shirt
How I position poplin inside a buyer’s assortment
| Role | Why Poplin Fits | What I Pair It With | How I Merch It |
|---|---|---|---|
| Core Fashion | clean and versatile | denim, trousers, mini skirts | “work to weekend” |
| Layering Hero | holds shape under layers | tanks, bodysuits | open shirt styling |
| Trend Vehicle | easy to update with details | wide-leg pants, cargos | new collars, new hems |
How do I prevent the common quality problems buyers see with Poplin Shirts?
Poplin shirts can disappoint fast if the spec is loose. The main complaints I hear are wrinkling, see-through body, and tightness across bust and arms.
I prevent poplin shirt problems by controlling three things early: weave density for opacity, finishing for softness and wrinkle behavior, and pattern grading for movement. Then I verify with wash tests, shrink checks, and wear tests focused on seated wrinkling and bust gaping.
The 6 most common poplin shirt issues, and what I do
| Problem | What the customer feels | Root Cause | My Fix |
|---|---|---|---|
| Too many wrinkles | looks messy fast | stiff finish + low recovery | softening + spec review |
| Sheer body | feels cheap | low density in light colors | increase density or add lining plan |
| Button gaping | bust opens | wrong size grading | add bust ease + better placement |
| Scratchy hand-feel | uncomfortable | harsh resin finish | change finish, enzyme/softener route |
| Collar curling | loses sharp look | weak collar fusing | upgrade fusing + test wash |
| Seam puckering | looks low-end | tension + needle mismatch | adjust thread/needle + sewing spec |
My factory wear-test routine (simple but strict)
- I sit for 30 minutes and stand up to check front placket wrinkles.
- I lift arms to check armhole pull and back width.
- I button the bust area and check gap under motion.
- I test light colors under strong light for opacity.
Construction details that matter more than most people think
Collar and collar stand
- A poplin shirt lives or dies by collar shape.
- I test fusing after wash, not before wash.
- If button spacing is wrong, poplin looks cheap even with good fabric.
- I keep spacing consistent and I check stress points.
Cuff and sleeve
- Cuffs need clean edges, or the whole shirt looks sloppy.
- Sleeve cap balance affects comfort more than fabric does.
How do I design a Poplin Shirt that feels on-trend without breaking production stability?
Poplin is a perfect base for trend updates because it holds shapes well. But if I chase trend too hard, fit becomes unstable and sampling cycles explode.
I make poplin shirts trend-ready by changing visible elements that do not destroy the block: collar shape, sleeve volume, hem shape, pocket styling, and waist shaping. I keep the shoulder, armhole, and basic bust ease stable so I can reorder and scale without surprises.
Low-risk trend updates I use often
- Collars: pointed, spread, small collar, exaggerated collar
- Sleeves: puff sleeve, balloon sleeve, extended cuff
- Hems: curved hem, high-low hem, side slit
- Front styling: hidden placket, half placket
- Pockets: patch pocket, no pocket, double pocket
Higher-risk updates I treat carefully
- extreme cinched waist that changes grading
- very dropped shoulder that changes sleeve mobility
- oversized fit without fixing neckline and back width
A quick “trend vs reorder” decision table
| Change | Trend Impact | Reorder Risk | My Rule |
|---|---|---|---|
| New collar shape | medium | low | safe |
| New sleeve volume | high | medium | sample carefully |
| New hem shape | medium | low | safe |
| New waist shaping | high | high | only with strong data |
| Oversized block change | high | high | rebuild pattern properly |
How do I price and buy Poplin Shirts in wholesale without sacrificing margin?
Poplin shirts can look similar, so buyers sometimes push price too hard. Then they get the exact problems they hate: sheerness, puckering, curling collars.
I keep margin by buying poplin shirts as “spec bundles,” not as generic shirts. I lock the fabric density, finishing, and collar/placket construction first, then I negotiate based on stable trims and repeat colors. This reduces returns and improves reorder speed.
What I standardize to protect price
- shared buttons across 3–5 shirt styles
- shared fusing spec for collars and cuffs
- shared thread color sets for core colors
- one proven fit block for repeat orders
What I refuse to downgrade
- collar fusing quality
- button placement and strength
- seam quality on placket and armhole
- opacity in light colors
Chambray Shirt
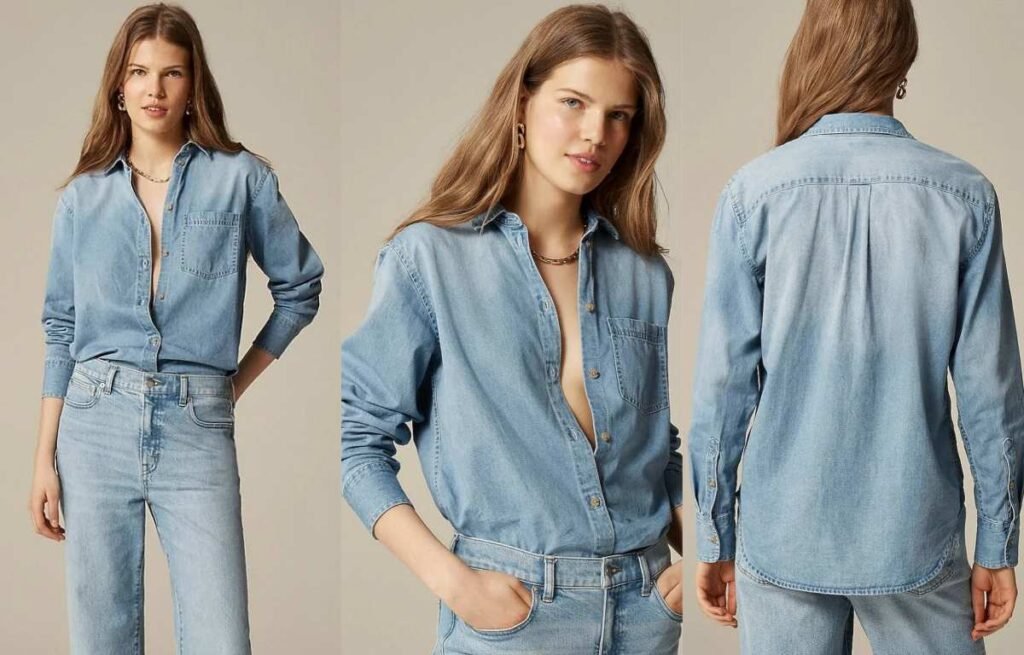
Spring always tests my planning. A warm noon can turn into a cold night fast. If I pick the wrong tops, my buyer misses the trend window and sits on stock.
Yes. A chambray shirt is one of the most useful Types of Spring Tops because it works as a top or a light layer, fits many brand styles, and stays relevant across years. In a 20-style spring range, it covers “easy layering” better than most trend-only tops.
I still remember one season when I pushed too many “statement” tops. The photos looked great, but customers wanted something simple they could wear three ways. Since then, I always keep chambray in my core list.
What exactly is a chambray shirt, and how is it different from a denim shirt?
Most buyers say “denim” when they really mean chambray. That mix-up causes wrong sampling and wrong price points, so I always define it first.
A chambray shirt is a plain-weave fabric shirt, usually made with a colored warp and a white weft, so it looks like denim but feels lighter and softer. A denim shirt is made from twill weave denim, which is thicker, heavier, and more structured.
The quick difference that saves time
- Chambray: plain weave, lighter hand-feel, softer drape, easier for warm spring
- Denim: twill weave, heavier, more rigid, better for cool spring and outerwear styling
Fabric and hand-feel comparison table
| Item | Chambray Shirt | Denim Shirt |
|---|---|---|
| Weave | Plain weave | Twill weave |
| Weight feel | Light | Medium to heavy |
| Drape | Softer | More structured |
| Best spring use | Layering + warm days | Layering + cooler days |
| Common buyer mistake | Overpaying for “denim look” | Complaints about heaviness |
Why does a chambray shirt sell so well in spring?
When I talk to boutique buyers like Emily, I hear the same words again and again: “easy,” “goes with everything,” and “layers.”
A chambray shirt sells well in spring because it works across many outfits, it flatters different body types, and it solves temperature swings. It also fits multiple aesthetics—minimal, coastal, Western, workwear, and casual—so brands can style it for different drops without changing the product.
The “3-outfit rule” that makes chambray a core style
I only keep a spring top as a core SKU if it can build at least three outfits:
- open over a rib tank + jeans
- tucked into a skirt + belt
- tied at waist over a slip dress
Why customers rewear it
- It feels casual but still looks “put together”
- It hides wrinkles better than many blouses
- It pairs with both light and dark bottoms
- It works in travel and daily commute
This is where many factories and buyers lose money. Two chambray shirts can look the same online, but one feels flat and one feels “alive.”
I spec a premium chambray shirt by controlling fabric weight, yarn quality, surface finish, and wash method. Then I lock stitching density and collar structure so the shirt holds shape after wear and wash. If these points are not controlled, chambray can look gray, limp, or overly shiny.
The fabric specs I check first
- Fabric weight (GSM):
- light spring: 110–150 GSM
- more structured: 150–200 GSM
- Fiber choice:
- 100% cotton for breathability and classic hand-feel
- cotton + lyocell/tencel for softer drape
- small % spandex only if the brand wants stretch, but I keep it low
- Yarn and surface: tighter yarn gives cleaner look, loose yarn gives casual softness
Wash and color: where quality shows up
Chambray quality often fails in the wash stage.
- Enzyme wash: softer hand-feel, safer “clean casual”
- Garment wash: more broken-in look, but higher shade risk
- Over-wash risk: fabric gets fuzzy, seams get twisted, color looks “tired”
QC table I use before bulk approval
| Check Point | What I look for | Why it matters in spring |
|---|---|---|
| Shade consistency | same blue tone across panels | avoids “two-tone” returns |
| Seam twist | side seam stays straight after wash | keeps shirt looking clean |
| Collar shape | collar points lie flat | helps styling in photos |
| Puckering | no ripples at placket | makes it look expensive |
| Shrink rate | stable length and sleeve | avoids size complaints |
Stitching and trims that change perception
- Topstitch thread: too thick looks workwear, too thin looks weak
- Buttons: matte buttons look modern, pearl snaps feel Western
- Placket: clean placket = higher perceived quality
- Pocket placement: 1 cm off can ruin the whole front photo
What fits and design details make a chambray shirt “on-trend” without raising returns?
A chambray shirt can look basic, or it can look like a hero piece. The difference is usually fit and small details, not big changes.
To keep a chambray shirt on-trend with low returns, I change visible details like length, pocket shape, and hem curve, while keeping shoulders, armholes, and sleeve pitch stable. Trend comes from silhouette and styling, not risky pattern changes.
Low-risk trend updates I like
- Slightly oversized fit with controlled shoulder drop
- Curved hem for easy half-tuck
- Single chest pocket for clean minimal look
- Double pockets for utility vibe
- Contrast stitching only if the brand wants more “denim” energy
Higher-risk changes I control tightly
- extreme crop length (can ride up)
- very wide sleeves (hard to layer)
- very deep armholes (gaping and poor fit)
- heavy distressing (shade and damage complaints)
Fit map: what I keep stable vs what I adjust
| Area | Keep Stable | Adjust for Trend |
|---|---|---|
| Shoulder & armhole | Yes | No |
| Sleeve pitch | Yes | No |
| Body width | Moderate | Oversize or straight |
| Length | Base | longline or slight crop |
| Hem | Base | curved or split |
How do I place a chambray shirt inside “Types of Spring Tops” and plan MOQ smartly?
If a buyer wants a 20-style spring range, I do not treat every style the same. Chambray is a “core fashion” piece for most brands.
In a 20-style spring tops plan, I treat chambray as a core layering top with strong reorder potential. I set a stable fit block, limit wash options in the first run, and use color planning to increase sell-through without multiplying SKUs.
My practical assortment position
- Role: core fashion layer
- Why: works for both “top” and “outer” use
- Best pairing styles in the 20 list: rib tank, tee, camisole, satin slip top, denim shorts, wide-leg pants
MOQ strategy that protects the season
- I start with 1–2 washes max in first bulk
- I use one fit block across sizes to reduce errors
- I avoid too many metal trims in the first run
- I hold fabric yardage for a quick reorder if sales spike
Color planning that sells without risk
Chambray can look “different” just by wash and undertone.
- light blue clean wash for minimal brands
- mid blue for everyday casual
- soft gray-blue for modern neutral styling
Blouse
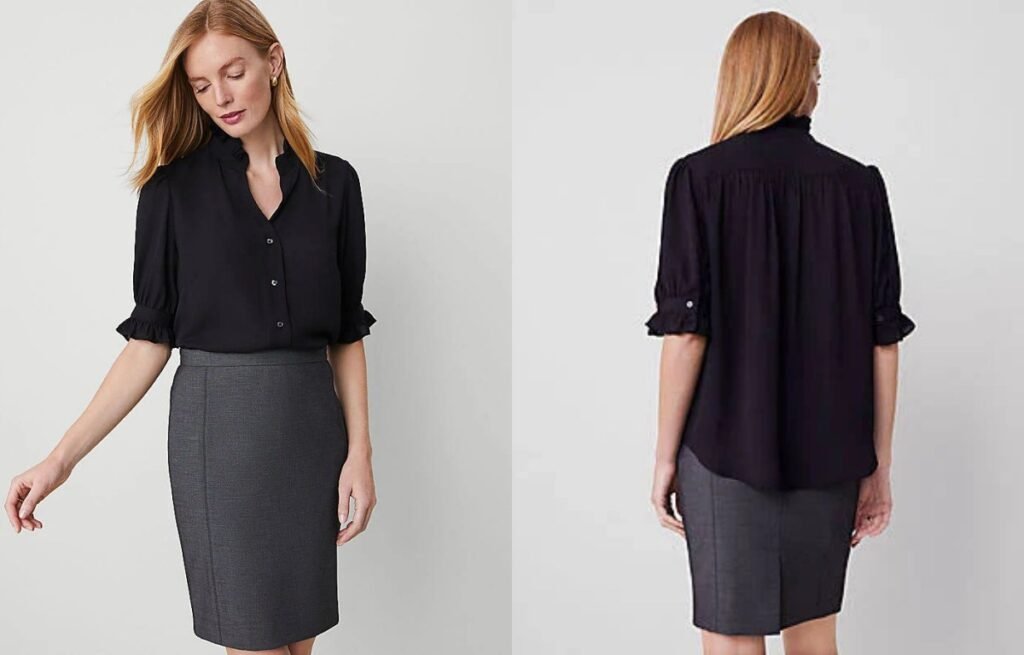
Spring blouses look easy, but they fail fast. A blouse can wrinkle, gap, or feel cheap. When that happens, returns go up, and reorders stop.
A blouse is a lightweight woven top made to look polished with simple styling. For spring, I pick blouses by checking fabric drape, opacity, wrinkle level, and front gaping. Then I choose 6–10 blouse sub-styles that match the brand’s customer and climate.
I still remember one early order where the blouse photos looked premium, but the fabric was noisy and see-through under sunlight. After that, I started treating “blouse” as a technical category, not a vague fashion word.
What blouse styles sell best as spring tops, and what is each one good for?
A blouse is not one style. Buyers usually mean “easy polish,” but the pattern and fabric decide everything.
The best-selling spring blouse styles are the ones that look elevated but fit many bodies: button-front blouse, wrap blouse, tie-front blouse, peplum blouse, puff-sleeve blouse, ruffle blouse, square-neck blouse, tunic blouse, sleeveless blouse, and satin blouse. Each works for a different customer mood and margin target.
10 practical blouse sub-styles I use in spring programs
- Button-front blouse: best for office + smart casual
- Wrap blouse: best for adjustable waist and bust fit
- Tie-front blouse: best for young, playful styling
- Peplum blouse: best for waist definition
- Puff-sleeve blouse: best for trend impact with simple body
- Ruffle blouse: best for romantic story and photos
- Square-neck blouse: best for clean neckline highlight
- Tunic blouse: best for relaxed coverage and comfort
- Sleeveless blouse: best for warm spring and layering
- Satin blouse: best for “dressy” shine and higher AOV
A quick selection map I use with boutique buyers
| Customer vibe | Best blouse styles | Why it works |
|---|---|---|
| Minimal / clean | square-neck, sleeveless, tunic | easy repeat buys |
| Romantic | ruffle, puff-sleeve, peplum | strong photos |
| Work-ready | button-front, tunic | stable demand |
| Night-out | satin, wrap, tie-front | higher margin |
How do I choose blouse fabric for spring without causing quality complaints?
Most blouse complaints start from fabric behavior. A blouse can look “soft” in photos but feel stiff, itchy, or too thin in real life.
For spring blouses, I match fabric to the blouse style and the customer’s day: chiffon and georgette for float, viscose for drape, cotton poplin for crisp shape, and satin for shine. I prevent complaints by controlling opacity, snag risk, seam puckering, and wrinkle recovery before bulk.
Fabric behavior is the real product
When buyers say “I want a blouse,” they usually want one of these:
- Flow: moves with the body (good drape)
- Coverage: not see-through in daylight
- Polish: looks neat after sitting and moving
- Comfort: does not stick to skin or scratch
Spring blouse fabrics and what they are best for
| Fabric | Best for blouse types | Main risk | My QC focus |
|---|---|---|---|
| Chiffon | ruffle, puff sleeve, tunic | sheer + snag | lining plan + yarn snag test |
| Georgette | wrap, tie-front, button-front | seam puckering | needle + stitch balance |
| Viscose / rayon | square-neck, tunic | shrink + twisting | wash test + grainline |
| Polyester crepe | work blouses | heat shine + static | pressing test + anti-static |
| Cotton poplin | button-front | wrinkles | finish + wash wrinkles |
| Satin (poly) | satin blouse | pulls + puckering | seam test + edge finish |
The “blouse fabric” checks I always run
- Opacity check under sunlight: especially for white, pastel, and bright colors
- Wrinkle check after a 10-minute crumple: quick way to predict customer complaints
- Seam puckering check: common on satin and light crepe
- Static test: a blouse that clings gets bad reviews
- Snag test: chiffon and satin need extra care
How do I stop blouse gaping, pulling, and fit issues across sizes?
Blouses fail in fit because woven fabric does not “forgive” like knits. Many spring buyers want a relaxed look, but they still want a clean chest line.
To stop blouse gaping and pulling, I control the bust ease, button spacing, dart position, and neckline shape. I also grade carefully from S to XL and add hidden snaps or modesty plackets for button-front blouses. This is the fastest path to fewer returns.
Why blouses gap more than other spring tops
- Woven fabric has less stretch
- Bust points vary a lot between customers
- Button-front styles create pressure points
- Neckline and armhole balance shifts with grading
My fit engineering checklist for blouses
Button-front blouse
- I tighten button spacing at the bust zone.
- I add a hidden button or snap where gaping happens.
- I adjust placket stiffness so it lies flat.
Wrap blouse
- I increase overlap width to reduce exposure.
- I stabilize the wrap edge with tape or clean finish.
- I control tie placement so it holds the body.
Square-neck blouse
- I stabilize neckline with interfacing or stay tape.
- I check neckline wave after wash and pressing.
Puff sleeve blouse
- I balance sleeve cap volume so it does not pull the armhole.
- I keep armhole comfortable to reduce underarm stress.
A grading table I use to catch problems early
| Risk point | What I measure | What I change if it fails |
|---|---|---|
| Bust gaping | button line opening | add hidden snap or adjust spacing |
| Armhole pull | strain near underarm | adjust armhole + sleeve cap |
| Neckline wave | shape distortion | add stay tape + adjust curve |
| Hem lift | body riding up | add length or add ease |
How do I decide which blouse details are worth paying for in spring?
Details can make a blouse look premium, but details can also slow production and increase defects. In spring, speed matters.
In spring blouses, I invest in details that buyers can see and feel fast: clean neckline finishing, stable buttons, and quality sleeve construction. I avoid risky details like complex ruffles, delicate lace joins, or heavy embellishment unless the brand’s price point supports it.
Details that raise value without breaking production
- Neckline finishing: clean facing or binding
- Button quality: strong sew + spare button pack
- Sleeve finish: elastic channel or cuff with stable topstitch
- Hem finish: narrow hem for light fabrics
Details that increase risk and why
- Multi-layer ruffles: more sewing time and higher defect rate
- Tiny rouleau loops: slow and easy to break
- Beads or heavy trims: can distort light fabric and cause returns
- Lace splice seams: scratch risk and seam failure
Cost vs value table for blouse development
| Detail | Cost impact | Visual impact | Risk level | My suggestion |
|---|---|---|---|---|
| better buttons | low | medium | low | yes |
| stay tape neckline | low | low | low | yes |
| extra lining panel | medium | medium | low | yes for light colors |
| complex ruffles | high | high | high | only for strong price point |
| bead trim | high | high | high | avoid for fast programs |
How do I source and produce blouses fast enough for spring without losing consistency?
A blouse program lives or dies by timing. If sampling takes too long, the trend window closes. If QC is weak, reorders stop.
I produce spring blouses with a two-track plan: stable “core blouses” that use proven fit blocks and repeat fabrics, plus “trend blouses” that use fast sampling and controlled MOQ. I keep consistency by locking fabric suppliers, color standards, and sewing SOPs early.
My two-track blouse plan
- Core blouses (reorder first):
- button-front blouse, tunic blouse, square-neck blouse
- repeat fabrics: crepe, viscose, poplin
- Trend blouses (speed first):
- puff sleeve, ruffle, tie-front, satin
- controlled MOQ and faster drop timing
The SOP points that keep blouse quality stable
- I standardize stitch type and SPI for light fabrics.
- I standardize pressing temperature per fabric.
- I enforce inline checks at collar, placket, and sleeve join.
- I test color fastness for bright spring shades.
A simple risk-control flow I follow
- I confirm fabric and lining plan.
- I test fit on the target size range.
- I run seam puckering and wrinkle checks.
- I lock trims and button standards.
- I start bulk with inline QC.
Wrap Top
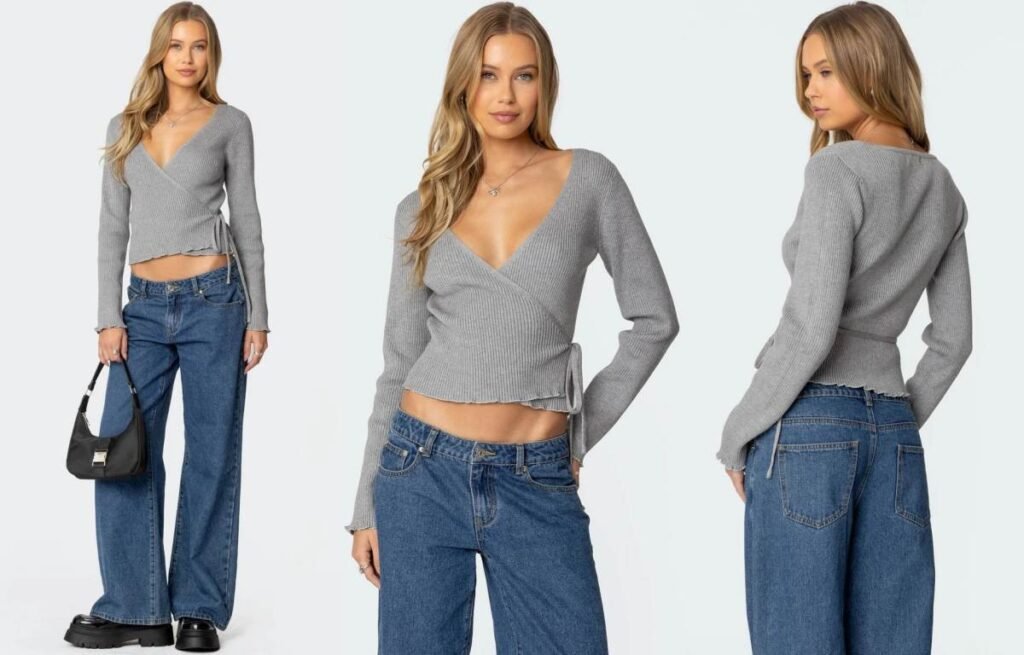
Spring weather changes fast, and customers still want a flattering fit. If I pick the wrong top, the return rate goes up, and the trend window closes before reorders land.
A wrap top is a top with a front closure that crosses over the body and ties or fastens at the side or back. It is popular in spring because it adjusts at the waist, creates a defined shape, and works for both layering and warm days.
I still remember one season when a “pretty” woven wrap top looked perfect on a hanger but gaped at the bust on real customers. After that, I started treating wrap tops like a technical product, not just a style photo.
What types of wrap tops sell best in spring?
Spring wrap tops sell when they match how people actually wear them: quick outfits, light layers, and easy photos for social. I focus on shapes that reduce gaping and keep the tie stable.
The best-selling spring wrap tops are true wrap tops, faux wrap tops, wrap blouses, wrap crop tops, and wrap bodysuits. These variants balance adjustability with stability, so they fit more body types and create fewer returns than “loose” wrap designs.
The 5 spring wrap top variants I use most
- True wrap top (tie closure): best for adjustable waist and easy sizing
- Faux wrap top (fixed crossover): best for less gaping and faster production
- Wrap blouse (woven): best for work-to-weekend looks
- Wrap crop top: best for Gen Z styling and high photo engagement
- Wrap bodysuit: best for a clean tuck and stable neckline
When I choose each variant
| Variant | Best Customer Use | Main Fit Risk | My Fix |
|---|---|---|---|
| True wrap | adjustable waist | tie loosens | add inside button + longer tie |
| Faux wrap | easy fit | less waist adjust | add side elastic or darts |
| Wrap blouse | polished look | bust gaping | hidden snap + better overlap |
| Wrap crop | trend look | ride-up | wider hem band |
| Wrap bodysuit | body-hugging | discomfort | soft elastic + clean seams |
A quick rule I follow for spring assortment
- If the brand sells basics, I lead with faux wrap and wrap bodysuit.
- If the brand sells date-night styles, I lead with true wrap and wrap crop.
- If the brand sells office looks, I lead with wrap blouse in stable woven fabric.
How should a wrap top fit, and what are the most common return reasons?
Wrap tops look forgiving, but fit problems are very specific. Customers return wrap tops when they feel exposed or when the tie slides.
A wrap top should sit flat at the bust, hold the crossover without pulling, and stay secure at the waist when the wearer moves. The most common return reasons are bust gaping, neckline shifting, tie loosening, uneven hem, and uncomfortable underarm pull.
The 6 fit checkpoints I use before bulk
- Crossover coverage: the overlap must cover the bust when arms lift
- Bust tension: no pulling lines from bust point to side seam
- Neckline stability: it should not slide open when the wearer walks
- Waist anchor: tie point should not creep upward
- Arm mobility: wearer can reach forward without the front separating
- Hem balance: the front hem must not tilt after tying
Why wrap tops fail in real wear
- The customer ties the top tighter on one side, so the hem twists.
- The fabric stretches at the neckline, so the crossover opens.
- The tie is too short, so it cannot double-knot.
- The overlap is too narrow, so larger bust sizes show gaps.
Fit risk by body area
| Body Area | What customers feel | What causes it | What I change |
|---|---|---|---|
| Bust | “It opens” | low overlap | add overlap width + snap |
| Waist | “It slides” | tie point floats | add inside button + waist stay |
| Underarm | “It pulls” | armhole too tight | adjust armhole curve |
| Neckline | “It droops” | stretch + weight | add stay tape or lining |
What fabrics work best for wrap tops in spring, and what fabric mistakes should I avoid?
Fabric decides if a wrap top feels “easy” or feels “fussy.” In spring, customers want comfort, but they also want the wrap to stay in place.
The best spring fabrics for wrap tops are rib knits, jersey, lightweight crepe, viscose blends, and stable cotton blends. I avoid overly slippery satin and overly stretchy loose knits unless I add structure, because both cause neckline shifting and gaping.
The fabric behavior I care about
- Drape: helps the wrap lay flat
- Recovery: helps neckline and waist keep shape
- Friction: helps the tie stay tied
- Weight: controls how much the front pulls open
Fabric-to-wrap-top matching table
| Fabric | Best Wrap Variant | Pros | Risk | My Control Method |
|---|---|---|---|---|
| Rib knit | faux wrap, wrap bodysuit | stable + flattering | bagging | tighter rib + recovery test |
| Jersey | true wrap | soft + easy | neckline stretch | stay tape + lining |
| Crepe (light) | wrap blouse | polished | seam puckering | needle + stitch tension |
| Viscose blend | wrap blouse | drape | shrink | wash test + pre-shrink |
| Cotton blend | true wrap | breathable | wrinkles | finish + pattern balance |
| Satin | trend wrap | shiny | slips open | add snap + wider overlap |
Fabric mistakes that create returns
- Too slippery: the wrap slides and the tie loosens.
- Too thin: the wearer feels exposed, even if coverage is okay.
- Too stretchy: the neckline grows during the day.
- Too stiff: the wrap forms a “tent” and looks bulky.
How do I engineer a wrap top so it stays closed and still feels comfortable?
This is where wrap tops become a real technical product. A wrap top is basically a moving closure system. If I do not control the closure, I cannot control customer experience.
I engineer a stable wrap top by combining overlap design, hidden security points, and neckline support. The key is to keep the wrap closed during movement without making the wearer feel restricted.
Overlap math I use in pattern review
I do not rely on “looks okay on the form.” I check overlap width as a rule.
- For smaller bust ranges, I aim for deeper overlap than a normal V-neck.
- For larger bust ranges, I aim for even deeper overlap and stronger anchor points.
- If the brand sells multi-size runs, I increase overlap grading, not just overall width.
The 7 security features I pick from
- Hidden snap at bust: stops gaping without changing the look
- Inside button at waist: anchors the under-layer
- Secondary tie (inside tie): gives a second lock point
- Waist stay tape: reduces upward creep
- Neckline stay tape: prevents neckline stretch
- Light lining or facing: adds friction and structure
- Elastic at side seam: keeps tension even without over-tight tying
What I choose for each wrap type
| Wrap Type | Best Security Combo | Why it works |
|---|---|---|
| True wrap knit | inside tie + neckline stay tape | keeps closure stable with stretch |
| True wrap woven | hidden snap + inside button | prevents bust gaping |
| Faux wrap | side elastic + facing | keeps crossover flat |
| Wrap crop | wide hem band + inside tie | reduces ride-up |
| Wrap bodysuit | neckline stay tape + soft snaps | stable and comfortable |
A simple wear-test checklist I run
- Wearer lifts arms above head 10 times.
- Wearer sits and stands 10 times.
- Wearer walks fast for 2 minutes.
- Wearer ties and unties 5 times.
If the wrap opens once, I change structure before bulk.
How do I price, MOQ-plan, and reorder wrap tops without getting stuck with slow stock?
Wrap tops can be fast winners, but they can also die fast if the fit is off. I treat them like a “controlled bet,” especially for woven wrap blouses.
I plan wrap tops with two tiers: low-risk repeatable wrap knits for reorders, and higher-risk woven wrap blouses as smaller test runs. I keep MOQ flexible by standardizing trims, using shared fabric families, and reusing one proven wrap block.
My wrap top risk tiers
- Low risk: faux wrap rib knit, wrap bodysuit
- stable fit, fewer gaping issues, good for reorders
- Medium risk: true wrap jersey
- needs strong neckline control
- High risk: woven wrap blouse
- needs precise grading and security points
The MOQ strategy I use with buyers like Emily
- I sample 2 fabrics max per wrap program.
- I keep one shared tie spec across multiple colors.
- I reuse one wrap block, then change neckline or sleeve for “newness.”
- I reserve trend fabrics (like satin) for small drops only.
Where brands lose money on wrap tops
- They skip bust security points to save cost.
- They do not test movement, only static fit.
- They overbuy woven wraps before proof of sell-through.
- They choose slippery fabric without adding structure.
Peplum Top
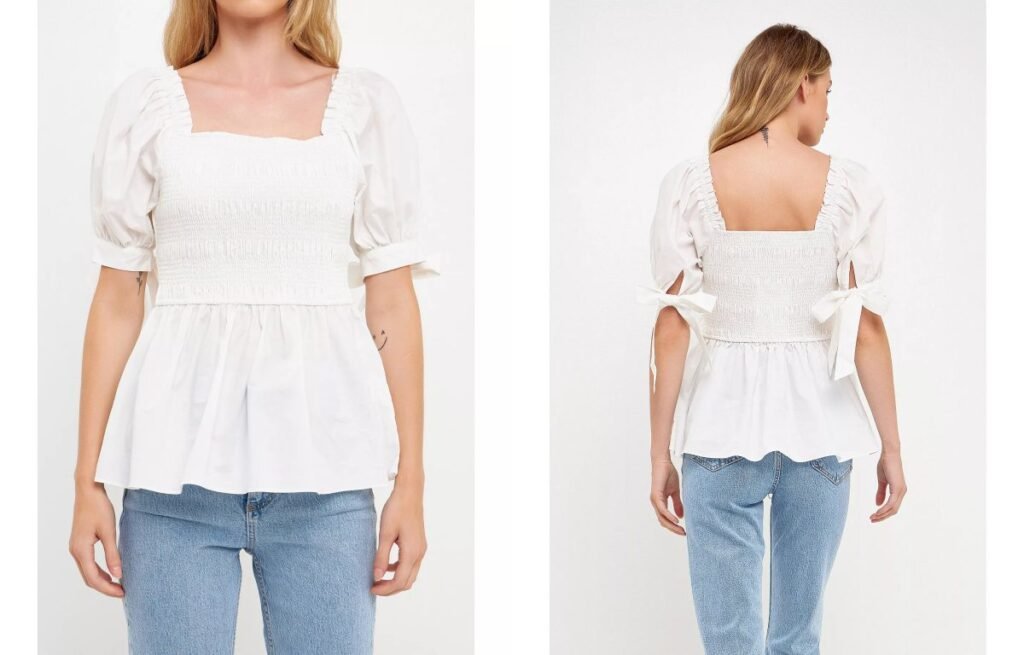
Spring buyers move fast, but fit mistakes move faster. A peplum top can look amazing online, then come back in a return bag if the waist and flare are wrong.
A peplum top is a fitted top with a flared ruffle at the waist that creates an hourglass shape. Inside “Types of Spring Tops,” I treat it as a spring hero for smart-casual and date-night, but only when the waist position, flare volume, and fabric support are planned for real bodies, not mannequins.
I once pushed a peplum style because the photos were perfect. The sales were fine, but the returns came from one reason: the waist seam sat too high on taller customers. Since then, I design peplum tops like a fit project first, and a trend project second.
Why is the Peplum Top still one of the most practical Types of Spring Tops?
The peplum top keeps coming back because it solves a simple styling problem: many customers want a waist shape without wearing a tight dress.
The peplum top stays practical in spring because it layers well, balances proportions for many body types, and upgrades simple bottoms like jeans or skirts. For brands, it also creates a “new look” with small pattern changes, so it can raise AOV without adding too many new fabrics.
Where peplum works best in spring
- Day-to-night: one top can work for office, dinner, and weekend
- Light layering: it sits well under a trench or light jacket if the flare is not too bulky
- Simple bottom pairing: it makes basic denim look styled
- Event dressing: it sells during spring weddings, brunch, and holiday weekends
What makes it “practical” from a production view
- I can reuse a proven bodice block.
- I can test multiple looks by changing only the flounce pattern.
- I can offer clear size grading rules once the waist seam position is stable.
What fit and pattern details decide whether a Peplum Top sells or gets returned?
This is where most brands lose money. A peplum top is not hard, but it is unforgiving. One wrong measurement can make the waist seam cut the body in the wrong place.
Return rates on peplum tops usually come from three pattern issues: the waist seam sits at the wrong height, the peplum flare is too stiff or too flat, and the bust/underbust shaping is not balanced. I reduce risk by locking the bodice fit first, then tuning flare volume and length by target customer height.
Waist seam placement is the first make-or-break
I set the waist seam based on the customer’s real “narrowest point,” not a size chart fantasy.
- If the seam is too high, taller customers feel it looks “pregnant” or “baby doll.”
- If the seam is too low, shorter customers lose the waist shape and look boxy.
My practical waist seam ranges (starting point)
| Customer Height Focus | Waist Seam Placement Goal | Notes |
|---|---|---|
| Petite focus | slightly higher waist | keep peplum shorter to avoid overwhelming |
| Average focus | true waist | safest for broad audience |
| Tall focus | slightly lower than true waist | prevents “empire” look |
Flare volume controls silhouette and comfort
Peplum is a controlled flare. If the flare is wrong, the top looks cheap or bulky.
- Too much volume: adds width at the hips and creates “tent” movement
- Too little volume: looks like a wrinkled seam, not a peplum
- Uneven volume: side flare pops out but front stays flat
How I tune the flare
- I adjust radius and length of the flounce pattern.
- I check front vs back flare balance to match posture and hip shape.
- I match flare to fabric drape, not only to sketch.
Bust and underbust shaping decides who can wear it
A peplum top often looks “cute” on small bust in photos. But brands sell to everyone.
- If the bust is tight, the waist seam rides up.
- If the bust is loose, the peplum starts too early and looks messy.
Fit points I always check in sampling
- bust ease at full bust
- underbust seam smoothness
- dart intake balance (or princess seam balance)
- armhole gaping when lifting arms
Which fabrics make the best spring Peplum Top, and which fabrics cause complaints?
Spring fabrics must handle sweat, movement, and light layers. The wrong fabric makes the peplum flare collapse or stand out like a lamp shade.
The best spring peplum fabrics keep a clean waist seam and a controlled flare: cotton poplin, ponte, structured rib, stretch woven, and medium-weight crepe. The most complaint-prone fabrics are very thin jersey, very stiff taffeta, and snaggy satin, because they either lose shape or exaggerate bulk.
Fabric behavior checklist I use before bulk
- Drape: does the flare fall or float?
- Recovery: does the waist seam stretch out after wear?
- Wrinkle: does the peplum crease when sitting?
- Sheerness: does the waist seam show through in light colors?
Fabric-to-result table for peplum
| Fabric Type | Peplum Look | Main Risk | Best Use Case |
|---|---|---|---|
| Cotton poplin | crisp, clean flare | wrinkles | office and daytime |
| Ponte knit | smooth, stable | warmer feel | cool spring regions |
| Structured rib | body-hugging with shape | seam ridging | casual and trendy |
| Stretch woven | balanced comfort | fit sensitivity | broad size range |
| Crepe (mid-weight) | soft, premium | seam puckering | dinner and events |
| Thin jersey | limp flare | loses shape | only with smart pattern support |
Stitch and construction choices that reduce complaints
- I stabilize waist seam with clear elastic or tape, depending on fabric.
- I use seam finishes that stay flat, especially for rib and ponte.
- I plan hem finish early because peplum hems show every mistake.
How do I style a Peplum Top so it fits real spring outfits, not only photos?
A peplum top needs the right bottom. If the bottom is also wide or bulky, the look becomes heavy.
The easiest spring styling rule is: peplum top + clean waist bottom. I pair peplum with high-waist straight jeans, slim trousers, pencil skirts, or fitted mini skirts. I avoid wide-leg bottoms unless the peplum is short and the fabric is soft.
Styling pairs that sell well for spring
- peplum + high-waist straight jeans + sneakers
- peplum + slim trousers + loafers
- peplum + midi pencil skirt + heels
- peplum + denim mini + boots
Layering rule for cool mornings
- trench or light blazer works best
- cropped jackets work if the peplum is not too long
- bulky cardigans fight with the flare and cause awkward bunching
How do I price and plan MOQ for a Peplum Top in wholesale?
Peplum looks premium, but it can turn into slow stock if the fit is narrow. I treat peplum as a “mid-risk fashion core,” not a basic.
For wholesale, I plan peplum tops with a safer MOQ by using one proven bodice block, two peplum lengths, and 2–3 fabrics max. This gives enough variety for brand identity while keeping sampling and QC stable. I scale only after sell-through data proves the fit.
My wholesale planning structure
- 1 bodice block (tested fit)
- 2 peplum options:
- short peplum (trend and petite friendly)
- medium peplum (broad audience)
- 1–2 neckline options:
- square neck for fashion
- V-neck for elongation
MOQ strategy that limits risk
| Phase | MOQ Approach | Goal |
|---|---|---|
| First drop | low MOQ, tight color range | test fit + demand |
| Second drop | add best seller colors | expand sales |
| Reorder | repeat same block | stabilize QC |
Quality checkpoints before shipment
- waist seam stretch and recovery test
- flare symmetry check on hanger
- hem measurement consistency
- button/zip performance if the style uses them
- color fastness for dark colors
Babydoll Top
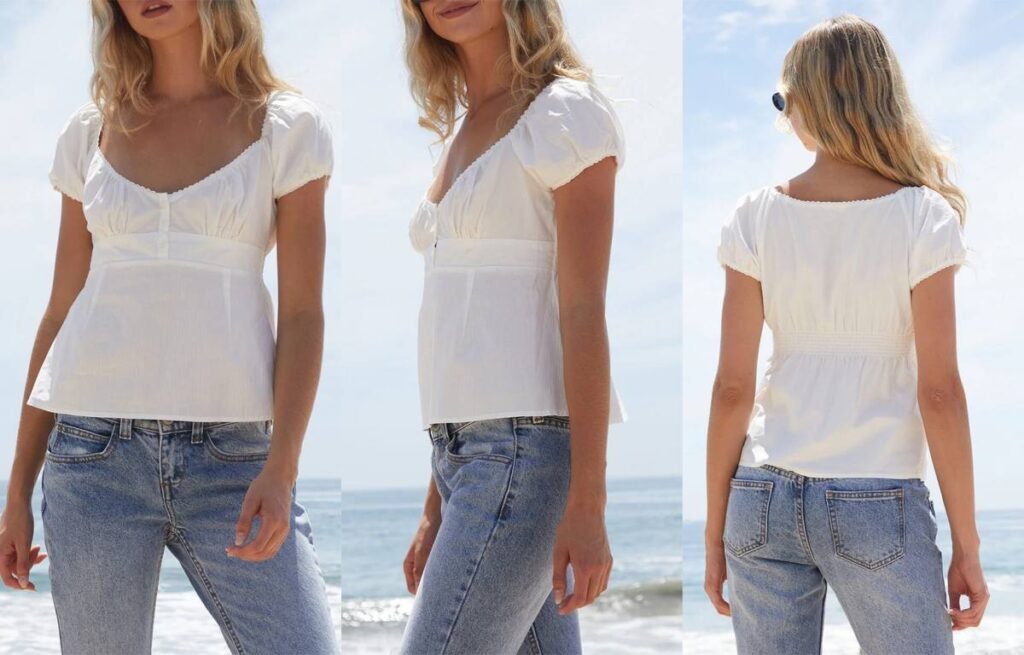
Spring tops can look “easy,” but returns can spike fast. If a babydoll top fits wrong at the bust or floats weird at the hem, customers blame the brand. When that happens, my buyer loses trust, and I lose reorders.
A babydoll top is one of the most forgiving Types of Spring Tops because it uses a high waist seam and a loose skirted shape, so it can fit many body types. I treat it as a spring hero style when I control three things: bust fit, seam placement, and fabric drape.
I once pushed a babydoll shape that looked perfect on a hanger. Then real customers said the chest felt tight and the body looked “puffy.” After that, I started building babydoll tops from clear fit rules, not just pretty photos.
What exactly is a Babydoll Top, and why does it work so well in spring?
A babydoll top is easy to style, and it hides spring weight swings. It also photographs well for social selling, which matters for fast-moving boutiques.
A babydoll top is a short, loose top with an empire seam or high waist seam, plus gathered or flared fabric below the seam. It works in spring because it layers over tanks, pairs with denim, and stays comfortable when the weather shifts.
The “babydoll” structure in simple parts
- Neckline: often square, sweetheart, scoop, or V
- Bodice: fitted or semi-fitted at bust
- Seam: sits above natural waist (empire)
- Skirt panel: gathered, flared, or lightly pleated
- Length: cropped to hip length is most common
Why spring customers keep buying it
- It feels airy in warm afternoons.
- It covers the midsection in early-season styling.
- It gives a “cute” silhouette without tight fit pressure.
How do I make a Babydoll Top fit correctly across sizes?
Fit is the whole game for babydoll. The top looks forgiving, but the bust area is not. If the bust is wrong, the entire garment looks cheap.
I fit a babydoll top by locking the bust and underbust first, then letting the lower panel stay loose. The safest approach is a bodice with controlled shaping and a skirt panel with planned volume. I also grade seam placement carefully so larger sizes do not look like maternity wear.
The fit areas that decide success
- Bust circumference: too small = pulling; too big = sagging
- Underbust seam position: too high = “kid top”; too low = loses babydoll shape
- Armhole + sleeve cap: too open = bra exposure; too tight = restriction
- Neckline stability: gaping is common on square necks
- Front length vs back length: prevents the “tent” look
The grading mistake I see most
Many factories grade the skirt width but forget the bodice balance. Then sizes L–XL look wide and short, and customers say it looks “pregnant.”
My grading rule for babydoll
- I add controlled ease in the bodice, not just in the skirt.
- I adjust the seam position slightly by size, but I keep the visual line consistent.
- I increase sleeve opening and bicep width earlier than many brands do.
A quick fit-check table I use during sampling
| Size Range | Main Risk | What I Check First | Easy Fix |
|---|---|---|---|
| XS–S | neckline gaping | neckline stay tape | add facing + shorten strap |
| M–L | bust pulling | bust point alignment | add dart or panel shaping |
| XL–2XL | maternity look | seam height + skirt volume | lower volume + extend bodice |
Which fabrics are best for a Babydoll Top in spring, and which ones cause complaints?
Fabric decides whether babydoll looks “light and pretty” or “puffy and cheap.” Many complaints come from the wrong drape.
For spring babydoll tops, I prefer light woven fabrics with soft drape like viscose, rayon blends, cotton poplin (lighter weight), and textured dobby. I avoid stiff fabrics that stand away from the body unless the design is meant to be structured. I also plan lining when the fabric turns sheer.
Fabric behavior matters more than fabric names
I do not pick fabric by label only. I pick it by how it moves.
- Soft drape: flows down, looks slim, feels premium
- Crisp drape: holds shape, can look “puffy”
- Stretch drape: comfortable, but can grow out
Best fabric picks by design goal
- Romantic and floaty: viscose, rayon challis, textured chiffon with lining
- Clean and modern: light poplin, light twill, cotton blend shirting
- Body-friendly comfort: knit jersey bodice + woven skirt panel (hybrid)
Fabric complaint triggers and my fixes
- Sheerness: add lining or use heavier GSM
- Wrinkles: choose blends or add easy-care finish
- Seam puckering: adjust needle, thread tension, stitch length
- Itch: avoid scratchy lace trims at neckline and armhole
A fabric decision table for buyers
| Fabric Option | Look | Feel | Risk | My Suggestion |
|---|---|---|---|---|
| Viscose/Rayon | soft, premium | cool | shrink | pre-shrink + wash test |
| Cotton Poplin (light) | crisp, cute | breathable | puffiness | reduce gathers |
| Polyester Chiffon | airy | light | sheer | add lining |
| Jersey Knit | casual | stretchy | growth | stabilize neckline |
How much volume should a Babydoll Top have, and how do I prevent the “maternity” look?
This is where many brands fail. They add too much gather and call it “cute.” Then customers say it looks like a maternity top.
I control babydoll volume by balancing seam height, gather ratio, and hem sweep. The top should create shape, not hide shape. My safest approach is moderate gathers and extra length through the bodice, so the garment reads as fashion, not maternity.
The key concept: gather ratio
Gather ratio is simple: how wide the skirt panel is compared to the seam line.
- Low ratio = flatter, cleaner look
- High ratio = puffier, more volume
My practical gather ratio guide
- 1.3–1.6x: modern, wearable, lower returns
- 1.7–2.0x: cute and trendy, but higher “puffy” risk
- 2.0x+: costume-like on many bodies unless fabric is very soft
Seam placement changes the message
- Too high seam: looks childish
- Too low seam: looks like a loose tunic
- Correct seam: supports bust and releases below
Pattern tricks I use to slim the look
- Add a center front panel instead of full gathers
- Use side gathers only to keep the front flatter
- Add princess seams on the bodice to create vertical lines
- Use A-line paneling instead of gathering for plus sizes
What design details sell a Babydoll Top faster in spring?
Small details change the whole sell-through. Babydoll is trend-sensitive, so the neckline and sleeve matter a lot.
The best-selling babydoll tops usually use a clear neckline story and a sleeve that matches the season: square neck with puff sleeves for a sweet look, V-neck with flutter sleeves for a slimmer look, or a sleeveless babydoll for warm climates. I also keep closures simple to protect lead time.
Necklines that perform well (and why)
- Square neck: strong trend look, great for photos
- Sweetheart: feminine, helps bust shaping
- V-neck: reduces “puffy” feel, elongates body
- Scoop: safe basic, easy fit
Sleeves that match spring use
- Puff sleeve: trend-forward, but must not restrict
- Flutter sleeve: easy, flattering, low complaint
- Short sleeve with elastic: stable, but watch tightness
- Sleeveless: best for warm spring, great for layering
Closures and finishing choices I prefer
- Side zipper can improve fit but slows production.
- Back smocking can increase fit range but needs good elastic.
- Hidden snaps are fast but must be strong.
How do I control MOQ and lead time for a Babydoll Top without missing the trend?
Babydoll is a “fast yes, fast no” style in many markets. I treat it like a controlled experiment, not a big gamble.
I control babydoll top risk by using one proven fit block, then changing only visible details like neckline, sleeve, and fabric. I start with smaller MOQ in 2–3 colors, then reorder winners fast. This protects cash while still catching spring demand.
My two-track production plan for babydoll
- Core babydoll: safe neckline + safe sleeve + stable fabric
- Trend babydoll: bold neckline + new trim + new fabric
A simple MOQ plan that fits wholesale reality
| Drop Type | Colors | MOQ per Color | Goal |
|---|---|---|---|
| First test | 2–3 | lower | validate fit + photos |
| First reorder | 1–2 | higher | ride best color |
| Late add-on | 1 | small | fill size gaps |
The lead-time shortcuts that do not hurt quality
- Use existing lace trims and buttons from stock.
- Keep the same bodice block for multiple designs.
- Use one lining fabric across several styles.
Tunic Top
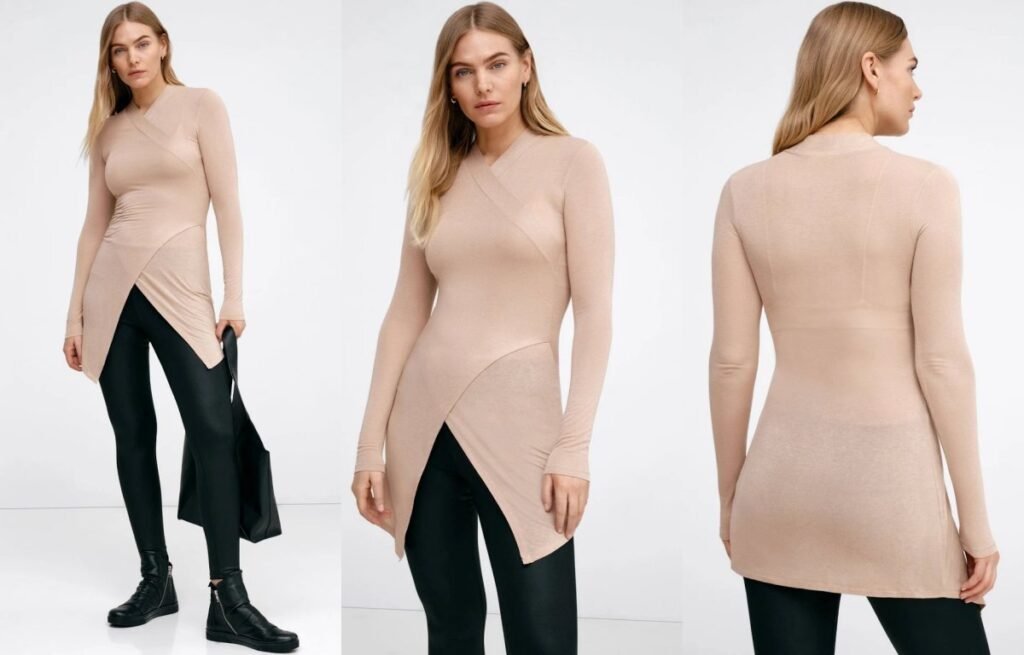
A tunic top looks simple, but it fails fast if the length, fabric, or side slits are wrong. I have seen buyers lose sales because the fit feels “off” in real life.
A tunic top is a longer-length top that usually covers the hip and sometimes reaches mid-thigh. In spring, I use it as an easy layering piece that works with leggings, slim pants, denim, or shorts, and it helps brands offer coverage without looking heavy.
I still remember one early bulk order where the tunic looked perfect on the hanger, but the hem flipped up when walking. After that, I started treating tunic tops like a technical style, not a “basic” style.
What makes a tunic top different from a regular top?
Many people call any loose top a tunic. I do not. I use clear rules, so my sampling team and my buyer speak the same language.
A tunic top is defined by extra body length, a relaxed fit through the waist and hip, and styling that is meant to be worn untucked. A regular top usually ends around the high hip and is often designed to be tucked or cropped.
The quick checklist I use in sampling
- Length: covers the hip bone at minimum
- Hem behavior: stays flat when walking and sitting
- Ease at hip: enough width to avoid cling
- Side slits or curved hem: supports movement
- Proportion: still looks balanced with slim bottoms
| Size Range | Regular Top Length (HPS) | Tunic Top Length (HPS) | Notes |
|---|---|---|---|
| XS–S | 56–60 cm | 68–76 cm | depends on trend and target customer |
| M–L | 58–62 cm | 70–78 cm | check hip coverage in motion |
| XL–2XL | 60–64 cm | 72–80 cm | add ease, not only length |
Why is the tunic top a strong spring style for wholesale programs?
Spring is full of “in-between” days. A tunic top fits that problem because it layers well and sells to more body types.
A tunic top works in spring because it gives light coverage, handles temperature swings, and fits many customers with fewer fit complaints. For wholesale, I like it because it can be a core reorder style when the fabric and length are stable.
Where I see tunic tops perform best
- online boutiques selling “easy outfits”
- capsule-style collections with neutral colors
- travel and weekend wear themes
- modest fashion edits
- plus-size assortments that need comfort and balance
The business reason I like tunic tops
- it supports repeat color reorders
- it has lower return risk than tight silhouettes
- it pairs with many bottoms, so styling photos are easy
- it can be upgraded with small details, so margin improves
How do I choose the right tunic top silhouette for different customers?
I do not treat “tunic” as one shape. I split it into clear silhouettes, because each one behaves differently on the body.
I pick tunic silhouettes by matching body movement and styling goals: straight tunics are safest, A-line tunics are best for hip comfort, and high-low or curved hems create the most modern spring look. I avoid extreme volume unless the brand sells boho.
The 5 silhouettes I use most
1) Straight tunic
- best for: basics and reorders
- risk: can look boxy without neckline detail
2) A-line tunic
- best for: hip room and comfort
- risk: can swing too wide in light fabrics
3) High-low hem tunic
- best for: modern shape and coverage
- risk: back hem can drag if too long
4) Curved hem tunic
- best for: sporty and clean outfits
- risk: hem curve must match size grading
5) Side-slit tunic
- best for: walking comfort and layering
- risk: slit height must be controlled
A fit decision table I use with buyers
| Customer Preference | Best Tunic Shape | Best Neckline | Best Sleeve |
|---|---|---|---|
| wants slimmer look | straight / curved hem | V-neck | long sleeve / 3/4 |
| wants hip comfort | A-line / side-slit | scoop | short sleeve |
| wants trendy | high-low / side-slit | square | cap sleeve |
| wants modest | straight longer length | crew | long sleeve |
How do I select fabrics for a spring tunic top without quality problems?
Fabric decides whether a tunic feels “flowy” or “cheap.” In spring, buyers want light fabric, but light fabric also shows every mistake.
For spring tunic tops, I choose fabrics based on drape, opacity, and recovery. Knits give comfort and fit tolerance, while wovens give shape. The best balance is usually a medium-weight knit with good recovery and low pilling risk.
Fabric options I recommend by tunic style goal
Soft and casual tunic
- cotton jersey
- cotton-modal blends
- rayon-spandex (only if recovery is stable)
Clean and structured tunic
- ponte knit
- double-knit jersey
- lightweight denim chambray for shirt-tunics
Elevated “dressy” tunic
- satin-like woven (needs lining plan)
- viscose woven (needs wrinkle plan)
The 6 fabric risks I check every time
- Sheerness: white and light colors need extra control
- Pilling: soft brushed knits can fail fast
- Growth: fabric gets longer after wear, especially rayon-heavy blends
- Twist: side seams rotate after washing if the fabric is unstable
- Shrink: length loss ruins the “tunic” definition
- Wrinkle: woven tunics can look tired after shipping
My minimum testing routine before bulk
- wash test for shrink and seam twist
- stretch and recovery test at hem and neckline
- rubbing test for pilling
- color fastness for darks and brights
- hanger hang test for growth (overnight)
How do I set the correct length, side slits, and hem details for a tunic top?
This is where most tunic tops fail. A few centimeters can change the whole look and comfort.
I set tunic length by “coverage goal,” not only by trend. Then I control side slits and hem shape for movement. A tunic should cover the hip in all sizes, stay flat when walking, and not ride up when sitting.
How I decide length in a practical way
- hip-cover tunic: best for slim jeans and everyday wear
- upper-thigh tunic: best for leggings styling
- long tunic: best for modest edits, but risk is higher
Side slit rules I use
- slit helps movement, but slit also shows underwear if it is too high
- slit height must change by size, not stay fixed
- reinforcement stitches are needed at slit top
Hem options and their trade-offs
| Hem Type | Visual Effect | Comfort | Risk |
|---|---|---|---|
| straight hem | simple, basic | stable | can look boxy |
| curved hem | sporty, modern | high | curve grading must be correct |
| high-low hem | trendy, coverage | medium | back hem drag risk |
| stepped hem | fashion detail | medium | seam alignment risk |
How do I grade sizes for tunic tops so they do not look “wrong” in XL and above?
Tunic tops look easy, but grading is not easy. If I only add width, the tunic becomes a tent. If I only add length, it becomes awkward.
For tunic tops, I grade with a balanced mix of width, length, and hem shape. I also control shoulder width and sleeve bicep to keep the silhouette clean. For plus sizes, I add ease at hip and bicep first, then adjust hem curve and slit.
My grading priorities (in order)
1) hip ease and hem sweep
2) bicep and sleeve opening
3) body length to keep coverage
4) shoulder width to avoid droop
5) neckline to prevent gaping
Common grading mistakes I correct
- neckline gets wider too fast
- shoulder drops too much and looks sloppy
- side slits stay the same height across sizes
- hem curve becomes flat and loses the “tunic” shape
How do I position tunic tops in a spring assortment with the other Types of Spring Tops?
A tunic top sells better when it has a clear role. If it competes with every top, it becomes a slow mover.
In a spring top assortment, I treat tunic tops as a “coverage and layering” anchor. I place them next to fitted basics like rib tops and bodysuits, and I use them to balance short tops like crops and tanks. This makes the assortment feel complete.
The pairing map I use
- tunic + leggings or skinny jeans = easy outfit
- tunic + denim shorts = spring casual
- tunic + wide-leg pants = modern balance (needs shorter tunic)
- tunic layered under denim shirt or light jacket = cool spring days
A simple assortment ratio example
| Category | Example Styles | Suggested Share |
|---|---|---|
| Fitted basics | rib-knit top, bodysuit | 25–35% |
| Standard basics | tee, tank, long sleeve tee | 35–45% |
| Coverage styles | tunic top, button-down | 10–20% |
| Trend tops | mesh, lace, tube, peplum | 10–20% |
Off-the-Shoulder Top
Spring is the season where buyers want “cute” first and comfort second. But if an off-the-shoulder top slips, scratches, or turns see-through, customers return it fast. I have seen one bad fit ruin a whole drop.
An Off-the-Shoulder Top works best in spring when it uses stable neckline construction (elastic + grip + lining), a fabric that holds shape, and a fit that stays in place during normal movement. For wholesale, I treat it as a trend-led style and control risk with tight size specs and pre-bulk wear testing.
I still remember a rush order where the sample looked perfect on the mannequin, but the bulk neckline stretched out after steaming. That experience pushed me to treat off-the-shoulder tops like a technical product, not just a pretty photo item.
What exactly counts as an Off-the-Shoulder Top in spring trends?
Most people use the name loosely, and that creates sourcing mistakes. I define it by neckline position and how the garment stays up.
An Off-the-Shoulder Top is a top designed to sit below the shoulder line, showing the shoulders and collarbones, while staying secure through elastic, structure, or grip features. In spring, the most common versions are elastic bardot tops, smocked necklines, and structured off-shoulder blouses.
The 5 off-shoulder constructions I see most in wholesale
- Bardot elastic neckline: the classic “straight across” off-shoulder look
- Smocked neckline (full smock or partial): more stretch, more comfort
- Structured blouse neckline: woven with facing, sometimes with boning
- One-shoulder / asym off-shoulder hybrid: trend piece, higher return risk
- Convertible neckline: can be worn on-shoulder or off-shoulder
Quick naming rules I use with buyers
- If it sits below both shoulders most of the time, I call it off-the-shoulder.
- If it sits below one shoulder, I call it one-shoulder.
- If it sits on the shoulder edge, I call it boat neck or wide neck, not off-shoulder.
What makes an Off-the-Shoulder Top slip, and how do I prevent it?
This is the main reason buyers get returns. People do not “baby” the garment. They raise arms, carry bags, and dance.
An Off-the-Shoulder Top slips when neckline tension is too low, grip is missing, fabric relaxes after heat/steam, or the sleeve/armhole shape pulls the neckline upward. I prevent slipping by combining elastic tension, anti-slip grip, stable facing, and a balanced sleeve pattern.
The real slipping causes I see in production
- Elastic is too soft or too wide: it feels comfy, but it cannot hold position
- Elastic is stitched without control: the sewing stretches it too much and kills recovery
- Fabric relaxes: rayon and some poly knits “grow” after steaming and hanging
- Sleeves are heavy: puff sleeves pull the neckline down unevenly
- Arm movement pulls the body up: the pattern is not balanced for reach
Neckline stability checklist I run before bulk
- Elastic length vs neckline opening is correct
- Stitch type supports stretch (coverstitch or stretch stitch)
- Elastic is anchored at seams so it does not “roll”
- Neckline facing is clean and not bulky
- Silicone tape is applied correctly if used
A simple wear test that catches 80% of problems
I ask someone to wear the sample and do this:
- Raise arms overhead 10 times
- Carry a tote bag on one shoulder for 2 minutes
- Sit and stand 10 times
- Walk fast for 3 minutes
If the neckline moves more than a few centimeters, I treat it as a redesign, not a “small tweak.”
Fabric choice changes everything: comfort, grip, drape, and whether the neckline stays put. In spring, buyers want airy fabric, but airy often equals unstable.
The best fabrics for an Off-the-Shoulder Top are medium-weight cotton poplin, cotton jersey with spandex, stable rib knits, and textured wovens that add friction. I avoid fabrics that “grow” too much unless I add structure, lining, or stronger elastic.
Fabric behavior matters more than fiber name
Two “poly” fabrics can behave completely differently. I judge fabric by:
- stretch recovery
- surface friction (grip)
- weight and drape
- shrink and growth after steam
Fabric selection guide I use
| Fabric Type | Look | Comfort | Slip Risk | My Notes |
|---|---|---|---|---|
| Cotton poplin | crisp | good | low | holds shape, needs good pattern |
| Cotton jersey + spandex | casual | high | medium | great for basics, elastic must be strong |
| Rib knit | fitted | high | low-medium | strong recovery, good grip |
| Viscose/rayon woven | soft, drapey | high | high | needs lining or stronger neckline build |
| Satin | glossy | medium | high | low grip, needs structure |
| Lace/mesh | sheer | medium | high | needs layering plan and clean seams |
Comfort risks I flag early
- scratchy elastic against skin
- silicone tape irritation for sensitive customers
- stiff facings that “bite” the upper arm
- itchy lace without lining
Sizing is tricky because the garment sits on a moving part of the body. I do not treat it like a normal neckline.
To reduce returns, I spec an Off-the-Shoulder Top using neckline stretch range, bicep opening, and upper-bust measurement, not just bust and length. I also grade neckline elastic carefully so larger sizes get more support, not just more width.
The 6 measurements I always add for this style
- Neckline opening (relaxed)
- Neckline opening (stretched to target)
- Upper bust (around armpit level)
- Bicep / sleeve opening
- Across shoulder to shoulder (even if it is “off” shoulder, the span matters)
- Body length (because riding up feels like slipping)
A practical grading rule I follow
When size goes up:
- neckline opening increases a little
- elastic strength increases a little
- bicep opening increases enough for comfort
If I only increase opening but keep the same elastic strength, bigger sizes slip faster.
Fit notes I write for buyers like Emily
- If the customer base is active, I recommend smocking or rib knit.
- If the brand wants a “dressy” look, I recommend poplin or structured woven with facing.
- If the customer base is sensitive skin, I reduce silicone use and improve pattern balance.
How do I plan MOQ and production for Off-the-Shoulder Tops as a wholesale supplier?
Off-the-shoulder is usually a trend push, not a forever-basic. I still want it to be reorderable, but I plan it differently from tees.
I plan Off-the-Shoulder Tops with controlled MOQ, faster sampling, and strict pre-bulk testing. I also lock the neckline components early because elastic, silicone tape, and lining fabric decide the final performance.
My two-track MOQ plan for this style
- Trend test MOQ: smaller, more color focus, fewer size extremes
- Proven reorder MOQ: expand sizes, add more colors, refine fit blocks
Where production goes wrong most often
- elastic spec is changed without notice
- silicone tape is replaced with a different supplier version
- steam pressing relaxes the neckline before packing
- sewing line stretches elastic too much during attachment
The control points I put into the workflow
- elastic is measured before sewing (random checks)
- one “golden sample” is kept at the line
- neckline stretch test is repeated after final pressing
- packing method avoids hanging stretch for unstable fabrics
How can I make an Off-the-Shoulder Top feel branded without increasing returns?
Branding does not have to mean risky pattern changes. I like visible details that do not break fit.
I make an Off-the-Shoulder Top feel branded by using sleeve shape, texture, trim, and print placement, while keeping the neckline construction stable. This keeps the signature look but avoids the common slip and gaping problems that drive returns.
Low-risk branding options that still look unique
- puff sleeve vs fitted sleeve
- ruffle placement (upper sleeve, not neckline edge)
- smock texture patterns
- contrast stitching on cuffs and hem
- custom logo embroidery on sleeve or side seam
Higher-risk branding changes I warn about
- lowering neckline too much for “sexier” look
- using ultra-smooth satin without structure
- removing lining to reduce cost
- making sleeves heavier without balancing the neckline
One-Shoulder Top

Spring tops can look right on a model but fail in real life. A one-shoulder top is even harder. If the fit slips, the fabric scratches, or the neckline rolls, customers return it fast.
A spring-ready one-shoulder top sells when I control three things: neckline stability, stretch recovery, and comfort at the underarm. I treat it like a structured neckline on one side and a flexible neckline on the other, then I test slip, twist, and transparency before bulk.
I still remember a buyer telling me, “This top looks amazing, but my customers keep pulling it up.” After that, I stopped treating one-shoulder like a normal knit top. I started building it like a hybrid of bodysuit support and tee comfort.
What is a One-Shoulder Top, and why is it a spring bestseller?
A one-shoulder top is simple to describe, but not simple to execute. It sits on one shoulder and leaves the other shoulder bare, so it creates an instant “styled” look.
A one-shoulder top is a single-strap neckline top that creates strong asymmetry, which reads as trendy even in plain colors. In spring, it works because it pairs with denim, skirts, and light layers, and it gives a going-out vibe without heavy fabric.
The reason it keeps trending in spring
- It shows skin in a controlled way, so it fits warm afternoons.
- It layers under a blazer or denim jacket for cool nights.
- It looks “fashion” even with a basic rib knit fabric.
Common spring retail pairings I see
- one-shoulder + high-waist jeans
- one-shoulder + satin maxi skirt
- one-shoulder + cargo pants
- one-shoulder + oversized shirt worn open
What are the best One-Shoulder Top variations within the “Types of Spring Tops” lineup?
I do not treat “one-shoulder” as one item. I treat it as a family of blocks. Different blocks fit different bodies and different climates.
The most useful one-shoulder variations for spring are: classic asymmetrical knit top, one-shoulder bodysuit, one-shoulder ruched top, one-shoulder long sleeve, and one-shoulder with scarf/strap detail. Each version changes support level, comfort, and how risky the fit is.
Core one-shoulder blocks I produce most often
| Variation | Best For | Fabric Match | Risk Level | Notes |
|---|---|---|---|---|
| Classic knit | volume basics | rib knit, cotton-spandex | Medium | needs strong neckline elastic |
| Bodysuit | clean tucked look | nylon-spandex, rib | Medium-High | gusset comfort matters |
| Ruched | forgiving fit | rib, jersey | Low-Medium | ruching hides minor issues |
| Long sleeve | cool spring | rib, jersey | Medium | sleeve weight can pull neckline |
| Scarf/strap detail | trend drops | satin/jersey mix | High | detail construction must be clean |
My quick “buyer fit” mapping
- If the customer base is curvy: I push ruched or bodysuit.
- If the brand sells basics: I push classic rib knit.
- If the climate is cool: I push long sleeve with extra support tape.
How do I stop a One-Shoulder Top from slipping, twisting, or rolling?
This is the real problem. A one-shoulder top fails when gravity wins. The neckline is asymmetrical, so the garment wants to rotate around the body.
To stop slipping and twisting, I build a one-shoulder top with “hidden structure”: neckline elastic, stabilizing tape, balanced pattern weight, and controlled negative ease. Then I run movement tests like reaching, sitting, and dancing before bulk.
What actually causes the slip
- The neckline edge is too soft, so it stretches out.
- The strap side is heavier, so the whole top rotates.
- The armhole on the open side gaps, so it loses friction.
- The fabric has poor recovery, so it grows after 30 minutes.
Pattern and construction moves I rely on
1) Add support where customers never see it
- Clear elastic (6–10 mm) inside neckline seam
- Stabilizing tape along the top edge for wovens or slippery knits
- Power mesh facing for higher support without bulk
2) Balance the “pull”
I do not let one side carry all the weight.
- I adjust the side seam angle.
- I control the hem sweep so it does not drag.
- I check that the strap side and open side have similar tension.
3) Use negative ease on purpose
For knits, I usually plan:
- Bust negative ease: 6%–10%
- Upper chest negative ease: 4%–8%
- Waist negative ease: 2%–6%
If the brand targets comfort-first customers, I reduce negative ease and add stronger elastic.
The movement test I require before production
I ask the fit model to do a simple set:
- raise both arms overhead 10 times
- walk and swing arms for 2 minutes
- sit and stand 10 times
- twist torso left and right 10 times
If the neckline shifts more than a small finger width, I rework the neckline elastic and the armhole curve.
What fabrics work best for a spring One-Shoulder Top, and what quality risks come with each?
Fabric choice decides everything: support, comfort, and whether the edge stays flat. In spring, buyers want it soft, but they still want it secure.
For spring one-shoulder tops, rib knit and nylon-spandex jersey are the safest because they recover well. Cotton jersey can work for a softer look, but it risks stretching out. Satin looks premium, but it needs internal support and clean finishing to avoid slipping.
My fabric ranking for stable fit
| Fabric | Best Use | Why It Works | Main Risk | My Fix |
|---|---|---|---|---|
| Rib knit (rayon/nylon blend) | fitted tops | strong recovery | bagging at edge | stronger elastic + wash test |
| Nylon-spandex jersey | bodysuits | high stretch + snap back | shine shows lumps | cleaner seam + right lining |
| Cotton-spandex jersey | casual look | breathable | grows during wear | higher GSM + tape at edge |
| Ponte / double knit | structured | holds shape | too warm | use thinner weight |
| Satin (woven) | going-out | premium look | slips, puckers | facing + tape + needle match |
Spring comfort checks I never skip
- underarm irritation on the open side
- edge scratch from elastic or tape
- sheerness under daylight
- color fastness (sweat + wash)
How do I price, set MOQ, and plan production for a One-Shoulder Top without high returns?
One-shoulder looks simple, but the return risk can be higher than a normal tee. So I plan it like a “semi-technical” top.
I keep MOQ and costing under control by splitting one-shoulder tops into two tiers: a core rib-knit version for stable reorders, and a trend version with special details for small tests. I also standardize components like elastic width and seam methods across seasons.
My two-tier production plan
Tier A: Core reorder version
- classic rib knit one-shoulder
- 2–3 core colors
- stable fit block
- higher MOQ, better cost
Tier B: Trend test version
- scarf detail, satin mix, cutouts, hardware
- 1–2 colors
- lower MOQ, fast sampling
- higher cost, higher margin potential
Where returns usually come from
- size feels “too small” because the top is meant to be fitted
- neckline slips on smaller shoulders
- elastic feels tight or itchy
- fabric becomes loose after 1–2 wears
How I reduce returns with sizing strategy
- I keep a clear fit description: “bodycon” vs “relaxed”
- I add garment measurements at neckline width and upper chest
- I suggest two fit models for approval: one smaller frame, one fuller bust
Puff-Sleeve Top
Puff sleeves look easy, but they can fail fast. The sleeve can feel tight, the shoulder can sit wrong, and the volume can collapse after washing. Then the return rate climbs.
A Puff-Sleeve Top is a spring top with extra sleeve volume created by gathers, pleats, or tucks, usually supported by elastic, lining, or structured fabric. I treat it as a “shape product,” so I control sleeve pattern, balance, and fabric recovery to keep the puff stable and wearable.
I still remember one early order where the puff looked perfect on the sample. After bulk wash, the sleeve lost shape and the armhole started biting. Since then, I build puff sleeves with clearer rules, not just a pretty sketch.
What types of Puff-Sleeve Top silhouettes sell best in spring?
Puff sleeves are not one look. Small pattern differences create totally different customer reactions. I sort them by “volume location” and “wear comfort.”
The best-selling puff-sleeve silhouettes usually fall into four buckets: micro-puff for daily wear, shoulder-puff for trend impact, elbow-puff for romantic volume, and statement-puff for photos. I pick the bucket first, then match the fabric and sleeve support method.
4 common puff-sleeve silhouettes I use
- Micro puff: light gathers at sleeve cap, easy for basics
- Shoulder puff: volume near sleeve head, strong fashion signal
- Elbow puff: volume plus taper to cuff, more romantic and soft
- Statement puff: large volume with stronger structure, higher return risk
How I match silhouette to customer profile
| Customer behavior | Best puff type | Why it works |
|---|---|---|
| “I want easy daily tops” | Micro puff | low volume, easy layering |
| “I want trend but not costume” | Shoulder puff | visible shape, still wearable |
| “I want feminine details” | Elbow puff | balanced volume and comfort |
| “I buy for photos” | Statement puff | big shape reads well on camera |
The decision I make before sampling
I choose one main goal:
- comfort-first (higher repeat rate)
- photo-first (higher viral chance)
- margin-first (more complex construction)
I do not try to hit all three with one puff sleeve. That is how brands waste sampling time.
How do I choose fabric for a Puff-Sleeve Top so the puff holds its shape?
Fabric decides if the puff lives or dies. If fabric is too soft, the sleeve drops. If fabric is too stiff, the sleeve looks like a costume.
For puff sleeves, I choose fabric based on “memory” and “weight.” Poplin, cotton blends, dobby, and light jacquard hold puff shape well. Jersey can work for micro puffs, but I need elastic and stable seams. I test wash recovery before bulk.
Fabric behavior I test (not just swatches)
- Shape memory: does the puff bounce back after squeeze?
- Drape vs structure: does the sleeve stand or collapse?
- Wrinkle profile: does it look messy after sitting?
- Sheerness: does it need lining or sleeve opacity control?
Practical fabric matching table
| Puff goal | Best fabric options | Risk | My control method |
|---|---|---|---|
| Crisp, clean puff | poplin, cotton-poly, dobby | wrinkles | finish + steam test |
| Soft romantic puff | viscose blend woven | collapse | add lining or tucks |
| Stretch daily puff | stable jersey, ponte light | twisting | stabilize shoulder seam |
| Statement puff | light jacquard, taffeta light | stiffness | reduce volume + soften cuff |
A rule I follow for spring
If the fabric is under-powered, I do not “add more gathers” to compensate. More gathers often makes the sleeve heavy and uncomfortable. I fix the fabric or the support method instead.
What pattern and construction details prevent tight arms and weird shoulder fit?
Most puff-sleeve complaints are fit complaints. Customers say “tight,” but the real problem is often sleeve cap height, bicep ease, or armhole shape.
To prevent tight arms, I build puff sleeves with controlled bicep ease, a stable armhole, and balanced sleeve cap height. I also keep the shoulder point in the right place, so the puff sits on top of the shoulder instead of sliding forward.
The 5 pattern points I check every time
- Sleeve cap height: too high = tight lift, too low = droopy puff
- Bicep circumference: needs real ease for movement
- Armhole curve: impacts comfort more than people expect
- Shoulder point location: wrong point makes puff look “off”
- Cuff opening: elastic must not cut skin
Comfort math I use when I grade sizes
I do not rely on “standard” charts only. I use movement logic:
- I add ease at bicep for raising arms
- I protect underarm seam position to avoid rubbing
- I keep cuff stretch range consistent across sizes
Common mistakes I see in rushed sampling
- too much gather at cap, not enough ease at bicep
- elastic too strong at cuff, so sleeve rides up
- shoulder seam not stabilized, so puff shifts after wash
- lining omitted, so puff collapses and wrinkles show
How do I control quality for a Puff-Sleeve Top in bulk production?
A puff sleeve can pass sample but fail in bulk. The main reasons are sewing tension, elastic variance, and inconsistent gathering.
In bulk, I control puff-sleeve quality by locking gather ratio, elastic spec, and seam reinforcement. I also run wash tests for shape recovery and check left-right sleeve symmetry on the line. These checks prevent “one sleeve bigger” and “puff disappears” issues.
My puff-sleeve QC checklist on the production line
- Gather ratio standard: same measurement every bundle
- Elastic spec lock: width, stretch, and recovery
- Thread tension check: prevents puckering and broken stitches
- Symmetry check: left sleeve vs right sleeve volume
- Seam reinforcement: shoulder seam tape when needed
Wash and wear tests I insist on
- 1 wash for shrink and twist
- 3 stretch cycles for cuff recovery
- sitting test for wrinkling (real life matters)
Typical defect causes and fixes
| Issue | Likely cause | Fix I apply |
|---|---|---|
| Puff collapses after wash | fabric too soft / no support | add lining or change fabric |
| Tight at bicep | low ease / high cap | adjust pattern, not elastic |
| Puffy but uncomfortable | cuff elastic too strong | lower elastic tension |
| One sleeve bigger | gather inconsistency | mark gather points + ratio control |
| Shoulder looks messy | seam stretch | stabilize seam and press method |
How do I price and plan MOQ for a Puff-Sleeve Top without overbuying?
Puff sleeves look simple, but they raise cost. They take more fabric, more sewing steps, and more pressing time. If I ignore that, the margin disappears.
I plan puff-sleeve MOQ like a fashion item, not a basic. I keep MOQ smaller for high-volume statement sleeves, and I scale up only after sell-through. I also price for extra operations like gathering, elastic setting, sleeve lining, and pressing.
Where puff sleeves add cost
- extra sleeve fabric consumption
- gathering operations and quality checks
- elastic or lining materials
- higher pressing time to keep shape clean
MOQ strategy I recommend to boutique buyers
- first drop: smaller MOQ, more colors only if fabric is stable
- second drop: reorder winners, cut slow colors
- keep one “safe color” for repeat: white, black, or seasonal neutral
A simple assortment split that works in spring
| Category | Share | Notes |
|---|---|---|
| Micro/shoulder puff | 60–70% | easier daily wear and reorders |
| Elbow puff | 20–30% | feminine, good margin |
| Statement puff | 10–15% | trend test only |
Ruffle Top
Spring tops sell fast, but ruffles can also fail fast. If I choose the wrong ruffle placement or fabric, the top looks cheap, the fit feels weird, and returns rise.
A ruffle top is a spring top that uses a fabric flounce as a design feature on the neckline, sleeves, placket, hem, or seams. Inside “Types of Spring Tops,” I treat it as a detail layer that can sit on blouses, wrap tops, peplum tops, and even tees, as long as the ruffle is stable and comfortable.
I used to think ruffles were only “cute.” Then I saw how one small ruffle choice changed the whole size curve and the whole margin. After that, I started checking ruffles like a construction problem, not a decoration.
Why is a ruffle top considered one of the most flexible Types of Spring Tops?
A ruffle top can look romantic, playful, or even sharp. It depends on where the ruffle sits and how it moves when the customer walks.
A ruffle top is flexible because the same ruffle detail can create different effects: it can add volume to the shoulder, soften the neckline, hide a bra line, or build a “statement” without prints. When I design a spring assortment, I use ruffles to upgrade a simple silhouette with low SKU risk.
Where I place ruffles for different goals
- Neckline ruffle: draws attention to face and collarbone
- Sleeve ruffle: makes shoulders look wider and waist look smaller
- Placket ruffle: makes a basic blouse feel more premium
- Hem ruffle: adds movement but can shorten the visual leg line
- Seam ruffle (princess/side): adds shape without extra prints
What ruffles do to fit, in real life
- They change how the fabric drapes.
- They add weight to one area.
- They can pull the neckline forward.
- They can make the chest feel tighter even when measurements match.
This is where most ruffle tops win or lose. The customer may not know the technical words, but she can feel cheap construction in one second.
I choose ruffle construction by matching the ruffle type to the base fabric and the target price: rolled hem for light chiffons, narrow babylock for stretch meshes, clean binding for crisp cottons, and lined ruffles for high-end looks. If the hem finish fights the fabric, the ruffle collapses or waves.
The ruffle styles I see most in spring tops
- Single-layer flounce: light, fast, can look thin if fabric is weak
- Double-layer ruffle: fuller, hides seams, costs more
- Gathered ruffle strip: easy to produce, can look bulky
- Circular flounce (spiral cut): smooth flow, better premium feel
- Pleated ruffle: sharp look, higher labor
Hem finishing choices and what they signal
| Finish | Best For | Premium Look | Main Risk | What I Check |
|---|---|---|---|---|
| Rolled hem | chiffon, georgette | High | wave/tunnel | stitch tension |
| Babylock | mesh, jersey | Medium | curling | thread + feed |
| Narrow turned hem | cotton, viscose | Medium | stiffness | hem width |
| Binding | poplin, woven blends | High | bulk | seam thickness |
| Lace edge | romantic styles | Medium | itch | skin contact test |
Dive deeper: why ruffle quality is mostly “tension control”
I do not treat a ruffle as “extra fabric.” I treat it like a moving edge that exposes every small mistake.
- If the stitch tension is too tight, the ruffle edge will wave in a bad way.
- If the ruffle edge is too stiff, it will stand up like a paper fan.
- If the edge is too soft, it will collapse and look flat on the model.
The 3 tests I run before bulk
- Hang test: I hang the sample for 12 hours to see if the ruffle droops.
- Shake test: I shake the garment to see if the ruffle flips and twists.
- Wear test: I move arms up and down to check pulling at the seam line.
The most common “cheap look” triggers
- ruffle seam allowances show through
- uneven gathering density
- ruffle edge thread breaks after one wash
- ruffle placement not mirrored left vs right
Which fabrics work best for a Ruffle Top in spring, and which ones usually cause complaints?
Spring is about comfort. A ruffle top must breathe, but it also must keep shape. This is the balance I look for.
The best spring fabrics for ruffle tops are lightweight woven fabrics with controlled drape, like chiffon, georgette, viscose, and light cotton blends. The highest complaint fabrics are very thin jerseys that curl, stiff poly that scratches, and heavy fabrics that make ruffles sag and distort the neckline.
Fabric behavior that matters more than “material name”
- Drape: does it fall smoothly or stick out?
- Recovery: does it bounce back after pulling?
- Sheerness: will the ruffle expose seams and stitching?
- Hand-feel: will it itch at the neck and armhole?
Fabric-to-ruffle matching table I use
| Base Fabric | Best Ruffle Type | Best Placement | Risk | My QC Focus |
|---|---|---|---|---|
| Chiffon | rolled hem flounce | neckline, sleeve | sheer | seam hiding |
| Georgette | double-layer flounce | placket, yoke | snag | needle choice |
| Viscose | gathered strip | hem, sleeve | shrink | wash test |
| Cotton poplin | bound flounce | collar, placket | stiffness | bulk control |
| Jersey knit | babylock strip | sleeve | curling | edge stability |
Dive deeper: why ruffle tops fail after production, not in sampling
Sampling is gentle. Bulk is real life. The buyer touches 500 pcs, not 1 pc. I focus on what changes at scale.
What changes from sample to bulk
- operators sew faster, so gathering becomes uneven
- fabric lots change, so drape changes
- thread lot changes, so color match shifts
- pressing time reduces, so ruffles look crushed
How I reduce bulk risk
- I lock the ruffle gathering ratio as a hard number.
- I write ruffle stitch length and tension range into the tech pack.
- I request fabric lot approval for ruffle fabric, not only body fabric.
- I add an in-line check point only for ruffle symmetry.
How do I price and plan MOQ for a ruffle top without hurting margin?
Ruffles can look small, but they add time. Time is cost. If I do not plan this early, the quote looks fine and the profit disappears later.
I plan ruffle top pricing by breaking it into three cost drivers: extra fabric consumption, extra sewing minutes, and extra ironing/pressing time. For MOQ, I keep ruffle tops in mid-range quantities unless the ruffle is simple, because complex ruffles increase defect risk and rework cost.
Where the cost really comes from
- Extra fabric: flounces often use more width than people expect
- Extra labor: gathering, attaching, edge finishing
- Extra pressing: ruffles need shape control
- Extra QC: symmetry and edge quality checks
A simple costing logic I use with buyers
| Ruffle Complexity | Example | Production Risk | Best MOQ Strategy |
|---|---|---|---|
| Low | small sleeve ruffle | Low | higher MOQ ok |
| Medium | neckline + sleeve ruffles | Medium | test then reorder |
| High | multi-layer hem + yoke ruffles | High | small MOQ + fast repeat |
Dive deeper: how I protect margin on ruffle tops
I do not try to squeeze cost by removing steps. I squeeze cost by removing uncertainty.
What I standardize
- one ruffle edge finish for the whole line
- one gathering method
- one stitch spec
- one approved pressing method
What I never skip
- symmetry check at final inspection
- wash test for shrink and wave
- skin comfort check at neck and armhole
How do I style a ruffle top so it sells to Gen Z and young Millennials, not just one niche?
A ruffle top can look “too sweet” if styling is wrong. For many brands, the goal is to keep it modern.
I style ruffle tops by balancing volume: if the top has big ruffles, I keep the bottom clean and fitted, like straight jeans or a simple mini skirt. If the ruffle is small, I can pair it with wider pants or a layered outerwear piece to keep the look trend-forward.
Styling formulas I use in line planning
- Big ruffle top + clean denim: modern and simple
- Small ruffle blouse + wide-leg pants: balanced volume
- Ruffle wrap top + mini skirt: going-out look
- Ruffle sleeve tee + cargo pants: sweet + street mix
Dive deeper: what makes a ruffle top feel “current”
I watch three things: proportion, texture contrast, and neckline shape.
Proportion rules I follow
- big ruffle + tighter waist line
- small ruffle + relaxed bottom
- high neckline ruffle + open hair/ear styling in photos
Texture contrast that lifts conversion
- ruffles + denim
- ruffles + rib knit base
- ruffles + lightweight leather look bottoms
Crop Top
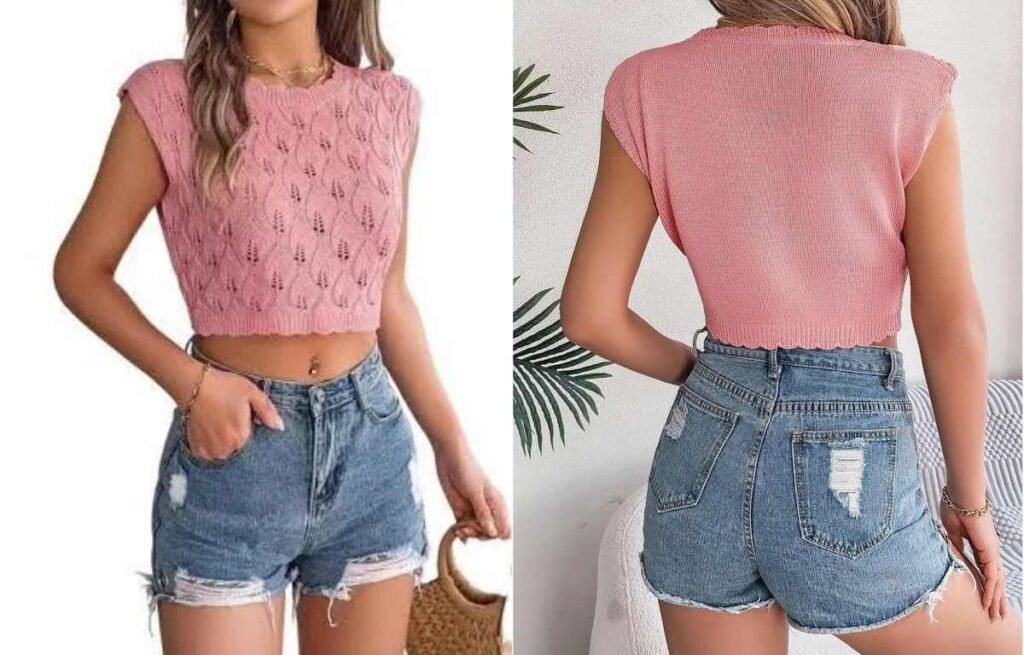
Crop tops look simple, but spring makes them risky. One bad length or one weak elastic band can turn a “best-seller” into returns, reviews, and dead stock.
A spring crop top sells best when I match it to the customer’s rise level, layering habits, and local temperature. I treat crop tops as a fit system, then I pick 6–10 proven sub-styles and control fabric stretch, hem recovery, and neckline stability to reduce complaints.
I still remember one early order where the crop top looked perfect on the model, but real customers said it rode up and felt tight in the bust. After that, I stopped guessing. I started measuring crop tops like I measure denim, with clear blocks and repeat rules.
What counts as a “crop top” in spring, and what lengths actually work?
Most people say “crop top” like it is one thing. In production, it is not. Length is the first decision that changes everything.
In spring, a crop top usually sits between the high waist and the natural waist. The safest commercial range is “high-waist crop” (hits 2–5 cm above the waistband) because it flatters more body types, layers well, and reduces ride-up compared to ultra-short crops.
I classify crop tops by length (the way I explain it to buyers)
- Micro crop: ends above the underbust line
- Best for: festival styling, very trend-led drops
- Risk: high returns, high “too short” feedback
- Bust-line crop: ends around underbust
- Best for: statement tops, warm spring regions
- Risk: bra exposure complaints
- High-waist crop (commercial sweet spot): ends just above the waistband
- Best for: most brands, most climates
- Risk: low if fit block is stable
- Long crop: covers the waistband top edge
- Best for: conservative customers, office-casual layering
- Risk: customers may not call it “crop” in marketing
The spring reality check I use
- If the brand sells in Australia and the U.S., I usually stock more high-waist crops and long crops.
- If the brand is Gen Z heavy, I add micro crops but I cap the MOQ.
Which crop top sub-styles are the most popular for spring, and what is each best for?
Spring crop tops win when the silhouette matches the outfit trend. I do not chase every new shape. I pick a set of sub-styles that cover the market.
The most practical crop top sub-styles for spring are: basic tee crop, rib-knit crop, long sleeve crop, tank crop, cami crop, halter crop, wrap crop, off-shoulder crop, corset-style crop, and zip-up crop. Together, these cover basics, going-out, and layering demand.
1) Basic tee crop
- Best for: high volume, low price points
- Watch: neckline wave and hem twist
2) Rib-knit crop
- Best for: fitted look, strong reorder potential
- Watch: stretch recovery and bagging at hem
3) Long sleeve crop
- Best for: cool spring mornings
- Watch: sleeve twist and cuff shape
4) Tank crop
- Best for: warm spring, gym-to-street styling
- Watch: armhole gaping
5) Cami crop
- Best for: feminine layering, satin or rib options
- Watch: strap strength and adjusters
6) Halter crop
- Best for: “going out” and festival edits
- Watch: neck comfort and pull at bust
7) Wrap crop
- Best for: adjustable fit, waist definition
- Watch: gaping and tie placement
8) Off-shoulder crop
- Best for: romantic spring styling
- Watch: elastic tension and slip-down issues
9) Corset-style crop (boning or seam shaping)
- Best for: premium look, higher margin
- Watch: boning poke-through and bust fit
10) Zip-up crop (sporty or street)
- Best for: athleisure brands
- Watch: zipper waviness and stitching stability
How do I pick the best fabric for a spring crop top without causing ride-up, sheerness, or stretching issues?
Fabric is the second decision after length. For crop tops, fabric problems show faster because the garment is shorter and tension is higher around the bust and hem.
For spring crop tops, I choose fabric by “tension zones”: bust, underbust, and hem. Rib knits and cotton-spandex jerseys are the safest for fit and reorders, while lightweight wovens and novelty fabrics need stronger construction, lining, or elastic support to avoid sheerness and ride-up.
Fabric behavior that matters most for crop tops
- Stretch direction: 2-way vs 4-way stretch changes fit stability
- Recovery: if recovery is weak, the hem bags out after a few wears
- Weight (GSM): too light = sheerness and curl; too heavy = stiff and bulky
- Hand-feel: crop tops sit close to skin, so scratchy fabric kills reviews
My fabric-to-style matching table
| Crop Top Style | Best Fabric Options | What Can Go Wrong | My Fix |
|---|---|---|---|
| Basic tee crop | cotton jersey, cotton-modal, cotton-spandex | twist, shrink | preshrink wash test + grainline control |
| Rib-knit crop | rib cotton, rib rayon/nylon blends | hem bagging | recovery test + stable hem finish |
| Cami crop | satin, rib knit, stretch woven | strap slip, sheerness | better adjusters + lining plan |
| Corset-style crop | stretch woven, ponte, heavy satin | bust gaping | internal structure + clean seam shaping |
| Off-shoulder crop | rib knit, jersey | slip-down | elastic spec + seam reinforcement |
The “sheerness trap” in spring
Many spring colors are light. If I run white, butter yellow, or light pink:
- I test under strong light
- I plan lining or double-layer panels
- I choose thicker yarns or tighter knit structure
How do I engineer a crop top so it stays in place and does not roll, curl, or ride up?
This is where crop tops become technical. A crop top that rides up is not just “annoying.” It is a pattern and construction issue.
To stop ride-up and hem rolling, I control three things: hem finish, stretch ratio, and balance between front and back length. I also stabilize necklines and shoulder seams so the body tension does not pull the top upward during wear.
What causes ride-up (the causes I see most often)
- Hem is too narrow or too stretchy, so it snaps upward
- Front length is too short compared to back, so it climbs
- Bust tension is too high, so the fabric seeks a shorter path
- Neckline or shoulder seam is weak, so the garment shifts
My crop top “stay-put” toolbox
- Hem options (from safest to trendiest):
- clean double-turn hem + coverstitch
- bound hem (stable if binding is correct)
- elastic hem casing (best for off-shoulder and tube looks)
- raw hem (trend, but highest risk for curl)
- Stabilizers I add when needed:
- clear elastic at neckline
- shoulder tape for knit crops
- silicone tape for strapless/tube
- Pattern balance controls:
- add 0.5–1.5 cm to front length for fuller bust blocks
- adjust side seam angle to reduce upward pull
- ensure waist opening is not tighter than bust opening in cropped fits
A quick “movement test” I require before bulk
I ask the fit model to:
- raise both arms 10 times
- sit and stand 10 times
- twist left and right 10 times
If hem rides up or neckline waves, I stop and revise.
How do I size crop tops for wholesale so they fit more body types and reduce returns?
Sizing is the biggest hidden cost for crop tops. Buyers often want “snatched” fits, but returns happen when size rules are unclear.
For wholesale crop tops, I reduce returns by using two fit blocks: a fitted block for rib and bodysuit-like crops, and a relaxed block for tee crops. I also grade crop length carefully, because length jumps feel bigger on a short garment than on a full-length top.
The grading mistake I see a lot
Some suppliers only grade width and forget length. On a crop top, that breaks fit fast.
My sizing rules (practical and repeatable)
- I grade length in smaller steps than a normal tee
- I give bust-friendly ease on woven corset-style crops
- I label stretch clearly for buyers:
- low stretch
- medium stretch
- high stretch
| Customer Type | Best Crop Fit | Why It Works | Risk |
|---|---|---|---|
| Trend-led Gen Z | fitted rib crop / halter crop | photos well, styled with low-rise | higher returns |
| Mainstream boutique | high-waist tee crop / long sleeve crop | layers and flatters | low returns |
| Premium going-out | corset-style crop | higher margin | bust fit risk |
How do I plan MOQ and production timing for crop tops so I do not miss spring trends?
Crop tops are fast-moving, but only some shapes are reorder-safe. I treat crop tops like a mix of basics and “campaign pieces.”
I plan crop tops with a core-and-trend split: core crops run early with stable fabrics and proven blocks, while trend crops run later with smaller MOQ and faster sampling. This keeps cash flow safe and protects the season calendar.
My two-lane crop top plan
- Core lane (reorder first):
- rib-knit crop, basic tee crop, long sleeve crop
- stable colors: black, white, grey, navy, neutral tones
- Trend lane (speed first):
- off-shoulder, corset-style, wrap, halter, novelty trims
- seasonal colors and prints
Sampling speed rules I use
- I limit crop tops to 1–2 sample rounds for trend lane
- I approve with clear “must-fix” notes only
- I lock trims early (zippers, adjusters, elastics)
Common production risks and how I reduce them
- Elastic inconsistency: I set a clear stretch spec and testing method
- Color mismatch across reorders: I keep one lab dip standard
- Stitch popping: I choose the right needle and seam type for stretch